
How to Construct a House - PowerPoint PPT Presentation
1 / 22
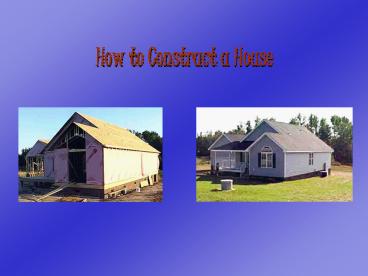
Title:
How to Construct a House
Description:
At this point, the footings are to be formed so that the concrete can be poured. ... Actually, a basement is poured in three pieces: the footings, then the walls (or ... – PowerPoint PPT presentation
Number of Views:2337
Avg rating:5.0/5.0
Title: How to Construct a House
1
How to Construct a House
2
Introduction
- When going through the process of designing a
house, the knowledge of the how one is
constructed is a vital tool. The steps to
building a house are as follows
- Site preparation
- Foundation
- Floors
- Walls
- Roof framing
- Windows doors
- Roof
- Cladding (brick or siding)
- Rough plumbing
- Rough electrical
- Insulation
- Drywall
- Garage slab
- Finishing-up
3
Site Preparation
- The first crew on the site handles site
preparation. Often, this crew the foundation
crew are the same people, but sometimes not
(especially if there are a lot of trees on the
lot). Houses are generally built on a foundation
that is a basement. The site-preparation crew
typically arrives on the site with a backhoe /or
bulldozer. The crew's job is to clear the site of
any trees, rocks debris, level the site if
necessary dig as necessary for the foundation
being built.
This track loader has a stump grinder attachment
that grinds tree stumps and roots into shreds,
while they are still in the ground.
4
foundation
- After a site is prepared a hole about 8
(2500mm) deep is dug for the foundation, the
footings are started. At this point, the
footings are to be formed so that the concrete
can be poured.
In these pictures, you can see a crew pouring
concrete taking down forms for footings.
5
foundation
- At the bottom of the hole is a concrete slab,
and then concrete or cinder-block walls form the
outer walls of the basement. Actually, a
basement is poured in three pieces the footings,
then the walls (or in concrete block form),
then the concrete slab floor inside the walls,
like this diagram
This approach helps keep the basement
waterproof. The L-shaped piece is a steel
reinforcing bar to bind the footing the wall
together. NOTE the concrete slab floor is
poured after the rough plumbing is complete. In
the picture on the right, you can see a completed
basement wall being covered with parging (tar) to
seal it from moisture.
6
Floors
- The framing crew is the next group of people on
the site to start building the floor. The floor
begins with a sill-plate made of pressure-treated
lumber bolted to the basement wall. Then the
floor is constructed on the sill with 2x10(50 x
254mm) lumber. These are called the floor
joists. From here, sheets of plywood cover the
floor joists making what is called the sub-floor.
The picture on the left shows a constructed
floor with its floor joists exposed. The picture
on the right is a completed floor including
sub-floor. Note This process is repeated after
the first floor walls are built if you have a
two-story house.
7
walls
- The framing crew next starts on the walls. A
wall is made of 2x6(50 x 152mm) studs of lumber
covered on the outside with a plywood
sheathing. The studs are placed apart 16(406mm)
from the centre of each stud. Using plywood as
the sheathing gives the wall rigidity.
As you can see from all the lumber on the floor,
walls are assembled on the ground then raised
into place.
8
walls
- In this wall, one thing interrupts the
consistent 16(406mm) pattern, a window. The
plywood will be cut out of the window opening as
construction proceeds. Above the window is a
header, which is actually three 2x10(50 x
254mm) pieces of lumber then there is a
2x6(50 x 154mm) piece of lumber along the
bottom.
You see these headers over all windows and
doors. They give the wall enough strength over
the window or door to support the floor above or
roof. Note This process is repeated for the
second story in a two-story house.
9
Roof framing
- Trusses are pre-fabricated, triangulated wooden
structures used to frame support the roof.
Trusses are quite common these days because they
have five big advantages from the builder's
standpoint
- Trusses are incredibly strong.
- Because they are built strictly from shorter
lengths of 2x6(50 x 154) lumber, they are
generally a lot less expensive than the
alternative. - You can have just about any shape custom-built,
this allows interesting features like cathedral
ceilings at low cost. - You can span a large distance with a truss the
truss transmits all of the weight to the exterior
walls decreases your number of load-bearing
walls. - Trusses go up quickly!
10
Roof framing
- The trusses are put into place by a crane tied
to the walls with small metal plates. Once the
trusses are up, the roof is covered in plywood,
which gives the roof tremendous rigidity.
The picture on the left show a crane putting
trusses into place the picture on the right is
of a completed framed roof including the plywood
covering.
11
Windows doors
- Inside the house, things are now beginning to
look enclosed. The next step in enclosure is
windows and doors. Today, the windows used are
standard vinyl windows. The windows and doors
arrive in one shipment and are unloaded from the
truck into a stack as shown here
The middle picture shows the plastic stripping
stapled to the inside of all window and door
openings. They are placed in each rough opening
and stapled in place on the outside.
12
roof
- This house uses standard asphalt shingles for
the roof. The first step is to cover the roof
with building paper (tar paper). The shingles
then go on very quickly
In the lower right photograph, you can see the
aluminum flashing that keeps water away from the
walls at the points where the shingles touch the
walls.
13
cladding
- The cladding on a house, being brick or siding,
protects the structure from incurring any
moisture which could be very damaging.
brick
Out of the different types of cladding, brick is
the most used desired material. Firstly,
L-shaped metal ties are nailed to the exterior
walls so that tabs are protruding out ready for
the bricks to laid. The bricks are laid with
mortar in between.
In the picture on the left, you can see a brick
layer starting the cladding on a house using
2x4(50 x 102mm) pieces of lumber to assist him
in keeping them inline.
14
siding
- Siding is made from thin, flexible sheets of
plastic or aluminum about 1/16(2mm) thick,
pre-colored bent into shape during
manufacturing. You start at the bottom the
sheets interlock into each other as you go up.
In the picture on the left, you can see a close
up of siding being nailed to the exterior of the
wall. The picture on the right is showing a wall
completed with siding.
15
Rough plumbing
- You may have wondered why you find these funny
loops of pipe under every sink in your house.
The idea is that water gets trapped in the "P."
This water blocks the fumes from the septic tank
or sewer keeps them from entering the bathroom.
In addition, the fumes can simply bubble through
the water in the trap cause the same problem.
Therefore, there is the concept of a vent pipe,
which allows the pressure to escape, as shown in
the diagram
The middle photograph demonstrates plumbing
coming through the main floor into the
basement. The photograph on the right shows the
rough plumbing in the basement before the
concrete slab floor is poured over it.
16
Rough electrical
- The purpose of the electrical system in a house
is to distribute the power safely to all of the
different rooms appliances. The electrician
will first place all of the boxes for electrical
outlets, lights switches. They will then run
wires from the fuse box to each box. A lot of
drilling is necessary, both down into the
basement up into the ceiling, as well as
through studs to run wires between boxes.
The pictures (from left to right) show the
progression of the rough electrical work ending
with an electrical box all wired-up.
17
insulation
- Today, fiberglass insulation in typically used
installed between the exterior wall studs. Over
the insulation is a thin plastic vapor barrier.
The idea behind the vapor barrier is to keep
moisture that develops inside the house inside.
Without the barrier, here is what happens inside
the wall in winter Warm, moist air moves through
the drywall into the insulated wall cavity at
some point inside the cavity it becomes cold
enough for the moisture to condense, soaking the
insulation. The vapor barrier prevents this
process.
The picture lets you see the insulation up in
the wall the ceiling before it is covered with
drywall.
18
drywall
- On the outside, the house now looks complete
but inside, it won't look "like a house" until
the drywall goes up. Drywall is a ½(12mm)-thick
layer of plaster or gypsum sandwiched between two
thick sheets of paper. It is remarkably solid
heavy. The Drywall nailed-up into place then
reinforced with drywall screws. To "tape" the
drywall means to cover all of the cracks
nails/screws with drywall mud (spackling
compound) so that the walls are completely smooth.
In the photograph on the left, you can see the
stacked ready to install. The photograph on
the right shows you what a wall looks like with
the drywall process completed before its
painted.
19
Garage slab floor
- The floor of the garage is a 4(102mm)-thick
concrete slab poured very late in the process.
Another 4(102mm)s of gravel are placed on the
ground covered with reinforcing wire first.
Around the edges, ½(12mm) thick homosote will
allow the slab to contract expand with
temperature changes. Once the prep work is
finished, a concrete truck will pour the concrete
to create the slab.
The picture on the left shows a close-up of the
homosote which will allow for expansion
contraction. On the right, you can see the
preparation for the concrete.
20
Finishing-up
- At this point, the steps that remain are all
"finishing steps" are things you can see in
your own home by opening doors removing cover
plates. The finishing steps include - HVAC - The HVAC contractor will install the
heating air conditioning unit (a.k.a. the
furnace), the vents all duct work. Some of the
HVAC in the walls or between floors would have
had to be install before the drywall went up in a
two-story design. - Finish electrical - The electrician will return
install all light fixtures, wall outlets,
switches cover plates. - Kitchen bathroom cabinets counters - The
cabinet company will install kitchen bathroom
cabinets. They are simply aligned on the wall
screwed into the wall studs. Countertops are
screwed on top of the cabinets. - Finish plumbing - Once the cabinets are in, the
plumber will return install sinks, toilets
faucets. The plumber will also install the water
heater if it was not installed during rough
plumbing.
21
Finishing-up
- Installation of well septic system or hook-up
to city water sewer - Depending on where the
house is located, it will either have a private
well septic system or it will hook up to
municipal water sewer lines. If a private well
septic tank are needed, the contractor will
bring in a well-drilling subcontractor a
septic-tank subcontractor. Otherwise, the
contractor will call someone (either the
municipality or a subcontractor) to extend the
municipal lines to the house. The plumber will
hook up the water sewer lines. - Wall trim - Once the cabinets are in, the
interior doors are installed the molding around
the doors, windows baseboards goes in. - Paint - Once the molding is on, it is time to
paint wallpaper the interior of the house. - Carpeting tile - Once the paint is done, carpet
tile goes down. - Deficiency list - At this point, the builder
inspects the house, noting any problems. All
problems are noted on a deficiency list. The
different contractors return to fix all of the
problems.
22
The house is complete!
- Now that you understand how a house is built,
keep in mind this process when designing let it
guide you to a better house.
Recommended
CrystalGraphics Presentations


