
Distance Learning Cart - PowerPoint PPT Presentation
1 / 46
Title:
Distance Learning Cart
Description:
In this tutorial you will learn the basic set up, description of components, ... will be referred to as the 'ELMO' to avoid confusion with the other camera. ... – PowerPoint PPT presentation
Number of Views:123
Avg rating:3.0/5.0
Title: Distance Learning Cart
1
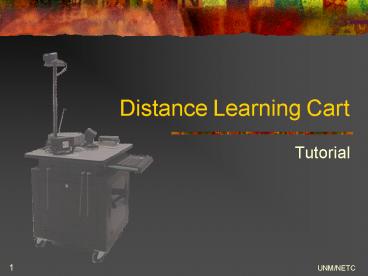
Distance Learning Cart
- Tutorial
2
Introduction
- Click on the items on the top to navigate this
site
- In this tutorial you will learn the basic set up,
description of components, tips and suggested use
for the Distance Learning Cart (DLC).
- The DLC is an effective tool that can be
effectively used in educational settings. It is
designed to support two-way video and audio
communication between multiple locations. - The cart has been used in the Tohatchi, Thoreau,
Gallup and Window Rock Schools.
3
DLC Components
Click on the items on the left to navigate this
page
- Computer/Keyboard
- LCD Projector/Monitor
- VCR
- Microphone and Echo Canceller
- Amplifier and Speakers
- Document Camera
- Cameras
- Diagrams
- This section of the tutorial is designed to give
a description of the parts in the Distance
Learning Cart (DLC).
4
Computer/Keyboard
- Computer/Keyboard
- LCD Projector/Monitor
- VCR
- Microphone and Echo Canceller
- Amplifier and Speakers
- Document Camera
- Cameras
- Diagrams
- The core of the DLC is the codec (coder/decoder).
This is a rack mounted PC that transmits and
receives video signals that the class will see.
It may be easier to think of the codec as an
extremely sophisticated modem. The codec takes
analog signals, compresses and digitizes them,
and transmits the signals over digital phone
lines. - The keyboard and mouse can be either wireless or
wired. They are connected to the PS2 port located
on the back of the system.
5
LCD Projector/Monitor
- Computer/Keyboard
- LCD Projector/Monitor
- VCR
- Microphone and Echo Canceller
- Amplifier and Speakers
- Document Camera
- Cameras
- Diagrams
- The projector is used to display images on a
screen. - The codec has two external XGA ports to display
both monitor(optional) and projector at the same
time. They are connected to the serial video
ports located on the back of the system.
6
VCR
- The VCR is used as a playback device to show VHS
tapes to the class. - It is connected to Port 2 of the Composite Video
Input Port on the back of the system and to the
VCR volume control located in the front of the
system.
- Computer/Keyboard
- LCD Projector/Monitor
- VCR
- Microphone and Echo Canceller
- Amplifier and Speakers
- Document Camera
- Cameras
- Diagrams
7
Microphone and Echo Canceller
- Computer/Keyboard
- LCD Projector/Monitor
- VCR
- Microphone and Echo Canceller
- Amplifier and Speakers
- Document Camera
- Cameras
- Diagrams
- Microphone
- The microphone is wireless (wired optional) and
very sensitive. Place the microphone at a
strategic location in the room. Make sure the
antennas are positioned downward on the cart. - Echo Canceller
- Is used to eliminate echo caused by feedback in
the room. Click on diagram to view proper
connection.
8
Amplifier and Speakers
- Amplifier
- Is used to amplify the audio signal for the
external speakers. - Speakers
- Are 15 watt un-powered speakers that are located
on top of the cart and connected to the PA
speaker connection located in back of the system.
- Computer/Keyboard
- LCD Projector/Monitor
- VCR
- Microphone and Echo Canceller
- Amplifier and Speakers
- Document Camera
- Cameras
- Diagrams
9
Document Camera
In the diagrams that follow the Document Camera
will be referred to as the ELMO to avoid
confusion with the other camera.
- Computer/Keyboard
- LCD Projector/Monitor
- VCR
- Microphone and Echo Canceller
- Amplifier and Speakers
- Document Camera
- Cameras
- Diagrams
- gives you the ability to show documents
(hardcopies and transparencies) and solid items
on the DLC screen. - This is connected to Port 3 of the Composite
Video Input port in the back of the system.
10
Camera
- PTZ Camera.
- Used to show class activity. Can be controlled
both locally and remotely. - This is connected to Port 1 of the Composite
Video Input port in the back of the system
- Computer/Keyboard
- LCD Projector/Monitor
- VCR
- Microphone and Echo Canceller
- Amplifier and Speakers
- Document Camera
- Camera
- Diagrams
11
Diagrams
- Computer/Keyboard
- LCD Projector/Monitor
- VCR
- Microphone and Echo Canceller
- Amplifier and Speakers
- Document Camera
- Cameras
- Diagrams
- F r o n t
- B a c k
12
Front Diagram
13
Back Diagram
14
DLC Procedures
Click on the items on the left to navigate this
page
- Start Up
- Starting a Session
- During a Session
- Management
- Closing a Session
- Shut Down
This Section of the tutorial will assist you in
the operation of the DLC
15
Start up
- Plug Ethernet cable into wall jack. The jack
should be video supported (sometimes marked with
a V) - Plug main power cable into 110- volt AC outlet.
(Wait 30 sec.) - Turn projector on first switch on main power
(located on side of unit) if not on, then press
the secondary power switch (located on top of the
unit). WAIT for the boot process to finish. - A login message will appear on the screen
- Press Ctrl-Alt-Delete and Enter your username and
password. WAIT for the login process to finish - Window Desktop will appear on the screen. The
unit is ready to initiate or receive calls.
- Start Up
- Starting a Session
- During a Session
- Closing a Session
- Shut Down
16
Starting a Session
- Start Up
- Starting a Session
- During a Session
- Closing a Session
- Shut Down
- Complete start up procedures first
- Click on the red Power Play Icon in tray (located
on the lower right hand corner of screen). - Select Call Manager from the menu. Wait for the
application to start. - Start a session by selecting and clicking on
participants from the list or by dialing direct. - The session has started correctly when the video
CODEC displays the screen image from the remote
site.
17
During the Session (Home)
- Start Up
- Starting a Session
- During a Session
- Management
- Closing a Session
- Shut Down
- The links below will assist you in managing your
video-conference. - Control Panel.
- Call Manager.
- Video Stage.
- Device Control
- Video Palette.
- Collaboration.
18
Control Panel
- Allows you to configure IPContact for your
intended application. - Can be found by clicking on the DLC icon on the
lower right corner of the screen.
Click to go to During The Session Page
19
Call Manager
- The Call Manager allows the user to take calls,
place calls and to perform basic session
management functions. - The Call Manager has three sections
- Call Control Buttons
- Active Calls Window that will list the
participates in the call - List Contact Window speed dials to assist in fast
and easy connections - Each of the sections can be hidden or expanded
with the control to the left of each section.
Click to go to During The Session Page
20
Video Stage
- The Video Stage Is the standard presentation area
for video conferencing, It controls the display
of the Video. - Multiple far end views are cleanly organized
within a single window during a point to point or
multi-conference session. - Window can be scaled to any size. Normal, half
size, double size, and full size screen - Can make quick changes between different video
layouts. - Can also control VCR, video switch and PTZ
Cameras. - Can be independently set or locked down so that
all participants see the same layout.
Click to go to During The Session Page
21
Far End Device Controls
- The DLC are many miles apart. This system can
manipulate these devices from or to a remote
location. - Camera Control Remote control of cameras
- On-screen Pan
- Tilt
- Zoom
- Video Source Control Controls which video source
is displayed by selecting from any of the
available sources. - VCR, Screen, Document Camera.
- Playback Device Control Full remote control of
all networked VCRs. - Play, Stop, Pause, Rewind, and Fast Forward.
Click to go to During The Session Page
22
Video Palette
- The Video Palette allows you to select the video
you want to display on the Video Stage, so you
can choose who and where people are displayed on
the screen. - Users can select sources for viewing by dragging
and dropping them onto the Video Stage. - Participants are represented by an icon with
their name at the top.
Click to go to During The Session Page
23
Collaboration
- Just click a button to turn on sharing, click on
the window you want to share - Allows you to share almost any applications with
the people in the conference. - Documents, Web pages, software applications.
- Allows you to share an entire screen or a window.
- All participants can view and make changes to it
at any time
Click to go to During The Session Page
24
Closing a Session
- Start Up
- Starting a Session
- During a Session
- Closing a Session
- Shut Down
- After session has ended Close the Video Stage
(Click on the X in the upper right corner of
the screen). - Press the hang up icon (Picture of a telephone)
in the Call Manager Window. - Turn off all wired microphones (the red light
will turn off). - Press power button on top of the projector. A
message will pop up of the screen POWER OFF?
YES press again. - Press the power button again (the light will turn
red) and WAIT until the flashing light turns off. - STOP HERE if you have another session within 15
minutes. If not continue to Shut Down.
25
Shut Down
- Complete the Closing the Session steps 1 - 3.
Close the Call Manager window and all other
application that are open. - Click on the start button (located in lower left
corner of screen). - Select Shut down and press Enter.
- Click YES in the pop up window, WAIT for the
process to finish. - When you see It is now safe to turn off your
computer on the screen - Proceed to turning off the projector VERY
IMPORTANT!!!! The lamp MUST cool. STOP HERE if
you have another session within 15 minutes. DO
NOT turn off the main power switch before the
lamp stops flashing. Doing so will damage the
lamp. The Lamp is expensive. - When the lamp turns off, switch off the main
power switch on the side of the projector. - When finished. Unplug the main power cable from
the wall and unhook the Ethernet cable
- Start Up
- Starting a Session
- During a Session
- Closing a Session
- Shut Down
26
Resources
- Click on the items on the left to navigate this
section
- Suggested Uses
- Tips and Best Practices
- Troubleshooting
- Where to get more info
- FAQs
This section will help you in obtaining
information such as best practices, trouble
shooting and where to get help and frequently
asked questions.
27
Suggested Use
- Suggested Uses
- Tips and Best Practices
- Troubleshooting
- Where to get more info
- FAQs
- DLC instruction can be effective because it
- Allows real time visual contact between
students and the instructor or among students at
different sites. Use for conferences, mock
debates and many other inter-school activities
where you can reach a wider range of students - Allows for supplementing class during teacher
shortages. - Allows the use of diverse media. Blackboards,
handwritten documents, sound and video at all
sites. - Enables connection with experts in other
geographical locations such as online courses and
tutoring sessions - Can provide access to at-risk or special needs
students. - Provides additional access to students at remote
sites and links students from different social,
cultural, economic and experiential backgrounds.
28
Tips and Best Practices
- Suggested Uses
- Tips and Best Practices
- Troubleshooting
- Where to get more info
- FAQs
- Click on these links for more in depth
information. - Items to Consider
- Designing Instruction
- Instructional Strategies
- Effective Teaching Skills
- Interaction and Feedback
- Information compiled from Documents of Business
Innovation Services Employees
29
Items to Consider
- Room Arrangement how should I set up my
classroom for ultimate learning, viewing,
participation. - Class Size what will work best in my situation,
subject area. - Communication Instructor and on-site
facilitator and students should be in constant
contact concerning class. - Prepare Lesson, Setup and Check System before
Session begins and Have a Back up plan available
for unexpected system failures.
Tips Page
30
Designing Instruction for DLC Classroom
- Focus attention on all students, not just those
at the home site. - Lessons should incorporate a variety of
activities for all students at the various sites.
Use small group activities, student
presentations, and an occasional break to add
variety to the lesson. As a rule of thumb,
instructors should change instruction methods
every 10-15 minutes. In other words, switch from
lecture to question-answer to small group
activity on a regular basis. - Bring guest lecturers into the classroom. It may
also be helpful to have guest speakers at one or
more of the distant sites. This will encourage
involvement of the distant students, as well as
allowing the students at the origination site to
see what it is like to have the teacher at
another location. - When preparing class visuals, keep in mind that
small fonts and light colors do not show up well
over the monitors. A variety of formatting will
also assist in maintaining student interest and
attention. When formatting visuals, be sure that
they will fit on the television monitor. - Be sensitive to different communication styles
and varied cultural backgrounds
Tips Page
31
Instructional Strategies
- Establish Class ExpectationsIn the distance
learning classroom, some students may adopt the
TV attitude, expecting the course to be
entertaining, not educational. Address this
attitude through well planned and focused
presentations with emphasis on teacher-student
interaction. At the start of class initiate a
frank discussion to set rules, guidelines, and
standards. Once procedures have been established,
consistently uphold them. - Reduce DistractionsStudents should be warned to
minimize extraneous noise and activity before
sessions begin. Both detract from the quality
of the course. - Use Variety and Interaction The instructor
should begin the course by preparing the learners
for an active experience. Interactive
videoconferencing is interactive, and students
can make the class much more interesting by being
actively involved. - Encourage DialogueBy asking open ended questions
and noting body language, instructors can
ascertain the interest and comprehension of the
students at both sites. This kind of attention
will make all students feel more comfortable.
Tips Page
32
Effective Teaching Skills
- For the most part, effective distance teaching
requires the enhancement of existing skills,
rather than developing new abilities. Pay special
attention to the following - Realistically assess the amount of content that
can be effectively delivered in the course.
Presenting content at a distance is usually more
time consuming than presenting the same content
in a traditional classroom. - Be aware that student participants will have
different learning styles. Some will learn easily
in group settings, while others will excel when
working independently. - Diversify and pace course activities and avoid
long lectures. Intersperse content presentations
with discussions and student-centered exercises. - Humanize the course by focusing on the students,
not the delivery system.
Next
33
Effective Teaching Skills (Cont.)
- Consider using a print component to supplement
non-print materials. - Use locally relevant case studies and examples as
often as possible to assist students in
understanding and applying course content.
Typically, the earlier in the course this is
done, the better. - Be concise. Use short, cohesive statements and
ask direct questions, realizing that technical
linkages might increase the time it takes for
students to respond. - Develop strategies for student reinforcement,
review, repetition, and remediation. Towards this
end, one-on-one phone discussions and electronic
mail communication can be especially effective. - And finally...relax. Participants will quickly
grow comfortable with the process of distance
education and the natural rhythm of effective
teaching will return.
Tips Page
34
Improving Interaction and Feedback
- Will enable the instructor and on-site
facilitator to identify and meet individual
student needs while providing a forum for
suggesting course improvements, consider the
following - Use pre-class study questions and advance
organizers to encourage critical thinking and
informed participation on the part of all
learners. - Require students to contact you and interact
among themselves via electronic mail. Maintaining
and sharing electronic journal entries can be
very effective toward this end. - Integrate a variety of delivery systems for
interaction and feedback, including one-on-one
and conference calls, fax, E-mail, video, and
computer conferencing. When feasible, consider
personal visits as well. - Contact each site (or student) every week if
possible, especially early in the course. Take
note of students who don't participate during the
first session, and contact them individually
after class.
Continue
35
Improving Interaction and Feedback (Cont.)
- Use pre-stamped and addressed postcards,
out-of-class phone conferences, and e-mail for
feedback regarding course content, relevancy,
pace, delivery problems, and instructional
concerns. - Have students keep a journal of their thoughts
and ideas regarding the course content, as well
as their individual progress and other concerns.
Have students submit journal entries frequently. - Use an on-site facilitator to stimulate
interaction when distant students are hesitant to
ask questions or participate. In addition, the
facilitator can act as your on-site "eyes and
ears and also teach a portion of your lesson. - Call on individual students to ensure that all
participants have ample opportunity to interact.
At the same time, politely but firmly discourage
individual students or sites from monopolizing
class time. - Make detailed comments on written assignments,
referring to additional sources for supplementary
information. Return assignments without delay,
using fax or electronic mail, if practical
Tips Page
36
Trouble Shooting
- Screen is Blank (Blue)
- Check if the System has gone to Sleep
- Check if the Monitor or System has been turned
off - Check if the System is plugged in, has been
unplugged. - No Connectivity
- Dialed Wrong Number
- Far site is busy, not operational or cannot
process the call properly - Connected, but cannot hear
- Remote site maybe muted or has disconnected their
microphone - Speaker Volume or TV monitor volume on your side
has been turned down - Far sight cannot process the call properly
- Check Cabling. 90 of all problems are cable
related! - Restart Local Site.
- Restart Remote Site.
- Network Problem.
- Is the Network Cable (RJ45 Connection) plugged
into outlet/cart? - Check to see if the LAN or WAN is Down.
- Check for IP Conflicts.
- Have a backup plan - Phone in to remote class,
give plan B instructions/assignments.
37
Trouble Shooting (Cont)
- Suggested Uses
- Tips and Best Practices
- Where to get more info
- FAQs
- Connected, but excessive feedback
- Remote site microphones are too close to speakers
or has their volume set too high - Far sight cannot process the call properly
- Connection drops during conference
- Someone hung up
- Loss of power
- Network crash
- Far sight cannot process the call properly
38
Where to Get More Information
- Suggested Uses
- Tips and Best Practices
- Troubleshooting
- Where to get more info
- FAQs
- IP Contact User Guide
- GMCS Technology Center
- Help Desk Ext. 51250
- Outside GMCS call
- (505) 721-2201-ask for Help Desk.
39
FAQs
- Click on the links below to find the answers to
the question. - What is Distance Education?
- Is Distance Education Effective?
- Who are the Key Players in Distance Education
- How is Distance Education Delivered?
- What do I need to know to operate the DLC Cart?
- Suggested Uses
- Tips and Best Practices
- Troubleshooting
- Where to get more info
- FAQs
40
What is Distance Education?
- At its most basic level, distance education takes
place when a teacher and student(s) are separated
by physical distance, and technology is used to
bridge the instructional gap. - The American education system is challenged with
providing increased educational opportunities
without increased budgets. - Many educational institutions are developing
distance education programs to help answer this
challenge.
41
Is Distance Education Effective?
- Many educators ask if distant students learn as
much as students receiving traditional
face-to-face instruction. Research comparing
distance education to traditional face-to-face
instruction indicates that teaching and studying
at a distance can be as effective as traditional
instruction, when the method and technologies
used are appropriate to the instructional tasks,
there is student-to-student interaction, and when
there is timely teacher-to- student feedback
(Moore Thompson, 1990 Verduin Clark, 1991).
42
Key Players in Distance Education
- Students - the primary role of the student is to
learn. - Faculty - the instructor's responsibility
includes assembling and delivering course
content, while taking into consideration the
needs and expectations of multiple, often
diverse, audiences. - On-site Facilitators - acts as a bridge between
the students and the instructor. At a minimum,
they set up equipment, collect assignments,
proctor tests, and act as the instructor's
on-site eyes and ears. - Support Staff - ensure that the many details
required for program success are dealt with
effectively. - Administrators - They work closely with technical
and support service personnel, ensuring that
technological resources are effectively deployed
to further the institution's academic mission.
Most importantly, they maintain an academic
focus, realizing that meeting the instructional
needs of distant students is their ultimate
responsibility.
43
How is Distance Education Delivered?
- Four major categories
- Voice - Interactive technologies are telephone,
audio conferencing, short-wave radio, tapes and
radio. - Video - Instructional tools include photos,
film, videotape and real-time moving images
combined with audio conferencing. - Data - Computer applications for distance
education are varied and include
Computer-assisted instruction (CAI),
Computer-managed instruction (CMI) and
Computer-mediated education (CME) - Print - textbooks, study guides, workbooks,
course syllabi, and case studies.
44
What I need to know
- It is important that an instructor be taught how
to use all features of the equipment. Some of the
critical operations that an instructor should be
capable of performing are - Turning on the codec and the monitors.
- Dialing the distant site(s) to establish a link.
- Controlling camera focus and field at the
origination site and at the distant site(s). - Adjusting the volume to an acceptable level.
- Dialing out to a remote location.
More WhatI need to know items
45
What I need to know (cont.)
- Selecting the appropriate data rate.
- Re-setting echo canceling capability.
- Switching to and from the document camera.
- Switching to and from the computer output.
- Utilizing a computer to generate and display
multimedia presentations. - Using the VCR to broadcast a video for all
locations. - Terminating the link with the distant site(s).
- Shutting down the equipment.
46
Summary
- You have learned the components, set up and tips
concerning the use of the DLC. - The DLC is an effective instructional tool for
educators. As with other technologies, its
usefulness is directly related to the
instructors understanding of its benefits,
limitations, and utilization strategies. - The DLC contributes to the development of a
significant unused educational-technological
resource and helps model an aspect of the future
students will benefit from.
Recommended
CrystalGraphics Presentations


