
Video Editing - PowerPoint PPT Presentation
1 / 37
Title:
Video Editing
Description:
'Real time' = 'Screen time' Maintain Continuity for: Motion & Speed ... Simpler interface: blend videos A & B and have transition effect. Save Workspace ... – PowerPoint PPT presentation
Number of Views:1041
Avg rating:3.0/5.0
Title: Video Editing
1
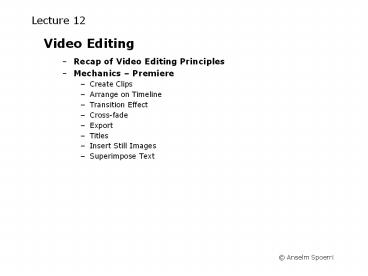
Lecture 12
- Video Editing
- Recap of Video Editing Principles
- Mechanics Premiere
- Create Clips
- Arrange on Timeline
- Transition Effect
- Cross-fade
- Export
- Titles
- Insert Still Images
- Superimpose Text
2
Summary Basic Editing Principles
3
Summary - Create Illusion of Continuity
- Compress Time by Selecting "Highlights"
- Viewer Fills In
- "Real time" "Screen time"
- Maintain Continuity for
- Motion Speed
- Location of Focus
- Line of Sight
- Theme similarity in subject background in
terms of shapes, color, texture, motion - Motivate Cuts
- Any Edit Has Potential of Breaking Illusion of
Continuity - Use or Break Conventions Viewer Expectations
- Use Cuts to Create Rhythm
- Maintain or Break Continuity As Storyline Requires
4
Media Production Workflow
- Create
- Collect Raw Footage
- Video Camera analog or digital
- Capture Premiere
- Digitize
- Edit / Effects Premiere
- Create Story
- Perform Edits and Apply Effects
- Compress Premiere
- For CD-ROM or Web
- Deliver
- Download or Streaming
5
Video Editing Basic Gameplan
- Identify Clips in your raw footage
- Identify IN and OUT points
- Create clips
- Decide on Order of Clips
- Drag drop clips onto Timeline
- Test if Illusion of Continuity is created
- Transitions?
- Place adjacent clips on separate tracks
- Extend clips to create overlap
- Insert Shot or Sound
- Detach video and audio tracks
- Trim video or audio
- Insert new video or audio
6
Video Editing Basic Mechanics
7
Premiere File Workspace
- Adobe Premiere Tryout
- http//www.adobe.com/ ? Premiere Pro (has
different interface) - Project Premiere file
- Stores references to all the clips, their
arrangement and transitions or effects applied - It is like in Fireworks you create a recipe
- Workspace
- Project Window display of source material
- Organize source material or clips into bins
- Clip Window / Source Window
- View source and create clip
- Timeline Window
- Drag clips from Project or Clip Window to
timeline - Monitor Window / Program Window
- View program or sequence of clips on timeline
8
Premiere Workspace
9
Step 0 Download files, Launch Premiere,
Initialize
- Create folder infovisLec12 in My Documents
folder - Download Files and Video (select zip file
extract into infovisLec12) - http//scils.rutgers.edu/aspoerri/Teaching/InfoV
is2007_ITI/Lectures/Lecture12/stepbystep12/ - Launch Premiere
- Start gt Adobe gt Premiere
- Load Project Settings
- Select "Multimedia Video for Windows"
- Select Save Workspace
- Window gt Workspace gt A/B Editing
- Why? Simpler interface blend videos A B and
have transition effect - Save Workspace
- Window gt Workspace gt Save Workspace
InfoVis2007"
10
Step 1a New Project Open Source File
- Open file premiere0 (to have A/B Editing
Workspace) - Start New Project
- File gt New Project
- (Can close for now "Timeline" and "Monitor"
windows) - Open Files into Project Window
- Premiere can import
- Type 2 AVI, MOV, Open DML
- MPEG also possible (but can be problematic)
- Still-image and sequence formats 43 format
- File gt Open nikead.avi"
- Clip Window is launched
- Drag clip from Clip Window into Project Window
- If you drag new clip directly onto Timeline, then
a clip record is also created in Project Window - Save Premiere Project
- File gt Save As
11
Step 1b Checking Project Clip Settings
- Open file premiere1a
- Project Settings Clip Settings ?!
- Project gt Settings Viewer
- Discrepancies in red 320x240 vs. 240x160 and
Mono vs. Stereo(Capture Settings not relevant
right now)
12
Step 1b Checking Project Clip Settings (cont.)
- Settings Viewer Display
- Click on Project Settings button
- Project Settings Display
- Select Video from pullmenu
- Frame Size 240 x 180
- Select Audio from pullmenu
- Format 16 Bit Stereo
- Click OK
- Click OK on warning message
- File gt Save As
- Tip Want to work with clips that have same
settings.Good practice to initially check
Settings Viewer.
13
Project Window
- Stores Organizes References to Imported Clips
- A. Thumbnail viewer B. Bins C. Clip D. Find E.
New Bin F. Create Item G. Delete Selected Items
H. Resize Bin Area I. Icon View J. Thumbnail View
K. List View L. Clip information M. Project
window menu - Lists All Source Clips Imported
- Don't have to use every clip you import
14
Tour of Project Window
- Thumbnail Viewer
- Playback
- Set Poster Frame
- Clips information notes
- Icon View, Thumbnail View, List View
- Bins Folders
- Find, New Bin, Create Item, Delete Selected
Items - Create Titles
- Resize Bin Area
- Project Window menu
15
Tour of Clip / Source Window
- Playback controls and Delta Duration
- Select Video and/or Audio to include
- Mark IN and OUT and Play IN to OUT
- Marker Navigation Editing
- Slider Move "IN" and "OUT" marks
- Drag drop clip to Timeline
16
Master Clip and its Instances
- Master Clip Reference to Original File
- Master Clip original source clip and reference
to actual file - Full clip displayed in Clip Window together with
most recent positions of "IN" and "OUT" marks - Multiple instances of same master clip in Project
and Timeline - If you delete the master clip, its instances are
also deleted - Named Duplicate Clips
- Duplicate clip is an independent copy of its
master clip and it refers directly to the source
file - Doesn't create any new files on disk
- Listed in Project Window
- Create Duplicate Clip
- Can first specify new "IN" and "OUT" marks in
Clip Window - Edit gt Duplicate Clip
- Select Drag from Clip or Timeline Window
- Copy Paste in Project Window
- Unnamed Instances of Clips
- Drag drop clip onto Timeline
- Copy paste in Timeline
- Premiere automatically keeps track of each
instance without listing it
17
Step 2 Creating Clips
- Open file premiere1b
- Project Window
- Double click on master clip nikead
- Clip / Source Window opens up
- To create clip
- Play and stop video at intended START Time
- Use Mark Frame Back or Frame Forward to
pinpoint exact time - Click IN Marker icon
- Play and stop video at intended END Time
- Click OUT Marker icon
- Edit gt Duplicate Clip or
- Drag drop from screen image from Clip Window
into Project Window - Name duplicate clip
- Create Poster Frame play in Thumbnail view,
click poster frame icon - Create these clips
- IN 00000000 OUT 00000226 name clip1
- IN 00001322 OUT 00001600 name clip2
- IN 00005222 OUT 00005718 name clip3
premiere2a
premiere2b
premiere2c
18
Summary Creating Clips
- Create duplicates or instances of master clip(s)
- Many or all clips can have same (long) master
clip - Notice working from master clip
- Full clip displayed in Clip Window together with
most recent positions of "IN" and "OUT" marks - Clip Window of duplicate clip shows only duration
of clip - To Create Duplicate Clips
- Mark IN and OUT
- Edit gt Duplicate Clip orDrag drop from Clip
Window into Project Window - Create Poster Frame
- Save Premiere Project
- Open Timeline and Monitor windows (if closed)
- Window gt select Timeline and Monitor
19
Timeline Window
- Schematic View of Edited Program
- Includes all video, audio, effects superimposed
video tracks - Changes you make in this window appear in the
Program view - Multiple references of the same clip can exist on
the Timeline
20
Tour of Timeline
- Work Area Markers Bar
- Edit Line Marker
- Timeline Windows Options
- Click triangle icon in top right corner of
Timeline Window or - Window gt Window Options gt Timeline Windows
Options - Set Track Format Start image Filename
- Time Zoom Tool (bottom left corner)
- Select Time Zoom 1 Second
21
Tour of Timeline (cont.)
- Toolbox
- Selection tool
- Range Select tool
- Notice small icon in bottom left corner ?
indicates more options - Click drag mouse to see and select options
- Tool for selecting / shifting one or multiple
tracks - Audio/Video Track Controls
- Video Shy state (eye icon), Lock
- Audio Shy state, Hide Waveform, Lock, Volume
Rubberband - Toggles
- Snap to Edges
- Toggle Sync Mode
- Controls if audio video of clip are both
changed - Make sure it selected (otherwise audio video
can be separated)
22
Step 3 Drag Drop Clips onto Timeline
- Open file premiere2c
- Select Clip in Project Window
- Drag Drop Clip onto Timeline
- Drag drop Clip1, Clip2 and Clip3 onto Video 1A
track - Notice Poster Frame Markers on Timeline
- Open file premiere3
- Rearrange Clips
- Select clip on timeline and move it to change its
position - Make sure Sync Mode is Selected
- Can use Video 2 track as Temporary Placeholder
- Shortening / Lengthening Clip in Timeline
- Select Selection Tool
- Place cursor at the start / end of clip
- Cursor will change shape to " / " and drag
- How to Close Gaps in Timeline?
- Select "Multitrack Select Tool", click on Video
1A track and drag to close gap
23
Step 4 Lengthen Clips
- Open file premiere3
- Move Clip2 to Video 1B track
- Select Selection Tool
- Select and move Clip2 straight down to Video 1B
track - Open file premiere4a
- Change Time Zoom and Clip Appearance
- Select Time Zoom 1 Frame
- Set Track Format All Images
- Open file premiere4b
- 3. Lengthen Clips in Timeline to Create Overlap
- Select Selection Tool
- Place cursor at the start / end of clip
- Cursor will change shape to " / " and drag
- Lengthen Clip1 at the END by 6 frames
- Lengthen Clip2 at the START and END by 6 frames
each - Lengthen Clip3 at the START by 6 frames
24
Transition Effects
- Visual Change from One Clip to Another
- Variety of transitions, such as wipes, zooms, and
dissolves. - Transitions typically involve end of one clip and
beginning of next. - Transitions only between overlapping clips (on
Video 1 tracks). - Some transitions, such as Inset, can involve both
complete clips. - Transition Palette
- Window gt Show Transitions
- Open Dissolve Folder
- Double-click Cross Dissolve icon
- Can see animation of transition
- Select Cross Dissolve from video track A ? B
25
Transition Effects (cont.)
- Recap Transitions only between overlapping
clips on Video 1 tracks - To move a clip or transition edge independently,
hold down Control key as you drag edge of
transition. - Drag Drop Transition on Transition Track
Between Two Overlapping Clips in the Timeline - Preview Transition
- Build preview move the yellow work area bar so
it covers the transition and press Enter - Render-scrub Hold down Alt, cursor becomes
downward-pointing arrow, scrub in Timeline
window's time ruler
26
Step 5 Drag Drop Transition
- Recap move / lengthen clips to create overlap
before adding transition - Open file premiere4c
- Select Cross-Dissolve in Transition Palette
- Dissolve Folder gt Cross-Dissolve
- 2. Drag Drop Cross-Dissolve Icon to Transition
Track in Timeline - Place transition where Clip1 Clip2 overlap
- Notice how extent of transition is determined by
overlap of clips - Open file premiere5a
- Preview Transition Using Render-scrub
- Hold down Alt, cursor becomes downward-pointing
arrow - Move cursor back and forth to preview transition
- 4. Select Cross-Dissolve in Transition Palette
- Iris Folder gt Iris-Round
- 5. Drag Drop Iris Round Icon to Transition
Track - Place transition where Clip2 Clip3 overlap
27
Step 6 Cross-Fade Audio Clips
- Two clips need to be on different tracks and
overlap. - Open file premiere5b
- Expand Audio Track
- Click triangle for the Audio 1 and Audio 2 tracks
- Select Cross-fade tool
- Select clip to fade out and clip to fade in
- Premiere automatically creates and adjusts volume
handles for both clips - Select Cross-fade and select Clip1 and then
Clip2 - Select Cross-fade and select Clip2 and then
Clip3 - Final file premiere6
28
Exporting Premiere Project as VIDEO file
- MPEG Video
- MPEG-1 (Motion Picture Experts Group)
- Generally used for Internet and CD-ROM
- VHS image quality
- Require significant processing time
- Needs to be saved to hard disk
- Streaming Media
- Video is sent frame by frame No download
- Limited bandwidth (56 Kbps or less) for most
- Use Windows Media Video streaming formats
- Assume high bandwidth Intelligent Streaming
(broadband) - Experiment to see what gives best results
29
Step 7 Export Project to Movie or Web
- Final file premiere6
- AVI format
- File gt Export Timeline gt Movie
- Export Settings AVI, 240x180, 15fps, Stereo
- MPEG or Streaming Format
- Launch Cleaner 5 EZ
- File gt Export Timeline gt Save for Web
Current Settings
To Change Settings
30
Premiere Review
- Create Clips
- Drag Drop Clips onto Timeline
- Add Transitions
- Create Clip Overlaps
- Drag Drop Transition
- Render-scrub using Hold down Alt
- Save Premiere Project
- It is like Fireworks save your recipe
- Export Project Video file
- File gt Export Timeline gt Movie
31
Recap Premiere Mechanics
- Window gt Workspace gt A/B Editing
- Checking Project Clip Settings ?!
- Project gt Settings Viewer
- Settings Viewer Display click on Project
Settings button - Project Settings Display select Video or
Audio from top pulldown menu - Open Master Clip
- File gt Open
- Clip Window opens up
- Drag drop screen image from Clip Window into
Project Window - Creating Clips
- Project Window Double click on master clip
- Clip / Source Window opens up
- Play and stop video at intended START Time
- Use Mark Frame Back or Frame Forward to
pinpoint exact time - Click IN Marker icon
- Play and stop video at intended END Time
- Click OUT Marker icon
- Edit gt Duplicate Clip or
- Drag drop screen image from Clip Window into
Project Window
32
Recap Premiere Mechanics (cont.)
- Drag Drop Clips onto Timeline
- Select Clip in Project Window
- Drag Drop Clip onto Timeline
- Rearrange Clips
- Select clip on timeline and move it to change its
position - Make sure Sync Mode is Selected
- Can use Video 2 track as Temporary Placeholder
- Shortening / Lengthening Clip in Timeline
- Select Selection Tool
- Place cursor at the start / end of clip
- Cursor will change shape to " / " and drag
- How to Close Gaps in Timeline?
- Select "Multitrack Select Tool", click on Video
1A track and drag to close gap
33
Recap Premiere Mechanics (cont.)
- Transitions only between overlapping clips on
Video 1 tracks(start end transitions
exception) - Create Transitions
- Show Transition Palette Window gt Show
Transitions - Select Transition in Transition Palette
- Drag Drop Transition Icon to Transition Track
in Timeline - Place transition where clips overlap
- Notice how extent of transition is determined by
overlap of clips - 3. Preview Transition Using Render-scrub
- Hold down Alt, cursor becomes downward-pointing
arrow - Move cursor back and forth to preview transition
- Cross-Fade Audio Clips
- Two clips need to be on different tracks and
overlap. - Expand Audio Track click triangle for the Audio
1 and Audio 2 tracks - Select Cross-fade tool
- Select clip to fade out and clip to fade in
34
Step 8a Create Title
- Open file premiere6
- 1. File gt New gt Title
- 2. Title Window and Title menu appear
- 3. Create colored background
- Select color in Color Picker
- Select shaded rectangle icon and start drawing
- 4. Create Text
- Select T icon, click where you want place text
and type - 5. Save as Premiere Title (.ptl) file
- (in same folder as source clips and Premiere
file) - Title is automatically placed in Project Window
- 6. Set Duration of Title
- Right click title icon in Project Window and
select Duration in pop-up dialog - Set Duration 1 second 00000100
35
Step 8b Fade in Title
- Open file premiere7a
- Drag drop Title onto Timeline Video 1B Track
from Project Window - Place at very beginning
- Lengthen / Shorten Title (optional)
- Place cursor at start / end of title clip, cursor
changes to " / " and drag - 2. Select Cross-Dissolve in Transition Palette
- Dissolve Folder gt Cross-Dissolve
- 3. Drag Drop Cross-Dissolve Icon to Transition
Track - Place transition where Clip1 Title overlap
- Notice how extent of transition is determined by
overlap of clips - 4. Preview Transition Using Render-scrub
- Hold down Alt, cursor becomes downward-pointing
arrow - Move cursor back and forth to preview transition
36
Step 9 Capture Image and Import Image
- Open file premiere7b
- Capture Still Frame
- Select frame to capture
- File gt Export Timeline / Clip gt Frame GIF
- Import Image
- File gt Open speedskate.gif
- Drag Drop into Project Window
- Set Duration of Image
- Right click title icon in Project Window and
select Duration in pop-up dialog - Drag Drop Image onto Timeline Video 1B Track at
the end - Extend Just Audio
- Select Toggle Sync Mode in Timeline Window ? no
chain icon - Place cursor at end of audio of clip 3 and extend
- (make sure Selection Tool selected)
- Remember to save Premiere file and to Export
Timeline to get Video File! - Final file premiere8
37
Premiere Superimpose Text
- File gt New gt Title
- Double click on Clip on which you want to
superimpose - Clip Window appears
- Go to frame you want to use as reference (use
play, frame_forward) - Click marker icon and select Mark gt Poster
Frame - Drag drop screen image from Clip Window into
Title Window - Create Shape / Text
- Save as Premiere Title (.ptl) file
- (in same folder as source clips and Premiere
file) - Drag drop onto Timeline Video 2 Track
Recommended
CrystalGraphics Presentations


