
What is a solar installation process and how to install solar panels for your home? - PowerPoint PPT Presentation
Title:
What is a solar installation process and how to install solar panels for your home?
Description:
Solar installation process: In the Solar installation process solar panels are used to absorb the sunlight. Solar panels produce DC (Direct current) electricity from sunlight and then the solar inverter converts the generated electricity into AC (Alternating current) so that we can use it for our household work. – PowerPoint PPT presentation
Number of Views:750
Title: What is a solar installation process and how to install solar panels for your home?
1
What is a solar installation process and how to
install solar panels for your home? Solar
installation process In the Solar installation
process solar panels are used to absorb the
sunlight. Solar panels produce DC (Direct
current) electricity from sunlight and then the
solar inverter converts the generated
electricity into AC (Alternating current) so that
we can use it for our household work. Solar
installation process for home
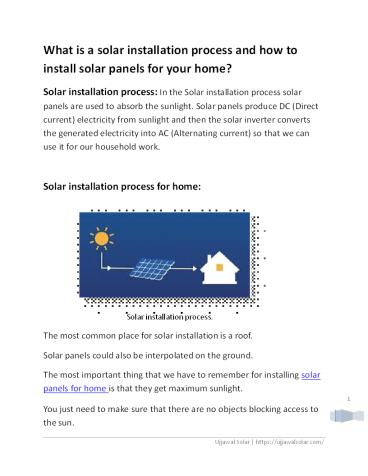
Solar installation process. The most common place
for solar installation is a roof. Solar panels
could also be interpolated on the ground. The
most important thing that we have to remember for
installing solar panels for home is that they
get maximum sunlight. 1 You just need to make
sure that there are no objects blocking access
to the sun.
2
- Solar installation process step by step as
follows - Set Up Scaffolding
- Firstly, you have to erect scaffolding to ensure
safety during the whole installation process
when being on the roof. - Install Solar Panel Mounts
- Then, the solar panel mounting system has to be
set up. This will support the base of the solar
panels. The whole mounting structure must be
tilted and have an angle between 18 to 36 degrees
to have maximum sunlight exposure. - Install the Solar Panels
- When the mounts are set up, the solar panel
itself has to be installed on the mounting
structure. - Wire the Solar Panels
- The next step in the installation process is to
install the electrical wiring. In most cases,
MC4 connectors are used because they are suited
for all types of solar panels. Make sure to shut
off the households electricity supply during
the wiring installation. - Install Solar Inverter
- After that, the solar inverter must be connected
to the system. It is typically installed near
the main panel and it could be both indoors and
outdoors. Inverters are more efficient if kept in
a cooler place.
If the inverter is outdoors, it should be kept
out from the afternoon sun. If it is installed
indoors, the garage or utility room are usually
the
2
3
- best places, since they stay cool for most of the
year and have ventilation. - Bond Solar Inverter and Solar Battery
- Thereafter, the solar inverter has to be
connected to the solar battery. Solar battery
storage can save you from worrying about the lack
of usable energy during cloudy times, it can
also lower the solar battery storage system
costs during installation. - Connect the Inverter to the Consumer Unit
- The inverter should be connected to the consumer
unit to generate electricity. A generation meter
should also be connected to monitor the amount
of electricity the solar panels actually produce.
You can use - your computer or another device to check your
solar systems performance. For example, you can
check how much electricity you generate at
different times and decide what time is suitable
for using your washing machine or other
utilities. - Start and Test Solar Panels
- The final step is to switch the power on and test
the newly installed solar panel system. After
that, the solar panel installation process is
completed.
3
4
- Things to remember while maintenance of the solar
installation process. - The solar installation process does not require
so much maintenance. Solar installation process
required solar installation kit like solar
panels, solar battery, solar inverter, solar
charge controller etc. - Always choose best solar installation company
while installing solar panel. - First thing is that while installing solar
panels is that, panels get maximum sunlight. - You can use a normal gardening hose to clean the
panels. - You should inspect solar panels few times a
year to clean the dust from the top so that no
blockage comes. - You should examine your system every 4,5 years
by the installer. - Benefits of the solar installation process
- The solar installation is very useful for us and
the environment both. - It reduces the electricity bills of our house.
- It causes no harm to the environment. It does not
produce greenhouse gases. - It requires only sunlight to produce electricity.
4
4. Solar energy can be stored so that it can be
used during cloudy or rainy times.
5
- It has a low maintenance cost
- Maximum sunlight produces more electricity.
- Conclusion
- In this article, we provided you the full
information about the solar installation
process. A solar installation is not a difficult
process instead of it is a simple process. It is
an environmentally friendly process and does not
harm our environment. Ujjawal solar is a solar
company that provides you the best service
regarding solar installation and solar products.
We are Indias largest mono perc solar module
manufacturer.
5
Recommended
CrystalGraphics Presentations


