
Manufactured by: - PowerPoint PPT Presentation
1 / 56
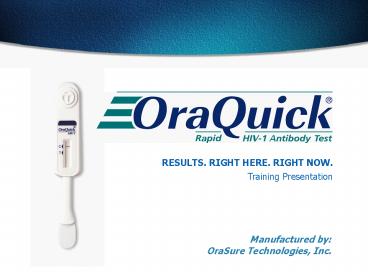
Title: Manufactured by:
1
RESULTS. RIGHT HERE. RIGHT NOW. Training
Presentation
Manufactured by OraSure Technologies, Inc.
2
The Challenge
How can you treat if you dont test? How can
you help if you dont know?
President George W. Bush Announcing CLIA waiver
for OraQuick-January 31, 2003
The OraQuick Test can provide test results in
one visit and in less than half an hour. By
virtue of its speed, simplicity, and its
portability, countless more Americans will be
able to find out their HIV status immediately.
HHS Secretary Tommy G. Thompson FDA Press
Conference-November 7, 2002
3
Provide Same Day Results And Counseling
- The OraQuick Rapid HIV-1 Antibody Test is the
first truly rapid point-of-care test that is FDA
approved and CLIA waived. - Same day results and counseling.
4
Intended Use
- The OraQuick Rapid HIV-1 Antibody Test is a
single-use, qualitative, immunoassay to detect
antibodies to Human Immunodeficiency Virus Type 1
(HIV-1) in fingerstick whole blood specimens. - For in vitro Diagnostic Use
- This is a restricted device. Sales, distribution
and use restrictions apply. See Customer Letter
and Package Insert.
5
OraQuick Rapid HIV-1 Antibody Test Kit
- Single-use testing device w/built-in procedural
control - Single-use test developer solution vial
- Reusable test stand
- Disposable single-use specimen collection loop
6
OraQuick Rapid HIV-1 Antibody Test KitKit
Controls
- Positive Control Black-capped vialcontaining
0.2 mL of inactivated human positive plasma
antibodies to HIV-1 - Negative Control White-capped vialcontaining
0.2 mL of normal human plasma negative for
antibodies to HIV-1 - Sufficient volume for a minimum of 25 tests
7
Additional Materials Required
- Disposable Gloves
- Sterile Lancet
- Timer or Watch
- Antiseptic Wipe
- Sterile Gauze Pads
- Biohazard Waste Container
- Disposable, Absorbent Workspace Cover
8
OraQuick Operating Principle
Conjugate pad with colloidal gold particle bound
to protein A.
Flat Pad
Cellulose Membrane
A sample specimen is wicked up by the flat pad of
the device and transferred to the cellulose
membrane. Human antibodies and HIV antibodies (if
present) bind to the colloidal gold particles.
9
OraQuick Operating Principle
Absorbent Pad
Colloidal gold particles containing HIV
antibodies bind to the HIV antigen T line
forming a visible red band. Colloidal gold
particles containing Human antibodies bind to the
Anti-Human Antibodies C line forming a visible
red band. Any remaining colloidal gold particles
are captured and retained by the absorbent pad.
10
CLIA Certificate of Waiver
- The Clinical Laboratory Improvement Amendments
(CLIA) program has been established to ensure
quality laboratory testing - Register for waiver by completing Form CMS-116,
150 fee for 2-year accreditation by Centers for
Medicare Medicaid Services (CMS) - Submit form to local CMS state agency
- More information at www.cms.hhs.gov/clia
11
Performing Kit Controls
Run one positive control () and one negative
control (-) for
- Each new operator prior to performing testing on
patient specimens, - Each new lot of test kits,
- With each new shipment of test kits,
- If the temperature of the test kit storage area
falls outside 2-27C 35-80F, - If the temperature of the testing area falls
outside of 15-27C 59-80F, and - At periodic intervals as dictated by the user
facility.
12
Performing Kit Controls
- Open a Kit Control vial containing the control
reagent. - Insert the round end of an unused Specimen
Collection Loop into the vial of the control
reagent. Use separate unused Specimen Collection
Loops for each control reagent. NOTE The Kit
Control reagents are clear to straw-colored. Do
not use if the reagent appears visually cloudy or
discolored.
13
Performing Kit Controls
- Immediately immerse the control-reagent-filled
Specimen collection in the developer solution
inside the Developer Solution Vial. - Use the loop to stir the contents.
- Discard the Loop in a Biohazard Waste Container.
- Insert the Flat Pad of the device all the way
down into the Developer Vial.
14
Performing Kit Controls
- Start timing the test.
- Pink fluid will appear and travel up the Result
Window. Gradually this will disappear as the test
develops. - Read the results after 20 minutes but not more
than 60 minutes in a fully lighted area.
15
Performing Kit Controls
Expected Results
Example of a Non-Reactive Result (Negative)
Example of a Reactive Result (Preliminary
Positive)
- The Negative Control will produce a Non-Reactive
test result. A line should be present at the C
triangle in the result window. - The Positive Control will produce a Reactive test
result that has been manufactured to produce a
very faint Test T line. Lines should appear at
the C and T triangles in the result window.
16
Prior to Testing
- Gather all your testing materials.
- Let your test come to room temperature.
- Set up your workspace cover and reusable Stand on
a flat level surface. - Put on your disposable gloves.
- Provide the Subject Information pamphlet to the
person being tested.
17
General Test Preparation
- Check the expiration date on the OraQuick Pouch
prior to opening. - Open the two chambers of the OraQuick Divided
Pouch by tearing at the notches. - Leave the Test Device in the Pouch until you are
ready to use it. - Remove the Developer Vial. Gently rock the cap
back and forth to remove. - Slide the Vial into the top of one of the slots
of the Stand making sure it is pushed down all
the way.
18
Performing the Test Step 1 Collect
- Use an antiseptic wipe, clean the finger of the
person being tested. Allow to completely dry. - Using a sterile lancet, puncture the skin just
off the center of the finger pad. - WIPE the first droplet with gauze. Hold the hand
downward to allow new droplet to appear. Do not
squeeze the finger harshly but gently apply
pressure to express a drop of blood. - With an unused Specimen Collection Loop, touch to
the blood droplet. Make sure the Loop is
completely filled with blood.
19
Performing the Test Step 2 Mix
- Immediately insert the blood-filled end of the
Loop all the way into the vial. Be careful not
to touch the sides of the vial. - Use the Loop to stir the sample in the Developer
Solution Vial. Dispose of the used loop in a
biohazard waste container. - Check the Solution to make sure it appears pink
in color. This will indicate that the blood was
correctly mixed into the Solution.
20
Performing the Test Step 3 Test
- Remove the test device from the Pouch. DO NOT
touch the flat pad. - NOTE To ensure accurate results, the Test
Device must be inserted into the Developer
Solution Vial within 60 minutes after introducing
blood sample. - Make sure an Absorbent Packet was included with
the Device. If no Absorbent Packet is present,
discard the Device and obtain a new Pouch for
testing.
Flat Pad
Absorbent Packet
21
Performing the Test Step 3 Test
- Insert the Flat Pad of the device all the way
down into the Developer Vial. - Start timing the test.
- Pink fluid will appear and travel up the Result
Window. Gradually this will disappear as the test
develops. - Read the results after 20 minutes but not more
than 60 minutes in a fully lighted area.
22
Reading a Non-Reactive Test
- A test is NON-REACTIVE if
- A reddish-purple line appears next to the
triangle labeled C and no line appears next to
the triangle labeled T.
23
Interpreting a Non-Reactive Test
A Non-Reactive test result means that anti-HIV-1
antibodies were not detected in the specimen. The
test result is interpreted as NEGATIVE for HIV-1
antibodies. Follow CDC Guidelines to inform the
subject of the test result and its interpretation.
24
Reading a Reactive Test
- A test is REACTIVE if
- A reddish-purple line appears next to the
triangle labeled C and a reddish-purple line
appears next to the triangle labeled T. Lines
may vary in intensity. - NOTE The test is reactive if any reddish-purple
line appears next to the T triangle and next to
the C triangle, no matter how faint these lines
are.
25
Interpreting a Reactive Test
A Reactive test result means that anti-HIV-1
antibodies have been detected in the specimen.
The test result is interpreted as PRELIMINARY
POSITIVE for HIV-1 antibodies. Follow the CDC
Guidelines to inform subject of the test result
and its interpretation.
26
Reading an Invalid Test
- A test is INVALID if
- No reddish-purple lines appears next to the
triangle labeled C (see picture a and b), or - A red background in the Results Window makes it
difficult to read the result after 20 minutes
(picture c), or - If any of the lines are NOT inside the C or T
triangle areas (picture d1 or d2).
a
b
d1
d2
c
27
Interpreting an Invalid Test
An Invalid test result means that there was a
problem running the test, either related to the
specimen or to the Device. IT CANNOT BE
INTERPRETED. Repeat the test with a new Pouch and
new fingerstick blood sample.
a
b
d1
d2
28
HIV Counseling Process with Rapid Testing
Introduce Testing Options
Testing algorithm courtesy of NYSDOH
Review Informed Consent including
meaning of the test result
Determine client's readiness to test
Offer rapid test, oral fluid test and
blood test (venipuncture) options
Client chooses a rapid test
Client selects conventional test
Counselor conducts
Counselor conduct rapid test
conventional test
Counselor gives client survey, for selected
Counselor gives client rapid
test method, for completion and
survey for completion
completes conventional counseling session
Counselor completes pretest counseling
session with client, including individualized
Schedule post-test appointment
risk assessment and risk reduction plan
Counselor reads rapid result after 20
minutes based on timer, counselor
interprets result for client
29
HIV Counseling Process with Rapid Testing
Testing algorithm courtesy of NYSDOH
Counselor reads rapid result after 20
minutes based on timer, counselor
interprets result for client
HIV Negative
Invalid
HIV Reactive
Review and reconsider
Repeat Test
Review protective behaviors
Original risk information
Emphasize importance
INVALID
Reinforce client's plan
of confirmatory test
STOP
to remain HIV negative
and return visit
Discuss decreasing transmission
Counselor explains meaning of
support services and consider
negative result taking recent exposure
PNAP options in preparation
(window period) into consideration
while waiting for confirmed test
Confirmatory test
Schedule retest date
explain importance of calling
to cover window period,
and returning for confirmatory
if necessary
test results in one week
Review risk reduction plan
30
Packaging Configurations
31
Test Kit Control Configurations
Kit Controls do not have to be brought to room
temperature prior to performing testing.
Run the Kit Controls under the following
circumstances
- Each new operator prior to performing testing on
patient specimens, - Each new lot of test kits,
- Whenever a new shipment of test kits is received,
- If the temperature of the test kit storage area
falls outside of 2-27C (35-80 F), - If the temperature of the testing area falls
outside of 15-27C (59-80 F), and - At periodic intervals as dictated by the user
facility.
32
Guidelines for Needlestick Safety and Prevention
- Needlestick Safety and Prevention Act U.S.
Department of Labor, OSHA Administration - www.osha-slc.gov/SLTC/needlestick
compliance.html - Requires Revision of Blood Borne Protection Plan
- Mandates safer medical devices with built in
safety features that reduce risk of exposure as
part of OSHA Standard. - Adds new requirements to annually review and
update the Exposure Control Plan. Employers must
annually document implementation of safer
medical devices
33
Guidelines for Needlestick Safety and Prevention
- Needlestick Safety and Prevention Act U.S.
Department of Labor, OSHA Administration - Requires employers to solicit input from
employees responsible for direct patient care in
the identification, evaluation and selection of
engineering and work practice controls. - Employer must maintain a Sharps Injury Log
which lists - type and brand of device
- work area of incident
- explanation of how incident occurred
34
Guidelines for Needlestick Safety and Prevention
Old devices which are no longer allowed
- Needle or blade is exposed
- Needle or blade does not retract
- Needle or blade can be reused or re-fired
35
Guidelines for Needlestick Safety and Prevention
Typical approved devices
- Needle or blade is entirely contained within
protective housing - Needle or blade retracts after use
- Unit can not be used again
Blades retract after use
36
How to Perform a Fingerstick
- Ask the client if they have a bleeding disorder.
- If they answer yes, refer them to their primary
care physician - Have the client wash their hands with soap and
warm water, then rinse in warm water for a count
of 20. Use of warm water will increase the flow
of blood in the digits. Rinse and dry. - Examine the tips of the ring and middle fingers
for calluses.
37
How to Perform a Fingerstick
- Choose a site on either side of the ring or
middle finger. - Use the sides of the finger pad, avoid calluses
and edge of the nail bed. - Make your cut or puncture at right angles to the
whorls of the finger print. Avoid the tip of the
finger which may have too much callus and be too
sensitive.
38
How to Perform a Fingerstick
- Specimen collection details
- Wipe away the first drop of blood.
- Do not milk the finger you will get more serum
than whole blood. Apply gentle pressure. - The ideal specimen is a free flowing drop of
blood. - Collect the sample in one motion avoid dabbing
the drop of blood to fill the collection device
(Loop). - Visually inspect the Loop to make sure the Loop
is completely filled with blood.
39
How to Perform a Fingerstick
- Cover the collection site with a tissue or ball
of cotton while you transfer the specimen to the
appropriate test system. - Ask the client to apply pressure to the
collection site until you are ready to apply an
adhesive bandage.
40
Universal PrecautionsHandling of Potentially
Infectious Human Samples
- ALWAYS wear gloves when handling blood or body
fluids. - Thoroughly wash your hands with soap and water
after any possibility of contact with blood or
body fluids. - After performing testing or after cleaning up a
blood or body fluid spill, immediately remove
your gloves, throw them away in a biohazard waste
container and wash your hands. - Wear protective over-coats like a lab-coat on top
of your clothing that can be removed and
disinfected in case of a spill or exposure. - It is also recommended that you wear protective
eye covering, like safety glasses. - If you have any cuts, abrasions or skin rashes on
your hands or lower arms that may allow for
easier transmission of infection, please discuss
this with your supervisor prior to collecting
samples from test subjects. - Do not cut, bend or re-cap needles or lancets.
Use safety-lancets or safetyneedles whenever
possible. - Discard of used sharps like needles or lancets
immediately after use into an appropriate sharps
container. Never try to remove these discarded
items from the disposal container. - Discard of used specimen collection loops in a
biohazard waste container. - Avoid personal activities like eating or
drinking, applying make-up, touching your face or
eyes, or inserting contact lenses in a workspace
where sample collection, processing, or testing
is done. - FOR COMPLETE INFORMATION REFER TO THE CDC WEBSITE
AThttp//www.cdc.gov/hiv/pubs/mmwr/precautions.h
tm
41
Universal PrecautionsCleaning Up Spills
- Spills of blood or body fluids must be
immediately cleaned up and disinfected. Until
the spill area is disinfected and cleaned, it
must be off limits to other workers. - Spills of biohazardous samples not contained on
disposable absorbent workspace covers should be
covered with absorbent material and the absorbent
material saturated with a solution of 10 bleach
(made fresh daily). - Allow the spill to decontaminate for 30 minutes
prior to removal and disposal. Follow up with
surface cleaning with more 10 bleach. - Throw away all contaminated materials in a
biohazard waste container.
42
OraQuick Rapid HIV-1 Antibody Test
- FDA Approved
- CLIA Waived
- Provide results, begin counseling, and start
treatment in just one visit - Improve disclosure and return rates
- Allow your patients to walk out knowing their
status
1-800-ORASURE 1-800-672-7873
43
OraQuick Interpretation Quiz
A
B
C
D
E
F
1-800-ORASURE 1-800-672-7873
44
OraSure HIV-1 Oral Fluid Antibody Testing
45
Corporate History
- 1981 - Incorporated as Immunologic Associate
(lab) - 1983 - Reincorporated as Epitope, Inc.
- 1983 - Developed 1st FDA approved monoclonal Ab
for routine blood typing - 1986 - Initial public offering on Nasdaq (Symbol
EPTO) - 1987 - Developed 1st complete panel of AIDS (HIV)
monoclonal antibody
marketed worldwide - 1990 - IDE application approval to begin OraSure
clinical trials - 1991 - Serum WB Kit FDA approved
- 1994 - OraSure/ELISA FDA approved for screen
- 1996 - OraSure WB FDA approved
- 2000 - Merged with STC Technologies, Inc. to
become
OraSure Technologies, Inc. (Symbol OSUR) - 2002 - OraQuick Rapid HIV-1 Test approved
46
OraSure is an Oral HIV-1Antibody Testing System
- Reliably tests for HIV-1 without needles,
lancets or blood. - The OraSure device collects oral mucosal
transudate. - Like blood tests, OraSure uses EIA and WB assays
to detect HIV-1 antibodies. - OraSure is available only for professional use.
47
How Does OraSure Work?
- The special pad is placed between the lower gum
and inner cheek and gently rubbed back and forth
2-3 times. - The pad is then left in place for 2-5 minutes.
48
OraSure is an Oral System but NOT a Saliva Test
- OraSure draws antibodies out of the cheek
and gum in oral mucosal transudate (OMT). - OMT contains high levels of IgG antibodies.
- Saliva has negligible levels of IgG antibodies.
- OraSure overcomes impurities found in saliva.
- OraSure specimens are stable for 21 days up
to 98 F.
49
OraSure Results Are Unaffected by Oral or
Medical Conditions
- Recent food intake
- Oral pathology
- Cigarette smoking
- False teeth
- Drugs causing dry mouth
- Other non-HIV medical conditions
50
Advantages of OraSure HIV-1 Testing
- Highly accurate results
- No needles, lancets, or blood
- Safer than serum testing
- Non-invasive, painless
- Portable
- Cost-effective
51
OraSure Provides Highly Accurate Results
OraSure is over 99 Accurate
In clinical trials, the OraSure HIV-1 test
provided the correct result or appropriate
follow-up in 99.97 of 3570 people. (JAMA,
January 15, 1997, Vol 277, No 3)
52
OraSure Testing Algorithm
53
Interpretation of Test Results
EIA Results Non-Reactive no additional testing
is performed. Reported as HIV negative. Reactive
Sample is re-tested in duplicate. If one or
both of repeat tests are reactive (repeat
reactive) the sample is forwarded to Western blot
testing. Western Blot Results Positive Any two
of the three major bands are present gp160/120,
gp41, and/or p24. Negative No bands are present.
Indeterminate Any bands that do not meet the
criteria for a positive (includes any non-viral
bands). A follow-up sample is advised.
54
Q A General Questions
- What is OraSure and how does OraSure work?
- Is this test as good as the blood tests that have
been in use for years? - How can the OraSure test for HIV in the mouth if
HIV cant be transmitted through saliva and
kissing? - Do any medications or mouth conditions affect the
test? - Are there any toxic chemicals in the collection
pad device?
55
Q A Testing Indications and Limitations
- How soon after the patient comes in contact with
HIV will OraSure be able to detect HIV
antibodies? - Will patient illness, gum disease, or oral
surgery affect the accuracy of OraSure ? - Will any medications or drug use affect the
results? - Can a pregnant woman use OraSure?
- Can OraSure be used to diagnose infection with
other viruses? - Is OraSure approved for all ages?
56
Q A Collection Procedures
- Who will collect the sample?
- Does OraSure hurt?
- Are there any precautions for individuals
handling the product? - How long should OraSure be left in a patients
mouth? - Can a patient eat, drink, or smoke before taking
the test? - Will patients experience any side effects?
- If a patient has bleeding gums and blood gets
into the oral sample, should testing proceed? - What are the active ingredients on the pad? Are
there any conditions or allergies that preclude
administering a test? - What is the blue fluid in the vial?
Recommended
CrystalGraphics Presentations


