
Planetary Imaging Workshop - PowerPoint PPT Presentation
1 / 64
Title: Planetary Imaging Workshop
1
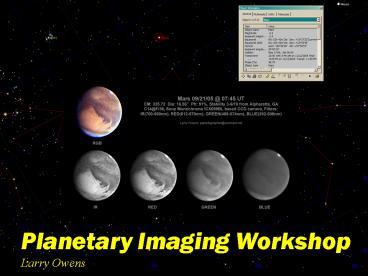
Planetary Imaging Workshop Larry Owens
2
(No Transcript)
3
Lowell Observatory, 1971-1973
4
Backyard Telescope, 2005
5
How is it Possible? How is it done?
Lowell Observatory Sequence,1971
6
The Secret
- Use the right tool for the job!
- Get the sampling right
- Use slower frame rates, longer exposures
7
The Secret
- Use the right tool for the job!
- For the best images, 11 16 aperture
- C9.5, high end refractors - exception
- Long inherent focal length
- Schmidt-Cassegrain, Maksutov, Refractor (would be
nice) - Sturdy low PE equatorial mount
- Motorized focuser
- Monochrome CCD camera with filter wheel
- Best images, best for analysis
- Get the sampling right
- Use slower frame rates, longer exposures
8
The Secret
- Use the right tool for the job!
- For the best images, 11 16 aperture
- C9.5, high end refractors - exception
- Long inherent focal length
- Schmidt-Cassegrain, Maksutov, Refractor (would be
nice) - Sturdy low PE equatorial mount
- Motorized focuser
- Monochrome CCD camera with filter wheel
- Best images, best for analysis
- Get the sampling right
- Ideal half the Dawes Limit per pixel
- Reduce, depending on atmospheric stability
- Use slower frame rates, longer exposures
9
The Secret
- Use the right tool for the job!
- For the best images, 11 16 aperture
- C9.5, high end refractors - exception
- Long inherent focal length
- Schmidt-Cassegrain, Maksutov, Refractor (would be
nice) - Sturdy low PE equatorial mount
- Motorized focuser
- Monochrome CCD camera with filter wheel
- Best images, best for analysis
- Get the sampling right
- Ideal half the Dawes Limit per pixel
- Reduce, depending on atmospheric stability
- Use slower frame rates, longer exposures
- 60-140ms, 5-15fps
- F-O-C-U-S!
- C-O-L-L-I-M-A-T-I-O-N!
10
Acquisition
Using monochrome cameras filters Color cameras
and resolution Format 640x480 or 320x240
(Sampling!) Frame rates, compression noise How
long to capture (fun with Algebra and
Trig!) Exposure, Gain and White Balance
Processing
Reference frame selection Alignment box size
(feature or planet) Quality settings, Pre-filter
usage To resample or not to resample Selecting
frames with stack graph Selecting frames with
frame list Final adjustments and PhotoShop Data
to present with your image
11
Acquisition
12
Acquisition Strategies
- Acquisition Software
- VRecord, AMcap
- AstroVideo, IC Capture, K3CCD Tools
- StreamPix, MaximDL
- Things to consider
- Raw image feature resolution
- Frame resolution
- Monochrome cameras and filters
- Experiment with Exposure and Gain
13
Acquisition Strategies
- Acquisition Software
- VRecord, AMcap
- AstroVideo, IC Capture, K3CCD Tools
- StreamPix, MaximDL
- Things to consider
- Raw image feature resolution
- If good, acquire frames for longer period for
Feature based alignment - If very soft, acquire frames according to
rotation maximum - Frame resolution
- Monochrome cameras and filters
- Experiment with Exposure and Gain
14
Acquisition Strategies
- Acquisition Software
- VRecord, AMcap
- AstroVideo, IC Capture, K3CCD Tools
- StreamPix, MaximDL
- Things to consider
- Raw image feature resolution
- If good, acquire frames for longer period for
Feature based alignment - If very soft, acquire frames according to
rotation maximum - Frame resolution
- 640x480, sub-frame, 320x240
- Planet angular diameter, sampling, chip area
- Monochrome cameras and filters
- Experiment with Exposure and Gain
15
Acquisition Strategies
- Acquisition Software
- VRecord, AMcap
- AstroVideo, IC Capture, K3CCD Tools
- StreamPix, MaximDL
- Things to consider
- Raw image feature resolution
- If good, acquire frames for longer period for
Feature based alignment - If very soft, acquire frames according to
rotation maximum - Frame resolution
- 640x480, sub-frame, 320x240
- Planet angular diameter, sampling, chip area
- Monochrome cameras and filters
- Consider time it takes to acquire full RGB sets
(color shift tolerance) - Plan for LRGB (if desired) color set luminance
set color set - Consider filter to use for Luminance UV/IR
block, IR, Red, Green - Watch filter distance from chip in optical train
- Experiment with Exposure and Gain
16
Acquisition Strategies
- Acquisition Software
- VRecord, AMcap
- AstroVideo, IC Capture, K3CCD Tools
- StreamPix, MaximDL
- Things to consider
- Raw image feature resolution
- If good, acquire frames for longer period for
Feature based alignment - If very soft, acquire frames according to
rotation maximum - Frame resolution
- 640x480, sub-frame, 320x240
- Planet angular diameter, sampling, chip area
- Monochrome cameras and filters
- Consider time it takes to acquire full RGB sets
(color shift tolerance) - Plan for LRGB (if desired) color set luminance
set color set - Consider filter to use for Luminance UV/IR
block, IR, Red, Green - Watch filter distance from chip in optical train
- Experiment with Exposure and Gain
- Longer exposures, lower gain, fewer frames
17
Monochrome Cameras
- Lumenera
- Atik
- Modified Philips Cams (mono chip raw mode)
- CCD Cameras
- Filter wheel or slider
- Filters
- Full Chip Resolution
- Color Combine in MaximDL
Schuler Standard Bandpass UV 345-385nm 70 Bu 375-
475nm 75 V 488-688nm 86 Rs 570-725nm 78 Is 700-
980nm 77 Custom Scientific (RGB) R 612-670nm 97
G 488-574nm 96 B 392-508nm 95
18
Color Cameras
- Actual Resolution of 640x480 Color Chips
- RED320x240
- GREEN320x480
- BLUE320x240
19
Color Cameras
- Actual Resolution of 640x480 Color Chips
- RED320x240
- GREEN320x480
- BLUE320x240
- At 320x240, Full color resolution (use RAW mod to
be sure, see link) - http//www.astrosurf.com/astrobond/ebrawe.htm
20
Color Cameras
- Actual Resolution of 640x480 Color Chips
- RED320x240
- GREEN320x480
- BLUE320x240
- At 320x240, Full color resolution (use RAW mod to
be sure, see link) - http//www.astrosurf.com/astrobond/ebrawe.htm
- At 640x480, Something less than full resolution
- Bayer pattern interpolation
- Twice the resource usage without twice the
resolution - Longer stacking and processing times
- High resource usage can cause processing problems
- 640x480 usage
- If you cant get the sampling right (more on this
later) - Short focal length Newtonians
- Philippe Bernascolle has performed some
interesting resolution tests with ToUcams - http//www.astrosurf.com/astrobond/Using-RAW-Mode.
pdf
21
Sampling
- Resolution is not the important setting
- Sampling is really what matters
- Oversampling (too many pixels)
- Undersampling (not enough pixels)
- Correct Sampling
22
Sampling
- Resolution is not the important setting
- Sampling is really what matters
- Nyquist sampling rule 2-3 pixels over the
highest possible resolution - Use the Dawes limit of your scope
- Raise the focal length so that 1 pixel covers
half of the Dawes limit - Somewhat dependent on seeing though -
Experimentation - Oversampling (too many pixels)
- Undersampling (not enough pixels)
- Correct Sampling
23
Sampling
- Resolution is not the important setting
- Sampling is really what matters
- Nyquist sampling rule 2-3 pixels over the
highest possible resolution - Use the Dawes limit of your scope
- Raise the focal length so that 1 pixel covers
half of the Dawes limit - Somewhat dependent on seeing though -
Experimentation - Oversampling (too many pixels)
- Power is too high, brightness too low
- Requires longer exposure times
- Very long exposures can cause loss of detail
- Undersampling (not enough pixels)
- Correct Sampling
24
Sampling
- Resolution is not the important setting
- Sampling is really what matters
- Nyquist sampling rule 2-3 pixels over the
highest possible resolution - Use the Dawes limit of your scope
- Raise the focal length so that 1 pixel covers
half of the Dawes limit - Somewhat dependent on seeing though -
Experimentation - Oversampling (too many pixels)
- Power is too high, brightness too low
- Requires longer exposure times
- Very long exposures can cause loss of detail
- Undersampling (not enough pixels)
- Resolution of optics is wasted
- Not enough pixels to represent finest details
- Correct Sampling
25
Sampling
- Resolution is not the important setting
- Sampling is really what matters
- Nyquist sampling rule 2-3 pixels over the
highest possible resolution - Use the Dawes limit of your scope
- Raise the focal length so that 1 pixel covers
half of the Dawes limit - Somewhat dependent on seeing though -
Experimentation - Oversampling (too many pixels)
- Power is too high, brightness too low
- Requires longer exposure times
- Very long exposures can cause loss of detail
- Undersampling (not enough pixels)
- Resolution of optics is wasted
- Not enough pixels to represent finest details
- Correct Sampling
- Records all that is possible from optics and
seeing conditions
26
Sampling
- Dawes Limits (116/aperture in mm) Pixel Sizes
- 4 - 1.14 11 - .41 ICX098BL 5.6µ
(Toucam, ATIK ¼) - 8 - .57 14 - .33 KAF402 9µ
(ST-402ME, ST-7E) - 10 - .46 16 - .29 TC-237 7.4µ
(ST-237) - ICX424 7.4µ (Lumenera other 1/3 Cams)
- Two ways to find arc seconds per pixel
- Arcseconds per pixel (Pixel Size in
microns)206 (Must know exact FL) - Focal length in mm
- Arcseconds per pixel Size in arcseconds
of known object (Must know angular size of
Planet) - Number of pixels across known
object - Now you can find your exact focal length
27
How Long to Capture Frames
- Planetary rotation can affect the image in as
little as 5 minutes - Theoretically, capture time should not exceed the
time it takes the planet to rotate through one
pixel - In reality, longer times are fine seeing,
arcsec/pixel vary Experimentation! - Times can be extended if you align by feature
(more later) - Two ways to calculate
28
How Long to Capture Frames
- Planetary rotation can affect the image in as
little as 5 minutes - Theoretically, capture time should not exceed the
time it takes the planet to rotate through one
pixel - In reality, longer times are fine seeing,
arcsec/pixel vary Experimentation! - Times can be extended if you align by feature
(more later) - Two ways to calculate
When you know The Current Distance
Mars
13195mi 1479m
Diameter4,200mi Circumference13,195mi
(pD) Period of Rotation24h 39m (1479m) Apparent
Diameter19.45 Distance from Earth44,701,711mi
9mi/min
A feature on the surface travels 9mi/min How
many arcseconds per minute is that?
9 miles
4.5x10⁷ Miles (variable)
opposite adjacent
?
Tan?
Convert Tan? to (Inv, tanangle in ) Multiply
by 3600 (for arcsec)
Earth
arcsec per pixel am
am ?
Cap Limit
29
How Long to Capture Frames
- Planetary rotation can affect the image in as
little as 5 minutes - Theoretically, capture time should not exceed the
time it takes the planet to rotate through one
pixel - In reality, longer times are fine seeing,
arcsec/pixel vary Experimentation! - Times can be extended if you align by feature
(more later) - Two ways to calculate
When you know The Apparent Diameter
Mars
When you know The Current Distance
Mars
13195mi 1479m
Diameter4,200mi Circumference13,195mi
(pD) Period of Rotation24h 39m (1479m) Apparent
Diameter19.45 Distance from Earth44,701,711mi
9mi/min
A feature on the surface travels 9mi/min How
many arcseconds per minute is that?
9 miles
d diameter (4200mi) d apparent diameter
(arcsec)(var) hc half circumference
(6598mi) hc apparent length of hc (arcsec) hd
half day (740min for Mars) am apparent motion
(arcsec/min) T Time (minutes)
1) Find the apparent half circumference
2) Now find apparent motion
4.5x10⁷ Miles (variable)
opposite adjacent
?
Tan?
d d
hc hc
hc hd
am T
Convert Tan? to (Inv, tanangle in ) Multiply
by 3600 (for arcsec)
d(hc) hc(d)
hd(am) hc(T)
Earth
hc(d) d
arcsec per pixel am
hc(T) hd
Cap Limit
am ?
hc
am
30
NexImage
Frame Rates
- Compression issue (Not a problem with CCD
Cameras, SBIG, Lumenera) - Noise issue
30fps
ToUcam Pro
20fps
25fps
15fps
15fps
5fps
31
NexImage
Frame Rates
- Compression issue (Not a problem with CCD
Cameras, SBIG, Lumenera) - Above a certain frame rate the camera performs
compression - Effects of compression not visible on video
- Causes severe processing artifacts
- ToUcam Pro
- Starts compression at 20fps and above
- 5, 10 and 15 fps are fine
- Celestron NexImage
- Starts compression at 30fps
- Rates from 5-25 fps are OK, 5 and 25 seem best
- Noise issue
30fps
ToUcam Pro
20fps
25fps
15fps
15fps
5fps
32
NexImage
Frame Rates
- Compression issue (Not a problem with CCD
Cameras, SBIG, Lumenera) - Above a certain frame rate the camera performs
compression - Effects of compression not visible on video
- Causes severe processing artifacts
- ToUcam Pro
- Starts compression at 20fps and above
- 5, 10 and 15 fps are fine
- Celestron NexImage
- Starts compression at 30fps
- Rates from 5-25 fps are OK, 5 and 25 seem best
- Noise issue
- Some cameras have different levels of noise at
different fps (even at slower rates) - Take several test shots with your camera, pick
the best exposure and frame rate after processing.
30fps
ToUcam Pro
20fps
25fps
15fps
15fps
5fps
33
How Many Frames to Capture
- Why capture large numbers of frames to begin
with? - The number of frames to capture is dependent on
- CCD cameras can get excellent images with only
100 or 200 frames - Web cams require 1000 or 2000 frames to reduce
noise to the same level - Best of both worlds (Lumenera, USB-2 CCD Cams
ST-402ME)
34
How Many Frames to Capture
- Why capture large numbers of frames to begin
with? - Defeat atmospheric turbulence (lucky imaging)
- Reduce noise through stacking
- The number of frames to capture is dependent on
- CCD cameras can get excellent images with only
100 or 200 frames - Web cams require 1000 or 2000 frames to reduce
noise to the same level - Best of both worlds (Lumenera, USB-2 CCD Cams
ST-402ME)
35
How Many Frames to Capture
- Why capture large numbers of frames to begin
with? - Defeat atmospheric turbulence (lucky imaging)
- Reduce noise through stacking
- The number of frames to capture is dependent on
- Cameras inherent noise level
- Camera sensitivity
- Chip quantum efficiency
- Gain setting the higher the gain, the higher
the noise level - CCD cameras can get excellent images with only
100 or 200 frames - Web cams require 1000 or 2000 frames to reduce
noise to the same level - Best of both worlds (Lumenera, USB-2 CCD Cams
ST-402ME)
36
How Many Frames to Capture
- Why capture large numbers of frames to begin
with? - Defeat atmospheric turbulence (lucky imaging)
- Reduce noise through stacking
- The number of frames to capture is dependent on
- Cameras inherent noise level
- Camera sensitivity
- Chip quantum efficiency
- Gain setting the higher the gain, the higher
the noise level - CCD cameras can get excellent images with only
100 or 200 frames - Web cams require 1000 or 2000 frames to reduce
noise to the same level - But more to choose from
- Careful frame selection increased clarity
- Best of both worlds (Lumenera, USB-2 CCD Cams
ST-402ME)
37
How Many Frames to Capture
- Why capture large numbers of frames to begin
with? - Defeat atmospheric turbulence (lucky imaging)
- Reduce noise through stacking
- The number of frames to capture is dependent on
- Cameras inherent noise level
- Camera sensitivity
- Chip quantum efficiency
- Gain setting the higher the gain, the higher
the noise level - CCD cameras can get excellent images with only
100 or 200 frames - Web cams require 1000 or 2000 frames to reduce
noise to the same level - But more to choose from
- Careful frame selection increased clarity
- Best of both worlds (Lumenera, USB-2 CCD Cams
ST-402ME) - Low noise camera
- High sensitivity
38
How Many Frames to Capture
39
Exposure, Gain White Balance
- Its not a good idea to use the cameras auto
exposure setting - Use manual camera settings for better control
- Exposure and gain settings go hand in hand
- White balance seems to work best in automatic
mode
40
Exposure, Gain White Balance
- Its not a good idea to use the cameras auto
exposure setting - Use manual camera settings for better control
- Exposure and gain settings go hand in hand
- Longer exposures with LOW gain settings
- Better images with fewer stacked frames
- Longer exposures require slower frame rates
- Set the gain just below the point where
saturation occurs - White balance seems to work best in automatic
mode
41
Exposure, Gain White Balance
- Its not a good idea to use the cameras auto
exposure setting - Use manual camera settings for better control
- Exposure and gain settings go hand in hand
- Longer exposures with LOW gain settings
- Better images with fewer stacked frames
- Longer exposures require slower frame rates
- Set the gain just below the point where
saturation occurs - White balance seems to work best in automatic
mode - Experiment with color settings
- A pale under colored video image can easily be
enhanced later - Images saturated with color tend to be difficult
or impossible to correct
42
Processing
43
Processing Strategies
- Prcessing Software
- RegiStax V3 (aligning, stacking, initial proc)
- MaximDL (color combining)
- WinJupos (planetary ephemeris)
- Photoshop CS (luminance stacking, final proc)
- Things to consider
- Acquisition strategy
- Raw image quality
- Reference frame selection
- Frame rejection strategy
- Monochrome cameras
44
Processing Strategies
- Prcessing Software
- RegiStax V3 (aligning, stacking, initial proc)
- MaximDL (color combining)
- WinJupos (planetary ephemeris)
- Photoshop CS (luminance stacking, final proc)
- Things to consider
- Acquisition strategy
- Somewhat determines the processing strategy
- Longer sets taken? (may need to feature align)
- Luminance filter sequences taken?
- Raw image quality
- Reference frame selection
- Frame rejection strategy
- Monochrome cameras
45
Processing Strategies
- Prcessing Software
- RegiStax V3 (aligning, stacking, initial proc)
- MaximDL (color combining)
- WinJupos (planetary ephemeris)
- Photoshop CS (luminance stacking, final proc)
- Things to consider
- Acquisition strategy
- Somewhat determines the processing strategy
- Longer sets taken? (may need to feature align)
- Luminance filter sequences taken?
- Raw image quality
- Will determine alignment strategy
- And percentage of rejected frames
- Reference frame selection
- Frame rejection strategy
- Monochrome cameras
46
Processing Strategies
- Prcessing Software
- RegiStax V3 (aligning, stacking, initial proc)
- MaximDL (color combining)
- WinJupos (planetary ephemeris)
- Photoshop CS (luminance stacking, final proc)
- Things to consider
- Acquisition strategy
- Somewhat determines the processing strategy
- Longer sets taken? (may need to feature align)
- Luminance filter sequences taken?
- Raw image quality
- Will determine alignment strategy
- And percentage of rejected frames
- Reference frame selection
- Frame rejection strategy
- Quality only
- Quality and alignment accuracy
- Monochrome cameras
47
Processing Workshop
48
Reference Frame Selection
- Reference frame becomes the model for Alignment
and Alignment Optimization - Selecting an average frame seems to work best
- An average frame produces a flatter alignment
curve (important later) - A frame from the middle of the AVI reduces
planetary rotation artifacts (unless aligning by
planetary feature)
49
Reference Frame Selection
- Reference frame becomes the model for Alignment
and Alignment Optimization - Selecting an average frame seems to work best
- An average frame produces a flatter alignment
curve (important later) - A frame from the middle of the AVI reduces
planetary rotation artifacts (unless aligning by
planetary feature)
Select Reference Frame
50
Alignment Box Size
- There are 2 options with planets
- Align the entire planet
- Planetary rotation affects central detail
- Align on a feature of the planet
- Use if there are high contrast features (best
with Jupiter) - Better central detail, less limb detail
51
Quality Setting, Alignment Optimization
- Better results are obtained when you take some
manual control - Pick a low Lowest Quality number or even 0
- Quality setting limits frames for you, but there
are 2 other ways to do that - Use Local Contrast quality estimate method
others work well also - The FFT Spectrum value estimates are usually OK
- Adjust filter until you see a single sizable red
area in center
52
Quality Setting, Alignment Optimization
- Better results are obtained when you take some
manual control - Pick a low Lowest Quality number or even 0
- Quality setting limits frames for you, but there
are 2 other ways to do that - Use Local Contrast quality estimate method
others work well also - The FFT Spectrum value estimates are usually OK
- Adjust filter until you see a single sizable red
area in center
Select Alignment Box Size Select Local
Contrast Select 0 Lowest Quality Adjust FFT
Filter Press Align
53
Quality Setting, Alignment Optimization
- Evaluate initial alignment curve (blue curve)
- If not relatively flat, select a different
reference frame - We are looking for the average alignment of
most frames - This will enable us to select a larger number of
similarly aligned frames - The Limit button is just a time saver
- Allows exclusion of very low quality frames
before alignment optimization - Use frame slider to exclude frames
54
Quality Setting, Alignment Optimization
- Evaluate initial alignment curve (blue curve)
- If not relatively flat, select a different
reference frame - We are looking for the average alignment of
most frames - This will enable us to select a larger number of
similarly aligned frames - The Limit button is just a time saver
- Allows exclusion of very low quality frames
before alignment optimization - Use frame slider to exclude frames
If alignment curve is OK Press Limit WAIT -
DO NOT PRESS Optimize and Stack!
55
Alignment Optimization
- After pressing Limit you have more options
- Dont use Optimize and Stack - more selecting
to do - Optimize until - sets optimization limits
- Reference frame gives you the option to create
a perfect frame for alignment optimization (not
recommended) - Resampling and Drizzeling allows each frame to
be enlarged before alignment optimization and
stacking (not recommended) - Use Pre-filter enhances each frame before
optimization (NexImage)
56
Alignment Optimization
- After pressing Limit you have more options
- Dont use Optimize and Stack - more selecting
to do - Optimize until - sets optimization limits
- Reference frame gives you the option to create
a perfect frame for alignment optimization (not
recommended) - Resampling and Drizzeling allows each frame to
be enlarged before alignment optimization and
stacking (not recommended) - Use Pre-filter enhances each frame before
optimization (NexImage)
Select Optimize until 1 Press Optimize Wait
for completion Press the Green Stack
tab (top)
57
Final Frame Selection, Stacking
- When alignment optimization is complete
- The Stack graph (tab on the lower right) is key
to fine tuning stacking - Vertical axis is used to select frames based on
alignment (relative to ref frame) - Flat curve allows more alike frames to be
stacked (exclude 10-30) - Horizontal axis is used to select frames based on
quality (exclude 10-20) - Exclude more frames with bad seeing Experiment!
- Some cameras benefit from using the Focus
pre-stack Filter (NexImage) - Histo stretch expands the number of colors or
levels of gray to 32bits
58
Final Frame Selection, Stacking
- When alignment optimization is complete
- The Stack graph (tab on the lower right) is key
to fine tuning stacking - Vertical axis is used to select frames based on
alignment (relative to ref frame) - Flat curve allows more alike frames to be
stacked (exclude 10-30) - Horizontal axis is used to select frames based on
quality (exclude 10-20) - Exclude more frames with bad seeing Experiment!
- Some cameras benefit from using the Focus
pre-stack Filter (NexImage) - Histo stretch expands the number of colors or
levels of gray to 32bits
Select Stack Graph tab Exclude 10-30 of
frames by alignment deviation (vertical
bar) Exclude 10-30 lowest quality
frames (horizontal bar) Select Histo
Stretch Select Brightness equalization Press
Stack
59
Wavelet Processing
- Press the Wavelet tab
- Open Histogram and Gamma
- Use histogram to prevent clipping and adjust
color - Use gamma to enhance contrast
- Wavelet enhancement
- 11 slider fine details
- 61 slider large details
- Save images in a 16-bit format for further
processing in PhotoShop - PNG or TIFF
60
Color Combining (MaximDL)
- Open RED, GREEN and BLUE filtered images
- Move Screen Stretch to maximum for each image
- Convert to monochrome
- Color Combine
- Select RGB process
- Select Red, Green and Blue files
- Align
- Color Combine
- Save color RGB image
- 16 bit format TIFF
- Next stop PhotoShop
61
PhotoShop and Final Image Prep
- PhotoShop CS or PhotoShop Elements
- Frequently used Features
- Levels
- Unsharp Mask
- Gaussian Blur
- Noise
- Polygon Tool
- Selection Feathering
- Brightness/Contrast
- Hue/Saturation
- Color Balance
- Selective Color
- Mode
- Image Size
- Rotate Canvas
- Layers Lum Layering
- Text Tool
- Planetary Data
- WinJupos
62
PhotoShop and Final Image Prep
- PhotoShop CS or PhotoShop Elements
- Frequently used Features
- Levels
- Unsharp Mask
- Gaussian Blur
- Noise
- Polygon Tool
- Selection Feathering
- Brightness/Contrast
- Hue/Saturation
- Color Balance
- Selective Color
- Mode
- Image Size
- Rotate Canvas
- Layers Lum Layering
- Text Tool
- Planetary Data
- WinJupos
63
PhotoShop and Final Image Prep
- PhotoShop CS or PhotoShop Elements
- Frequently used Features
- Levels
- Unsharp Mask
- Gaussian Blur
- Noise
- Polygon Tool
- Selection Feathering
- Brightness/Contrast
- Hue/Saturation
- Color Balance
- Selective Color
- Mode
- Image Size
- Rotate Canvas
- Layers Lum Layering
- Text Tool
- Planetary Data
- WinJupos
64
More Practice PhotoShop, RegiStax,
MaximDL Questions Suggestions Comments