
UNIT: Oxy-Fuel Welding, Brazing, Cutting and Heating - PowerPoint PPT Presentation
1 / 14
Title:
UNIT: Oxy-Fuel Welding, Brazing, Cutting and Heating
Description:
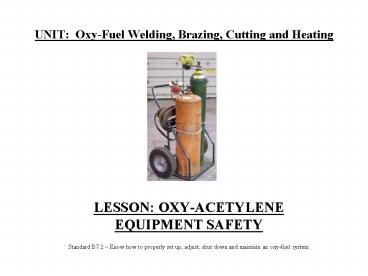
UNIT: Oxy-Fuel Welding, Brazing, Cutting and Heating LESSON: OXY-ACETYLENE EQUIPMENT SAFETY Standard B7.2 Know how to properly set up, adjust, shut down and ... – PowerPoint PPT presentation
Number of Views:498
Avg rating:3.0/5.0
Title: UNIT: Oxy-Fuel Welding, Brazing, Cutting and Heating
1
UNIT Oxy-Fuel Welding, Brazing, Cutting and
Heating
- LESSON OXY-ACETYLENE EQUIPMENT SAFETY
- Standard B7.2 Know how to properly set up,
adjust, shut down and maintain an oxy-fuel system
2
OXY-FUEL UNIT Identification
Oxygen Cylinder Valve
Oxygen Regulator
Oxygen Cylinder
Acetylene Regulator
Acetylene Cylinder Valve
Oxy-Acetylene Hoses
Acetylene Cylinder
Oxy-Acetylene Cart
Cylinder Safety Chain
3
SECURING THE CYLINDER
- Always chain or secure cylinders to a cylinder
cart, wall or stable work bench - Always keep cylinders secured properly in a
vertical (up-right) position. - Do not drop, strike, or apply heat to any part of
the cylinder or valve.
4
Cylinder Protective Cap
- Always keep the protective safety caps in place
whenever cylinders are moved or are in storage
(full or empty). - The cylinder cap has two holes on its sides
- Larger Oval Shaped Hole- designed to cause a
cylinder with a broken-off valve to spin instead
of taking-off like a missile. - Smaller Circular Hole- designed to make a loud
whistling noise if the cylinder valve is
broken-off, alerting the operator and others in
the shop of danger.
5
EMPTY CYLINDERS
- Mark empty cylinders EMPTY or Place a ring
around the protective cap. - Always close cylinder valves completely on empty
cylinders.
6
CRACKING THE CYLINDER VALVE
- DO NOT stand directly in front of cylinder valve.
Stand behind the cylinder valve while cracking
and be aware of others in the shop, aiming in a
safe direction. - Momentarily open and close the cylinder valve
cracking - this will blow out any dust, dirt,
or debris within the cylinder valve and prevent
it from entering the regulator and seats. - Open the cylinder valve slightly. If the valve
is opened too much the cylinder could tip over
from the pressure. - If Acetylene cylinders spray a mist when cracked,
let sit for 30 minutes allowing acetone to settle.
7
Inspecting the Cylinder Valve and Regulator
- Make sure the connection seat and threads on the
cylinder valve are not damaged. - A damaged screw thread may ruin the regulator
nut, while a poor connection seat will cause the
gas to leak. - Carefully inspect the cylinder valves and
regulator threads for traces of grease and oil.
If oil or grease is found DO NOT USE! Report to
instructor immediately.
8
ATTACHING THE REGULATOR
- Connect the oxygen regulator to the oxygen
cylinder and the acetylene regulator to the
acetylene cylinder. - All Oxygen connections have right handed threads.
- Oxygen cylinder valves have male fittings and
the oxygen regulator have female fittings. - All Acetylene connections have left handed
threads - Acetylene cylinder valves have female fittings
and the Acetylene regulator have male fittings.
9
Attaching the Regulator Cont.
- Tighten regulators with a close-fitted wrench
(open-end wrench). Do not use jawed tools such as
pliers, vice grips or channel locks to tighten
regulator nuts. - Do not over tighten regulators to cylinders.
Fittings are made of Brass a soft metal and
stripping will likely occur. - Make sure the regulator has the correct pressure
rating for the cylinder being used.
10
Turning on the Cylinder Valve
- Never stand in front or behind a regulator when
opening the cylinder valve. Always stand to the
side of the cylinder leaving the cylinder between
you and the regulator. - Be certain that the tension on the regulator
adjusting screw is released. Unscrew adjusting
screw counter clockwise until tension is removed. - Standing to the side of the cylinder, slowly open
the oxygen cylinder valve until the maximum
pressure registers on the high pressure gauge.
Then open the oxygen cylinder valve all-the-way
to seal the valve packing. - In the same manner, slowly open the acetylene
cylinder valve. But only open the Acetylene
valve ¾ - 1 full turn. Allowing the operator to
quickly turn off the fuel in case of emergency.
11
Adjusting the Oxygen RegulatorNever Exceed 40
PSI Working Gauge
Working Gauge Cylinder Gauge
Oxygen Regulator Adjustment Screw
- Oxygen Regulator- Female Fitting
- Right Handed Threads
- No Markings on nut
12
Slowly Crack the Acetylene Cylinder ValveOpen
cylinder valve ¾ - 1 full turn (quick shut-off)
13
Adjusting the Acetylene RegulatorNever Exceed
15 PSI Working Gauge
Working Gauge Cylinder Gauge
Acetylene Regulator- Male Fitting
Acetylene Regulator - Adjustment Screw
Acetylene Regulator- Left Handed Threads Notches
on Nut Indicate Left Handed Threads.
14
Oxy-Fuel Hoses
- Oxygen Hoses- Are GREEN in color, have
right-handed threads with no markings on the
connecting nuts. - Acetylene Hoses- Are RED in color, have left
handed threads, with notched markings on the
connecting nuts. - New hoses should have the preservative talcum
powder blown out before the welding or cutting
torch is used. - Hoses are flame retardant, but should still be
kept away from open flame, fallen slag, molten
metal and sparks. - NEVER EXCEED 15 PSI ON THE ACETYLENE REGULATOR
WORKING GUAGE. - NEVER EXCEED 40 PSI ON THE OXYGEN REGULATOR
WORKING GUAGE
Recommended
CrystalGraphics Presentations


