
Introduction to PowerPoint - PowerPoint PPT Presentation
1 / 24
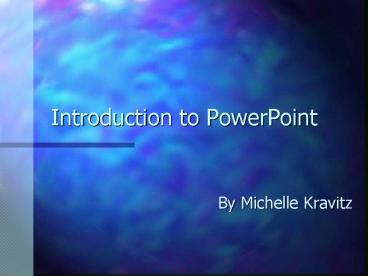
Title: Introduction to PowerPoint
1
Introduction to PowerPoint
- By Michelle Kravitz
2
What is PowerPoint?
- A presentation software
- Uses multimedia text, graphics, pictures,
sounds, videos, music, etc. - A tool for professionally displaying and
presenting work
3
Getting Started
- First, click on the Button in the
bottom-left corner - This will open up the menu options
- Second, click on Programs then Microsoft
PowerPoint - This will open PowerPoint and you will have a
choice box
4
PowerPoint (continued)
- You will be asked about your new presentation
that youre going to create with this menu - Click on Blank Presentation then click on
5
PowerPoint (continued)
- Next, a choice of several screens will come up
for the New Slide you will be making - Double-click on the first screen
6
PowerPoint (continued)
- You will now have the template for a Title
Slide open - This will serve as the first slide in your
presentation. - Click in the top box and type a Title
- Click in the bottom box and type a subtitle (or
name and date, etc.)
7
The Title Card
- The title of your presentation should be concise
and to the point - The subtitle box can contain your name, date, or
an actual subtitle.
8
Coloring and Formatting Text
- We dont live in a boring Black-and-White world
- Lets add color and nice formatting to the text!
9
Coloring and Formatting Text
- Select text you wish to format by dragging across
the text with the mouse - Click on Format, then Font to make changes to
Font Style, Size, Color
10
Moving a Text Box
- Put arrow on the thick gray line, and a
four-headed arrow will appear - Click, hold, and drag the text box to where to
you would like it
11
Resizing a Text Box
- Click on one of the corner handles of the box
(and hold) - Using your other hand, drag the mouse either
inside (to make smaller), or outside (to make
bigger)
12
Adding a Background Color
- Adding a background color to your slide will
improve the visual quality and appeal to the
entire presentation - First, open the Format Menu, and select Background
13
Background Color (cont.)
- Click on the down-arrow then select More Colors
- From the palette, you may pick any color you want!
14
Background color (cont.)
- After you have selected your new color, the
previous window will again appear. - Choose Apply to apply this background color to
just this one slide - If you choose Apply to All, this background
color will be applied to all of your slides!
15
Importing a picture
- Pictures and images can also be incorporated into
presentations (as you have seen with this
presentation) - Pictures can be from sources such as Clip Art,
the Internet, or from your personal disk
- Clip Art
- Internet
- From disk
16
Importing Clip Art
- Open the Insert menu and select Picture, then
Clip Art
17
Clip Art (cont.)
- First, select the category that interests you
(single click) - Then, select the image within the gallery that
you want (single click)
18
Clip Art (cont.)
- Now, close the Clip Art dialog box and you will
see your selected clip art on the slide - To move and resize the clip art, apply your
knowledge of the methods of moving and resizing
text boxes
19
Importing a picture from your disk
- To personalize your presentation, it is always a
good idea to add pictures that are generated
yourself. - This makes your project unique to you!
20
Importing a picture (cont.)
- To insert a picture from your own disk, first
select the Insert menu, then Picture, then From
File .
21
Importing a picture (cont.)
- Next, you will be presented with a screen that
asks where the picture file is located..
22
Importing a picture (cont.)
- If your picture is on your disk, select drive A,
3½
23
Importing a picture (cont.)
- Select the picture that youd like to import from
your disk, then click
24
For additional study
- Adding a slide transition
- Importing a video
- Importing a sound / Recording a sound
- Applying design templates
- Word art
- Inserting graphs from Excel and Word
Recommended
CrystalGraphics Presentations


![uPVC Doors and Windows [PowerPoint] PowerPoint PPT Presentation](https://s3.amazonaws.com/images.powershow.com/9443708.th0.jpg?_=20200523126)


