
DAWN - PowerPoint PPT Presentation
1 / 47
Title: DAWN
1
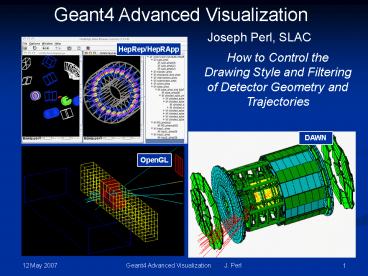
Geant4 Advanced Visualization
Joseph Perl, SLAC
HepRep/HepRApp
How to Control the Drawing Style and Filtering of
Detector Geometry and Trajectories
DAWN
OpenGL
2
Contents
- Visualization Attributes
- Trajectory Modeling
- Advanced Trajectory Modeling
- Trajectory and Hit Filtering
- Smooth and Rich Trajectories
3
How this Document Fits withOther Tutorial
Materials
- This presentation can be used on its own, but
gives the most comprehensive introduction to
Geant4 visualization when used as part of the
following full set of documents - Introduction to Geant4 Visualization
- Geant4 Installation Guides
- Geant4 Visualization Tutorial using the HepRApp
HepRep Browser - Geant4 Visualization Tutorial using the DAWN
Event Display - Geant4 Visualization Tutorial using the OpenGL
Event Display - Geant4 Visualization Commands
- Geant4 Advanced Visualization
- See the URLS at the end of this presentation
- This presentation discusses seven visualization
drivers - OpenGL
- OpenInventor
- HepRep
- DAWN
- VRML
- RayTracer
- ASCIITree
4
Visualization Attributes
5
Two Kinds of Visualization Attributes
- G4VisAttributes - carry standard drawing
information - Color
- Visible/Invisible
- Wireframe/Solid
- etc.
- HepRep-Style Attributes - carry arbitrary,
user-defined information - for trajectories
- momentum
- particle type
- etc.
- for hits
- energy
- electronics channel number
- etc.
- for geometry volumes
- logical volume name
- material
- etc.
6
G4VisAttributes
- G4VisAttributes - carry standard drawing
information - Color
- Visible/Invisible
- Wireframe/Solid
- etc.
- Up until a few years ago, these were the only
kind of Visualization Attributes in Geant4
7
LineStyle WireFrame or Solid
WireFrame
Solid
8
Setting Vis Attributes from C
- Create a G4VisAttributes object and assign it to
a volume - experimentalHall_logical -gt SetVisAttributes
(G4VisAttributesInvisible)
9
Setting Vis Attributes from Commands
- From the command prompt
- /vis/viewer/set/style wireframe
- Watch out for fact that interactive commands do
not override C commands that have the force
prefix, such as - experimentalHallVisAtt-gtSetForceWireframe(true)
10
HepRep-Style Attributes
- HepRep-Style Attributes - carry arbitrary,
user-defined information - for trajectories
- momentum
- particle type
- etc.
- for hits
- energy
- electronics channel number
- etc.
- for geometry volumes
- logical volume name
- material
- etc.
- These attributes were added to Geant4 over the
last few years to support advanced features in
the HepRep browsers (HepRApp, Wired4 and FRED). - display the HepRep attributes when you click on
the relevant graphics object. - perform cuts on these values
- label objects by these values
11
HepRApp Pick to Show Physics Attributes
- Picked on thisvolume to show
- Material
- Density
- Radlen
- etc
- Picked on this trajectory to show
- Particle ID
- Charge
- Momentum
- etc.
12
HepRApp Labeling by Any Attribute
13
HepRApp Cut by Any Attribute
14
HepRep Attributes beyond the HepRep Browsers
- Other visualization drivers can also use the
HepRep-style attributes - Open Inventor will show the attributes when you
click on the relevant object. - OpenGL will have this ability soon.
- Advanced visualization features described later
in this presentation also use HepRep attributes
and work for all Geant4 visualization drivers - Trajectory Modeling
- Trajectory and Hit Filtering
15
Defining Your Own HepRep Attributes
- While a useful set of attributes is already
defined by default in the standard Geant4
trajectory, you are also free to define your own
attributes - stdmapltG4String,G4AttDefgt store
G4AttDefStoreGetInstance("G4Trajectory",isNew) - G4String PN("PN")
- (store)PN G4AttDef(PN,"Particle
Name","Physics","","G4String") - G4String IMom("IMom")
- (store)IMom G4AttDef(IMom, "Momentum of
track at start of trajectory", "Physics","","G4Thr
eeVector") - Then fill the attributes with lines such as
- stdvectorltG4AttValuegt values new
stdvectorltG4AttValuegt - values-gtpush_back(G4AttValue("PN",ParticleName,"")
) - s.seekp(stdiosbeg)
- s ltlt G4BestUnit(initialMomentum,"Energy") ltlt
stdends - values-gtpush_back(G4AttValue("IMom",c,""))
- See geant4/source/tracking/src/G4Trajectory.cc
for a good example.
16
Trajectory Modeling
17
Enhanced Trajectory Drawing
- Ability to change trajectory drawing model
through interactive commands - Lets you, for example,
- declare that trajectories should be color-coded
by charge, - then change to have them color-coded by particle
type - Eliminates the most common reason users had to
code their own trajectory classes - Project Lead Jane Tinslay
18
Example A01, five events, drawBy various models
19
Models Supplied with Geant4
- Four models are supplied since release Geant4
v8.1 - More are being developed for future releases
- drawByCharge
- Default model
- Colors trajectories according to charge
- drawByParticleID
- Colors trajectories according to particle type
- All trajectories are colored grey by default
- Configure to highlight chosen particle types with
chosen colors - No limit on the number of particle types that can
be highlighted - drawByOriginVolume
- Colors trajectories according to volume in which
they originated - for example, to highlight all particles that
backscattered from a particular collimator - generic
- Draws all trajectories the same
1 Blue
-1 Red
0 Green
20
Model Configuration
- You can create and configure multiple models
through either - Interactive commands
- Compiled code
- Interactive commands
- Located in /vis/modeling/trajectories directory
- Possible to have multiple instances of given
model type - e.g., toggle between two different ways of
coloring by charge - List and select instantiated models with
commands - /vis/modeling/trajectories/list
- /vis/modeling/trajectories/select
ltmodel-instance-namegt - Note that detailed help for a given model is not
shown in the help system until you have created
an instance of that model - e.g., only after you do your first
- /vis/modeling/trajectories/create/drawByCharge
- will the help system will include details on
drawByCharge
21
Trajectory Modeling Examples
Example macro Standard setup /vis/scene/create /v
is/open OGLIX /vis/scene/add/volume /vis/scene/add
/trajectories /vis/scene/add/hits /vis/viewer/set/
lightsThetaPhi 90. 0. /vis/viewer/set/viewpointThe
taPhi 150. 90. /vis/viewer/set/style
surface /vis/viewer/set/hiddenEdge true Create
drawByParticleID model, highlighting
photons /vis/modeling/trajectories/create/drawByPa
rticleID /vis/modeling/trajectories/drawByParticle
ID-0/set gamma red /run/beamOn 1 Create
drawByCharge model, coloring neutrals
white /vis/modeling/trajectories/create/drawByChar
ge /vis/modeling/trajectories/drawByCharge-0/set
1 blue /vis/modeling/trajectories/drawByCharge-0/s
et -1 red /vis/modeling/trajectories/drawByCharge-
0/set 0 white /run/beamOn 1a
22
More Sample Commands drawByParticleID model
- Create a drawByParticleID model named
drawByParticleID-0 - /vis/modeling/trajectories/create/drawByParticleID
- Configure drawByParticleID-0 model
- /vis/modeling/trajectories/drawByParticleID-0/set
gamma red - /vis/modeling/trajectories/drawByParticleID-0/set
proton yellow - /vis/modeling/trajectories/drawByParticleID-0/setR
GBA e 1 0 1 1
23
More Sample Commands drawByCharge Modeland
Toggling Between Two Models
- Create a drawByCharge model (will get default
name of drawCharge-0) - /vis/modeling/trajectories/create/drawByCharge
- Create another drawByCharge model with an
explicit name of testChargeModel - /vis/modeling/trajectories/create/drawByCharge
testChargeModel - We can now go on to configure these two
different drawByCharge models and then - can choose to visualize using either one of
them at any time - Configure drawByCharge-0 model
- /vis/modeling/trajectories/drawByCharge-0/set 1
red - /vis/modeling/trajectories/drawByCharge-0/set -1
red - /vis/modeling/trajectories/drawByCharge-0/set 0
white - Configure testCharge model through G4Colour
components - /vis/modeling/trajectories/testChargeModel/setRGBA
1 0 1 1 1 - /vis/modeling/trajectories/testChargeModel/setRGBA
-1 0.5 0.5 0.5 1 - /vis/modeling/trajectories/testChargeModel/setRGBA
0 1 1 0 1
24
Trajectory Modeling by HepRep-Style Attributes
- For even greater flexibility, you can model the
trajectory based on any ofthe HepRep-style
attributes, whether it is one of the default ones
or anattribute that you have defined for
yourself. - E.g., set color based the value of the attribute
CPN (for creator process name)
- /vis/modeling/trajectories/create/drawByAttribute
- /vis/modeling/trajectories/drawByCharge-0/verbose
true - /vis/modeling/trajectories/drawByCharge-0/setAttri
bute CPN - /vis/modeling/trajectories/drawByAttribute-0/addVa
lue brem_key eBrem - /vis/modeling/trajectories/drawByAttribute-0/addVa
lue annihil_key annihil - /vis/modeling/trajectories/drawByAttribute-0/addVa
lue decay_key Decay - /vis/modeling/trajectories/drawByAttribute-0/addVa
lue muIon_key muIoni - /vis/modeling/trajectories/drawByAttribute-0/addVa
lue eIon_key eIoni - /vis/modeling/trajectories/drawByAttribute-0/brem_
key/setLineColour red - /vis/modeling/trajectories/drawByAttribute-0/annih
il_key/setLineColour green - /vis/modeling/trajectories/drawByAttribute-0/decay
_key/setLineColour cyan - /vis/modeling/trajectories/drawByAttribute-0/eIon_
key/setLineColour yellow - /vis/modeling/trajectories/drawByAttribute-0/muIon
_key/setLineColour magenta
Draw by the attribute called CPN
25
Example A01, five events, drawByAttribute models
26
Modeling Trajectory as Line, Step Points or Both
- In the discussion of models up to now, weve only
shown you how to set the color, but a model can
include many more options including whether to
show the trajectory as a line, a set of step
points or both - setDrawLine Set draw line command
- setLineVisible Set line visibility command
- setLineColour Set colour through a string
- setLineColourRGBA Set colour through red,
green, blue and alpha components - setDrawStepPts Set draw step points command
- setStepPtsVisible Set step points colour
command - setStepPtsColour Set colour through a string
- setStepPtsColourRGBA Set colour through red,
green, blue and alpha components - setStepPtsSize Set step points colour command
- setStepPtsType Set step points type.
- setStepPtsFillStyle Set step fill style type.
- (the following items relate to special kind of
points discussed later under smooth trajectory) - setDrawAuxPts Set draw auxiliary points
command - setAuxPtsVisible Set auxiliary points
visibility command - setAuxPtsColour Set colour through a string
- setAuxPtsColourRGBA Set colour through red,
green, blue and alpha components - setAuxPtsSize Set auxiliary points size
command - setAuxPtsType Set auxiliary points type.
27
Sample Commands generic trajectory model
- Create a generic model (will get default name
of generic-0) - From here we can set overall defaults for
things like line color, - whether to show step points or just the
trajectory line, etc. - /vis/modeling/trajectories/create/generic
- Configure the generic model to colour all
trajectories cyan and to show step points - /vis/modeling/trajectories/generic-0/default/setDr
awStepPts true - /vis/modeling/trajectories/generic-0/default/setSt
epPtsSize 16 - /vis/modeling/trajectories/generic-0/default/setLi
neColour cyan - /vis/modeling/trajectories/generic-0/default/setSt
epPtsColour red
28
Enhanced Trajectory Drawing Releases
- Since Release 8.0
- Color by Charge
- Color by Particle Type
- Since Release 8.1
- Color by Origin Volume
- Control over more than just color, including
- whether to show just trajectory line, or just
trajectory points, or both - width of trajectory lines, type of marker to use
for points, point size, etc. - Since Release 8.2
- Color by Any of the HepRep-Style Attributes, such
as - Initial volume name
- Magnitude of momentum
- Number of trajectory points
- User defined attributes
- Creator process name type (if using Rich
Trajectory) - Next volume name (if using Rich Trajectory)
29
Advanced Trajectory Modeling
30
Controlling Model from Compiled Code
- Instantiate model
- Configure model
- Register with visualization manager
31
Defining Your Own Model
- New trajectory models must inherit from
G4VTrajectoryModel and implement these pure
virtual methods - virtual void Draw(const G4VTrajectory, G4int
i_mode 0) const 0 - virtual void Print(stdostream ostr) const
0 - New models can be used directly in compiled code
- Need to be registered with visualization manager
32
To Make User Defined Model Available from
Interactive Commands
- You will need to write Messenger classes
- Messengers to configure the model should inherit
from G4VModelCommand. The concrete trajectory
model type should be used for the template
parameter - and a Factory class
- A factory class responsible for the model and
associated messenger creation must also be
written. The factory should inherit from
G4VModelFactory.The abstract model type should
be used for the template parameter, e.g.
G4ModelCommandDrawByParticleIDSet.cc class
G4ModelCommandDrawByParticleIDSet public
G4VModelCommandltG4TrajectoryDrawByParticleIDgt
...
G4TrajectoryDrawByChargeFactory.cc class
G4TrajectoryDrawByChargeFactory public
G4VModelFactoryltG4VTrajectoryModelgt ...
33
Construct the Model and Associated Messengers
34
Trajectory and Hit Filtering
35
Trajectory and Hit Filtering
- Display user-defined subset of trajectories
- Solves problems with overly busy graphics or
excessively large graphics files - Similar structure to enhanced trajectory drawing
- Set of simple filter models
- Similar Interactive creation/configuration
structure - chargeFilter
- Filters trajectories according to charge
- particleFilter
- Filters trajectories according to particle type
- originVolumeFilter
- Filters trajectories according to volume in which
they originated - Project Lead Jane Tinslay
36
HandsOn5, McGill tutorial, 1000 events,
Attribute Filter
IMag gt 2.5 MeV
IMag gt 2.5 MeV, particle gamma
- Momentum (MeV)
- 0-2.5
- 2.5-5
- 5-7.5
- 7.5-10
- 10-10.25
- 12.5
37
Trajectory Filtering
- Simplest example
- /vis/filtering/trajectories/create/particleFilter
- /vis/filtering/trajectories/particleFilter-0/add
e- - will cause everything except electrons to be
filtered out - You can chain multiple filters
- e.g., filter out gammas
- and filter out particles with momentum less than
100 MeV - Two modes of filtering
- Important issue when working with those
visualization drivers that allow you to turn
visibility on and off from the vis application
(HepRApp or OpenInventor) - One mode has rejected trajectories marked
invisible but still sent to vis app - user can toggle them back to visible from within
the vis app - but if there is a very large number of these
invisible trajectories,application may be slowed
down and files may be very large - Other mode has rejected trajectories entirely
omitted - user cannot toggle them back to visible from
within the vis app - but application stays fast and files stay small
38
Filtering Example
- /vis/modeling/trajectories/drawByAttribute-0/setAt
tribute IMag - /vis/modeling/trajectories/drawByAttribute-0/addIn
terval interval1 0.0 keV 2.5MeV - /vis/modeling/trajectories/drawByAttribute-0/addIn
terval interval2 2.5 MeV 5 MeV - /vis/modeling/trajectories/drawByAttribute-0/addIn
terval interval3 5 MeV 7.5 MeV - /vis/modeling/trajectories/drawByAttribute-0/addIn
terval interval4 7.5 MeV 10 MeV - /vis/modeling/trajectories/drawByAttribute-0/addIn
terval interval5 10 MeV 12.5 MeV - /vis/modeling/trajectories/drawByAttribute-0/addIn
terval interval6 12.5 MeV 10000 MeV - /vis/modeling/trajectories/drawByAttribute-0/inter
val1/setLineColourRGBA 0.8 0 0.8 1 - /vis/modeling/trajectories/drawByAttribute-0/inter
val2/setLineColourRGBA 0.23 0.41 1 1 - /vis/modeling/trajectories/drawByAttribute-0/inter
val3/setLineColourRGBA 0 1 0 1 - /vis/modeling/trajectories/drawByAttribute-0/inter
val4/setLineColourRGBA 1 1 0 1 - /vis/modeling/trajectories/drawByAttribute-0/inter
val5/setLineColourRGBA 1 0.3 0 1 - /vis/modeling/trajectories/drawByAttribute-0/inter
val6/setLineColourRGBA 1 0 0 1 - /vis/filtering/trajectories/create/attributeFilter
- /vis/filtering/trajectories/attributeFilter-0/setA
ttribute IMag - /vis/filtering/trajectories/attributeFilter-0/addI
nterval 2.5 MeV 1000 MeV
39
Hit Filtering
- The Attribute-Based filtering discussed above for
Trajectories was implemented generically so that
it can apply to any class which implements the
Geant4 generic attributes method - Whatever your Hit class, you can basically get
interactive hit filtering for free - To activate, add a filter call to G4VVisManager
in Draw method of hit class
const stdmapltG4String,G4AttDefgt GetAttDefs()
const stdvectorltG4AttValuegt CreateAttValues()
const
void MyHitDraw() if (!
pVVisManager-gtFilterHit(this)) return
40
Trajectory and Hit Filtering Releases
- Since Release 8.1
- Filter by Charge
- Filter by Particle Type
- Filter by Origin Volume
- Since Release 8.2
- Filter by Any of the HepRep-Style Attributes,
such as - Initial volume name
- Magnitude of momentum
- Number of trajectory points
- User defined attributes
- Creator process name type (if using Rich
Trajectory) - Next volume name (if using Rich Trajectory)
- Future Releases
- Filter by creation time of particle
- more
41
Smooth and Rich Trajectories
42
G4SmoothTrajectory and G4RichTrajectory
- Most users use the standard G4Trajectory.
- A point is generated each position that something
physical happens - Interaction, Decay, Boundary Crossing, Step
- But two other trajectory classes are available
- Smooth Trajectory
- adds auxiliary points to allow smoother line in
visualization(not Geant4 Steps, no physics at
auxiliary points) - useful when trajectories are highly curved due to
magnetic fields - Rich Trajectory
- encodes additional information at every step
point (which you can then see when you click on
the step in HepRApp) - Total energy deposited at this point
- Position (x,y,z)
- Why was this point generated(Interaction, Decay,
Boundary Crossing or Step) - Project Lead John Allison, Joseph Perl
43
Regular versus Smooth Trajectory
- Regular Trajectoryis a polyline made up of only
the actual steps used by Geant4
- Smooth Trajectoryincludes additional points to
make the polyline appear smoother. - These additional points are not Geant4
steps.They are only used by visualization.
44
Smooth Trajectory Makes Big Difference for
Trajectories that Loop in a Magnetic Field
- Yellow dots are the actual step points used by
Geant4 - Magenta dots are auxiliary points added just for
purposes of visualization
45
Rich Trajectory Has Details on Every Step Point
46
Smooth and Rich Trajectories Now Easier to Use
- Up to Release 8.1, users who wanted to use these
trajectories have had to write their own tracking
action and explicitly instantiate one of these
special kinds of trajectory - Release 8.2 made this possible from an
interactive command - /vis/scene/add/trajectories
- /vis/scene/add/trajectories smooth
- /vis/scene/add/trajectories rich
- /vis/scene/add/trajectories smooth rich
- Note that default trajectory modeling draws
trajectories only as a line.Step points are not
drawn. To draw the points, you need to include
modeling commands such as - /vis/modeling/trajectories/create/generic
- /vis/modeling/trajectories/generic-0/default/setDr
awStepPts true - /vis/modeling/trajectories/generic-0/default/setSt
epPtsSize 16 - /vis/modeling/trajectories/generic-0/default/setSt
epPtsColour red
47
Geant4 Visualization Resources
- Geant4 Installation Guides
- http//geant4.slac.stanford.edu/installation
- Hands on HepRApp Tutorial
- http//geant4.slac.stanford.edu/Presentations/vis/
G4HepRAppTutorial/G4HepRAppTutorial.html - Hands on DAWN Tutorial
- http//geant4.slac.stanford.edu/Presentations/vis/
G4DAWNTutorial/G4DAWNTutorial.htmlHands on
OpenGL Tutorial - http//geant4.slac.stanford.edu/Presentations/vis/
G4OpenGLTutorial/G4OpenGLTutorial.html - Geant4 Visualization Commands
- http//geant4.slac.stanford.edu/Presentations/vis/
G4VisCommands.ppt (and .pdf) - Geant4 Advanced Visualization
- http//geant4.slac.stanford.edu/Presentations/vis/
G4VisAdvanced.ppt (and .pdf) - How to Make a Movie
- http//geant4.slac.stanford.edu/Presentations/vis/
HowToMakeAMovie.ppt (and .pdf) - Visualization Chapter of the Geant4 Users Guide
for Application Developers - http//geant4.web.cern.ch/geant4/UserDocumentation
/UsersGuides/ForApplicationDeveloper/html/ - List of Visualization Commands
- http//geant4.web.cern.ch/geant4/UserDocumentation
/UsersGuides/ForApplicationDeveloper/html/AllReso
urces/Control/UIcommands/_vis_.html - For Questions or Comments Geant4 Visualization
Online Forum
Recommended
CrystalGraphics Presentations


