Qpopper Quick Installation Guide PowerPoint PPT Presentation
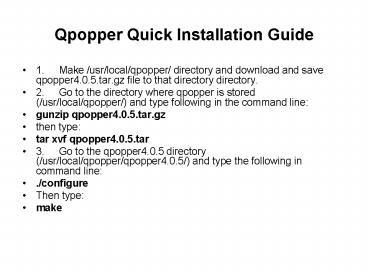
Title: Qpopper Quick Installation Guide
1
Qpopper Quick Installation Guide
- 1. Make /usr/local/qpopper/ directory and
download and save qpopper4.0.5.tar.gz file to
that directory directory. - 2. Go to the directory where qpopper is stored
(/usr/local/qpopper/) and type following in the
command line - gunzip qpopper4.0.5.tar.gz
- then type
- tar xvf qpopper4.0.5.tar
- 3. Go to the qpopper4.0.5 directory
(/usr/local/qpopper/qpopper4.0.5/) and type the
following in command line - ./configure
- Then type
- make
2
- 4. Use mkdir command to create a directory as
follows - mkdir /usr/local/man/
- mkdir /usr/local/man/man8
- 5. Type following in command line
- make install
- 6. Open the file /etc/xinetd.conf and add the
following lines to the file and save - (A similar configuration is available
in the following file - /qpopper/qpopper4.0.5/samples/qpopper.xi
netd - You can copy it to the destination and
do the necessary changes)
3
/etc/xinetd.conf
- service pop3
- flags REUSE NAMEINARGS
- socket_type stream
- wait no
- user root
- server /usr/local/sbin/popper
- server_args popper f /etc/qpopper110.cfg s
- instances 50
- disable no
- port 110
- per_source 10
- service pop3s
- flags REUSE NAMEINARGS
- socket_type stream
- wait no
- user root
4
- 7. Go to qpopper source directory and then to
the samples - directory inside that
- (e.g. /usr/local/qpopper/qpopper4.0.5/sam
ples) - 8. Open the qpopper.config file in
/usr/local/qpopper/qpopper4.0.5/samples/ and save
it as qpopper110.cfg in /etc/. - 9. Type following in the command prompt
- service xinetd restart
- 10. Type the following in command prompt to test
qpopper - telnet localhost 110
5
Create Linux users as mail users
- useradd suranga
- passwd suranga
PowerShow.com is a leading presentation sharing website. It has millions of presentations already uploaded and available with 1,000s more being uploaded by its users every day. Whatever your area of interest, here you’ll be able to find and view presentations you’ll love and possibly download. And, best of all, it is completely free and easy to use.
You might even have a presentation you’d like to share with others. If so, just upload it to PowerShow.com. We’ll convert it to an HTML5 slideshow that includes all the media types you’ve already added: audio, video, music, pictures, animations and transition effects. Then you can share it with your target audience as well as PowerShow.com’s millions of monthly visitors. And, again, it’s all free.
About the Developers
PowerShow.com is brought to you by CrystalGraphics, the award-winning developer and market-leading publisher of rich-media enhancement products for presentations. Our product offerings include millions of PowerPoint templates, diagrams, animated 3D characters and more.

