

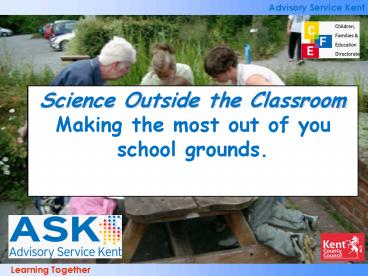
Science Outside the Classroom Making the most out of you school grounds. PowerPoint PPT Presentation
1 / 48
Title: Science Outside the Classroom Making the most out of you school grounds.
1
Science Outside the ClassroomMaking the most out
of you school grounds.
2
What can we do?
- This Powerpoint will give ideas as to how schools
can use their environments to help develop
childrens scientific knowledge and investigative
skills. It will do this by looking at two main
areas - Habitats (Animals, Plants and Micro-organisms)
- Activities to support learning across the science
curriculum.
3
Animals
- Mammals bats and hedgehogs
- Birds
- Pond life
- Bees
- Worms
- Ladybirds
- Butterflies
- Rockeries/Log pile minibeasts
4
Bats
- Make the box from rough sawn timber to give the
bats something to cling to. Make sure the wood is
untreated - many wood preservatives can kill
bats! - The best place to position a bat box is on a
tree. Place them in groups round three sides of a
tree - bats like to move from one box to another
during the day and from season to season as
temperatures change. - Put the boxes as high as possible above the
ground to avoid predators - some species of bat
such as noctules prefer roosts at least 5 metres
off the ground. - Clear away surrounding branches to give them a
clear flight path. - Boxes can also be located on buildings. A good
position is under the eaves to protect them from
bad weather. - It is illegal to disturb any bat when it is
roosting, or to kill, injure or handle a bat
without a licence
5
http//www.lincstrust.org.uk/factsheets/batbox/ind
ex.php
6
Hedgehogs
- This is a design that the British Hedgehog
Preservation Society recommends and is a more
permanent type of home. Any available timber can
be used (old or new) but the better it is made,
the longer it will last. - Do not nail down the roof as you may need to
clean the box in the future. - The entrance tunnel could be constructed with
old bricks placed on top of each other with a
piece of slate with a brick atop for the roof.
Make sure the entrance is kept clear and avoid
the temptation to disturb the Hedgehogs during
hibernation. - The finished Home should be covered with plastic
sheeting, soil and twigs placed on top and hay
left outside which will be taken in and used for
bedding by any prospective resident. Remember
that Hedgehogs have soft feet and so the floor of
your Hedgehog House should have newspapers,
sawdust or earth on it.
7
Hedgehogs
Helpful Hints When you have made a Hedgehog
House, place it in a quiet part of your garden,
preferably against a bank, wall or fence and hope
that you will have a visit from a friend seeking
a home. Make sure the entrance to the house does
not face North or North East, thus avoiding the
cold winter winds. It may then become the winter
home for some lucky hedgehog. If female, she may
even have her young in it in the Spring. After
winter use, it needs to be cleaned out and, to
some extent, fumigated or washed out. To make
sure there is nobody in residence, put a small
amount of food into the entrance to see whether
it disappears if it doesn't, this is an
indication that the hedgehog is no longer in
residence and you can clean the house using
Pyrethrum powder or one of the herbal dog dusting
powders. On no account should the Hedgehog House
be creosoted or "treated" as the fumes remain for
a long time and can be very harmful.
- http//www.britishhedgehogs.org.uk/FAQS/hedgehog_h
omes.htm
8
Birds
- A Hanging Bell Feeder
- To make a hanging bell feeder, popular with blue
tits and great tits, take a small plastic plant
pot and thread a length of wire or string through
the hole in the bottom, securing the pot so it
hangs upside down. This will enable you to hang
the feeder from the tree. If you are using
coconut shells, cut the coconut in half and
either remove the flesh to use yourself, or hang
it up for the birds to peck at. - Mix a selection of bird seed, nuts and berries
together with breadcrumbs and suet in a bowl - .Warm some lard carefully in a pan until melted,
then add to the mixing bowl. Stir the lard in,
and allow to cool a little. - Carefully spoon the mixture into the pot or
coconut shell, packing it in tightly. When the
lard has completely cooled it will set hard and
hold the mixture in place.
9
Birds
- Making a Hanging Log Feeder
- To make a hanging feeder log, take sections of
branch 7cm - 8cm in diameter and 25cm- 30cm long,
e.g. from coppicing or heavy pruning. Drill a
series of holes along the length of a wooden log,
approximately 2cm in diameter, using a wide-ended
drill bit. Attach a galvanised metal eyelet to
one end, ensuring it is securely fastened and
strong enough to take the weight of the log.
Thread a piece of string or wire through the
eyelet, to tie it to the tree. Prepare the
mixture in the same way as above, packing it into
the holes along the length of the log and waiting
for it to set before hanging it out for the
birds.
10
Birds
- Mealworm Feeder
- To make a live food container to keep mealworms
for insectivorous birds like blackbirds, robins
and thrushes, thread a piece of string or wire
through the holes in the bottom of a plastic
plant pot, securing so the pot hangs the right
way up. This will be filled with the mealworms,
so to prevent them from wriggling out, tape over
the holes with waterproof tape, e.g. freezer
tape. To protect the mealworms from the weather,
cut the top off an old plastic bottle (leaving
the top screwed on) and attach it to the string
higher up to act as a roof. Remember to leave
sufficient space between the two for the birds to
get in and out easily.
11
Pondlife
- Choosing the right pond
- Make sure you discuss your requirements with the
company/garden centre that you are using. - Siting the pond
- It should be in the sun for at least ½ the day
and preferably not surrounded by many trees to
avoid shading and leaves falling into it. Best
sited at the top of a slight slope. - Making it Wildlife Friendly
- If possible have adjacent areas for marshlands,
wild flower meadows and any other habitats. - Go for an edge that provides a mixture of cover
and open ground. - Requirements
- It does NOT need to have a depth of 1m plus at
its deepest point, but this would help it all
freezing in winter. You need to include shallower
areas 50cm, 30-40cm, etc. - Include varied collection of pond life
12
Pondlife Pond plants
- Go for a good mixture of floating, submerged and
emerging species. - Submerged plants milfoil, hornwort, starwort and
water violet. These are good oxygenators and
provide cover and hunting grounds for aquatic
minibeasts. - Floating plants also provide cover, prevent the
water going green, and provide platforms for
minibeasts. - Emergent plants ones that root underwater but
grow through the surface are vital for minbeasts
e.g. dragonflies and damselflies need an emerging
stem to climb out of the water to turn into
adults.
13
Pondlife Beware of aliens!
- Avoid invasive alien plants like parrots
feather, New Zealand pygmyweed and floating
pennywort. These may seem ideal minibeast
habitats but will take over the pond and all too
easily escape into the wild where they will
damage other aquatic wildlife habitats.
14
Pondlife
- Water supply
- If using mains water, this must be left in the
open for 24 hours to allow chlorine to disperse. - Health and safety
- Nursery very shallow
- Infants up to 60cm
- Junior up to 75cm
- The aim is for children to be able to stand up in
it. - Avoid large stones in pond so children cannot
knock their heads on them if they were to fall
in. - A small wall/hedge may stop young infants
inadvertently walking into the pond.
15
- School Wildlife Ponds Guidance from The Royal
Society for the Prevention of Accidents - Schools have a duty of care towards their staff,
pupils and other who may be on their premises. A
school is required to carry out a risk assessment
and implement reasonably practicable measures to
ensure an acceptable level of safety. When
considering safety issues, and in particular the
risk of drowning in a school pond, there are a
number of factors to assess - What are the hazards?Primarily the water itself,
but also how it interacts with features such as
steep banks, silt, and overhanging branches. - Who might be harmed? And how?Young children,
particularly under fives the elderly children
with special needs teenagers (peer pressure
often leads to risk taking) lone workers
members of the local community. The prevention of
slips, trips and falls should be considered, and
hygiene issues such as the risk of Weils disease
and other water borne causes of ill health. - Evaluate the level of riskDecide whether
existing precautions are sufficient, or whether
more can be done. Assess factors such as
function, location, depth, edge gradients,
supervision, user groups, information provision,
effects of weather i.e. ice, summer swimming. - Record findings and policiesCreate normal
operating policies which detail how the pond is
operated, the measures which have, or not, been
implemented, and the reasoning behind any
decision. Also, create an emergency action plan.
This should be distributed to all staff, to let
them know what to do on the event of an accident.
- Monitor and reviewThe safety policy should be
monitored, as should the pond itself e.g. if
signage is damaged, it must be replaced, and user
behaviour should be monitored and the operating
procedures altered accordingly. The same
principles should be applied to the assessment of
pond dipping activities organised by schools.
Reach poles, details of the risk assessment, and
emergency action plans should be available to
teachers supervising the activity. - For further information visit http//www.rospa.co
.uk/waterandleisuresafety/factsheets/pondsafety.ht
m
16
Bees
The blue orchard mason bee will only lay eggs in
pre-existing holes. She is not capable of making
nesting holes herself and will potentially lay
fewer eggs if she can't find adequate housing.
Bee boxes are easy to make, and having mason bees
around will help your garden grow
3.Hammer a hook into the back of the bee box.
Using this hook, hang up the block in an area
that is south- or east-facing (exposed to morning
light). The box should be about 4 feet off the
ground and is most efficient if it is placed near
native plants and/or fruit tree blooms
2.Find a piece of wood that is 7 inches long and
1 inch thick. Nail this piece to the top of the
bee box to protect the holes from rain water.
1.Find an old or new 4x4" block of wood that has
not been treated. Using a 5/16" drill bit, drill
deep holes into the side of the wood being
careful not to drill through the end. Ensure
that the holes are clean.
http//www.lifecyclesproject.ca/resources/bee_aver
age/bee_box.php
17
Flowers for bees
- Tubular or bell-shaped flowers
- Snapdragons
- Penstemons
- Campanulas
- Ericas
- Broom
- Clover
18
Ladybird Homes
- Ladybird and lacewing homes (hibernacula) similar
to bird boxes can be used be bought from
suppliers and used as a place where they can
safely pass the winter. (Available from TTS)
19
Worms
- Making a wormery
- 400 compost worms. These are often called
brandlings, tiger worms or redworms and are
available from most fishing shops - How to make your worm composter
- 1. Drill a tap into the bin about 5 to 10cm from
the bottom. Don't put it too far up the bin
otherwise it won't work properly. - 2. Place the piece of wire mesh inside the bottom
of the bin so that it covers the inside of the
tap. This will help to prevent the tap getting
blocked. - 3. Drill some breathing holes into the bin lid.
- 4. Place 5 to 10 cm of sand or gravel at the
bottom of the bin for drainage. - 5. Place the wooden slats on top of the sand or
gravel. The purpose of these is to separate the
drainage material from the compost you are going
to produce. - 6. On top of the wooden slats, put down 10 to 15
cm of damp bedding material for the worms. - 7. Dig a small hollow in the bedding material and
place the worms inside.
http//www.recyclezone.org.uk/az_worms.aspx
20
Flowers for minibeasts
- Open structures
- The widest variety of insects in attracted to
flowers with an open, flat structure which allows
access to the nectar for insects without
specialised mouthparts - Rose family hawthorns, crab apples and
potentillas. - Saxifrage family saxifrages, heucheras and
astilbes. - Stonecrop family ice-plant and other Sedum
species. - Umbel family angelica, lovage and fennel.
21
Butterfly Gardens
Mint, Phlox Primrose, Red valerian Rudbeckia,
Sedum Flowering shrubs and climbers Buddleja,
Ceratostigma Cotoneaster, Escallonia Hebe,
Honeysuckle Ivy, Lavender Lilac,
Privet Wildflowers Common fleabane Daisy,
Dandelion Field scabious Hemp agrimony Ox-eye
daisy Knapweed Purple loosestrife Ragwort,Teazel
- The first step is to design the border, which
needs to be in a sunny position, but can be any
size and shape you like. - Butterflies and moths feed on the nectar of many
flowers but will lay their eggs only on leaves of
specific plants which are their caterpillars
food. Check the sowing times and any temperature
requirements, then devise a growing timetable.
Its best to start off all the seeds in
containers as this gives much more control over
the process.
40 top butterfly plants Annuals and biennials
from seed Alyssum,Aster Bedding
dahlias Candytuft Forget-me-not French
marigold Lobelia, Honesty Sweet
rocket,Verbena Border perennials and
herbs Aubrieta, Catmint Marjoram Michaelmas daisy
22
Flowers throughout the year
- Aim to provide a good variety of flowers
throughout most of the year. - Overwintering queen bumblebees, drone flies,
small tortoiseshell and brimstone butterflies
rely on late-flowering michaelmas daisies, ice
plants and ivies. On emerging in early spring,
they use early-flowering hellebores, narcissi,
doronicums, viburnums and Prunus species.
23
Rockeries/Log piles
- These are superb areas for both vertebrates and
inverebrates. - Many minibeasts hibernate (overwinter).
- Leaving fallen leaves and tree trunks to
naturally decay will increase the diversity of
animals. - Dead wood attracts many beetles and hoverflies.
- Go for branches or trunks in preference to twigs.
- It is best to site these at the edge of shade or
in dappled sunshine (but not in full sun) to get
a good balance of warmth and moisture.
24
Hot Spots
- Minibeasts are almost without exception,
cold-blooded they must get their body heat
from external sources rather than from their
food. Little warm spots are therefore vital for
minibeasts. - Any bare ground, rock or wood in full sunshine
rapidly warms up and may be 10 degrees Celsius
hotter than planted areas. - Particularly useful are hot spots that warm up
quickly in the morning, allowing minibeasts an
early start. - If possible, make sure that there are little hot
spots throughout the day in a variety of
locations.
25
Micro-organisms/ Composting
www.recyclenow.com/home_composting/compost_at_scho
ol/index.html This website will provide plenty
of information on how to compost at school. It
also provides a teacher pack for both Key stage 1
and 2.
26
The Composting Process
- There are two main stages
- Bacteria, fungi, and micro-organisms (known as
heaters) break down the softer material, causing
the compost heap to heat up to over 60C. - The compost heap cools. Worms, insects and other
small creatures (known as chompers) break down
the tougher material. - Compost usually takes about 3-9 months to mature,
although it may take longer during the winter
months. Composted material can be taken from the
bottom of the heap, allowing the partly composted
and newer material to remain. - Getting started
- Buy a compost bin. These can be bought at most
DIY stores and garden centres. Make sure you buy
a big enough composter. A 200-300 litre bin is
big enough for average-sized gardens. Get one
with a lid to keep out the rain. - Make your own compost bin out of wood. Create a
timber frame and attach to posts driven into the
ground. Cover with a plastic sheet or carpet to
keep out the rain and keep in the heat and
moisture. - Place your bin in a sunny, well-drained area of
bare soil or grass, out of the wind. Breaking up
the earth underneath will improve drainage.
Warmth from the sun speeds up the composting
process.
27
What to put in a compost
- What to put in your compost...
- hair and fur
- shredded paper / soft card
- chopped straw and hay
- animal bedding
- egg shells - crushed
- grass cuttings / prunings / chopped old plants
- chicken / pigeon / horse manure
- raw vegetables and fruit
- tea / tea bags / coffee granules
- Do not add...
- meat or fish
- coal ash
- dog / cat mess
- nappies / used tissue
- persistent weeds
- dairy products
- cooked foods
28
Plants
- Grasslands
- Hedgerows
- Herb Garden
- Herbaceous borders
- Marshlands
- Meadows
- Trees
- Vegetable plots
- Walls
- Woodlands
- Raised beds
29
Grasslands/Meadows
- These must be grown on poor soils otherwise they
will be competing with docks and thistles. This
is best achieved by removing the top soil and
ensuring any thistles and docks have been
removed. - Seeds can be sown into the ground in early
September. - Plugs (seeds that are grown in nurseries and sold
as seedlings) can be sown in April. - It is important to cut the meadow at particular
times of the year and then leave to grow
naturally in other months
30
Grasslands/Meadows
- Spring meadows should be left uncut until early
July when the flowers will have bloomed and set
seed. It should then be mown regularly to a
height of 5cm until October. - Summer meadows should be mown regularly from
April until the end of June to a height of 7.5 to
10cm. This will prevent coarse grasses becoming
dominant. Cutting should cease from June to mid
September to allow the flowers to bloom and set
seed. - Information on which seeds to buy and
identification sheets for grasses and weeds can
be found on rbkc.gov.uk/EnvironmentalServices/Eco
logy/ec_teacherspack_section2_a2.pdf
31
Hedgerows
- What makes a good hedgerow?
- Ideally, a hedgerow should be 4 or 5 metres wide,
of unlimited length, planted with a variety of
berry- and seed-bearing shrubs for food, and
interspersed with cedar for added cover. It
should be thick, bushy, largely unpruned and
entangled with vines. - However, schools with small plots need not
despair. Even a short, narrower hedgerow can be
attractive to wildlife, if you follow the basic
rules of mixed planting.
32
Hedgerows why bother?
- Dense, well connected hedges are preferred by
small mammals, and consequently by their
predators e.g. foxes, stoats and weasels also. - The presence of hedgerow trees is thought to be
important for bats, providing potential
hibernating places for species such as the
noctule bat. - For more information on growing hedgerows visit
- www.ofnc.ca/fletcher/howto/hthedge_e.php
33
Herb gardens
- Choice of site
- It needs to be
- in sunlight, although some herbs will tolerate a
bit of shade - accessible in all weathers
- safe and secure
- Soil
- Ideally the soil should be well drained and
light, but herbs will grow in heavier soils. If
your soil is wet and heavy, include coarse grit
to improve drainage. Or alternatively, build a
raised bed, with sides about 30cm high.
34
Herb gardens
- Themes
- You may want to design your herb garden around a
theme - Culinary
- Medicinal
- Aromatic
- Historical
- Food for wildlife
- Dyeing
- For more information on growing herb gardens
visit - http//www.herbsociety.org.uk/schools/introsheets/
making_garden.htm
Roman soldiers were said to put a leaf of
plantain in their footwear before a long march to
prevent blisters.
35
Marshlands
- When creating a pond it is worth providing a
marshland area at one end. It is most easily
created if the pond is made from an artificial
lining this is extended beyond the pond boundary
to retain water in the fringe zones
36
Trees
- Growing trees
- For all the information you need for growing
trees visit www.treeforall.org.uk/JoinIn/AsASchoo
l/ - Identifying trees
- Some great tree identification charts are
available to buy from www.gatekeeperel.co.uk
37
Vegetable plots
- For information on what to grow and how to grow
it visit www.rhs.org.uk/education/documents/growi
ngvegetables.pdf - Remember that you do not need lots of space for
vegetable plots maybe use raised beds or old
tyres.
38
Activities to support learning in science
- How often do you use your outdoor environment to
support science learning? - Do you use it to enhance all areas of the science
curriculum? - From the ASK primary science website download a
copy of the playground pack for ideas about
science that children can do during break times.
39
Habitats
- How many habitats are there in your school
grounds? The children can help improve these. - Do children study these habitats at different
times of the year in order to compare the number
and types of animals and plants found there? - Have you developed a nature walk around the
school? You could have plaques at different
locations where children are given information or
questions/tasks.
40
Plant/animal identification
- How often do children identify the plants and the
animals in the school grounds? - Do you have good identification charts for the
children to use? Some great identification charts
are available to buy from www.gatekeeperel.co.uk - Have you tried giving children paint colour
charts from DIY shops to match to natural objects
around the grounds? - Do you maintain displays of what the children
have found throughout the year.
41
Human body
- Heights of children. Maybe there is an area in
the grounds where children can mark their heights
on a wall/fence. Could a semi-permanent plaques
be attached for the smallest, average and tallest
child for each class? Could these be updates
every year? - Pulse rates. Could you set up a variety of
activities for children to do outside? After each
one they could measure their pulses. - The heart. Could a model of the circulatory
system be painted on the playground. The children
could then run the route of the blood! - Healthy eating. Are children having the
opportunities to sow, grow, cook and eat their
own foods?
42
Materials
- Names of materials. Are different materials
outside labelled? Have you got covered pictures
of school buildings on display outside which
children can use to identify different materials?
43
Forces
- Are there opportunities for children to explore
forces in the school grounds - Walls to bounce balls against
- Trays of water for floating and sinking
- Playground equipment
- Slopes built into grass banks for cars
44
Earth, Sun and Moon
- Measuring shadows. Is the equipment available for
children to measure the length of shadows and
show their direction? Is there a compass rose for
children to relate to the shadows? Have you an
outside board on which information about shadow
length and direction can be recorded and kept
throughout a year? - The Moon. Can children record what the Moon looks
like on different days?
Health and safety Children need to reminded about
the dangers of sunlight.
45
Light
- Transparent, translucent and opaque. Are there
materials available for children to explore to
find out whether or not they are opaque? Do
children have the opportunities to measure the
amount of light in different places in the school
grounds with data loggers? - Reflection. Do children have opportunities to
explore with mirrors even directing light onto
targets that are available? - Shadows. Are children finding out if they can
make different coloured shadows with coloured
paddles?
Health and safety Children need to reminded about
the dangers of sunlight.
46
Sound
- Loudness. Is there a loudness scale with pictures
available for children to judge different amounts
of loudness? Do children have the opportunities
to measure the loudness of sounds with a data
logger? - Pitch. Again, is there a visual pitch scale
available for children to judge the pitch of
different sounds? Do you have whirly tubes for
children to use? What about plastic bottles
containing different amounts of water?
47
Electricity
- Making a circuit. Allow the children to have a
glow/ghost ball (available from TTS). They can
all join hands to make a circuit and make the
ball flash and buzz.
48
Advisory Service Kent Shepway Centre Oxford
Road Maidstone ME15 8AW Tel 01622 203800 Fax
01622 670509 www.clusterweb.org.uk/ask
Recommended

