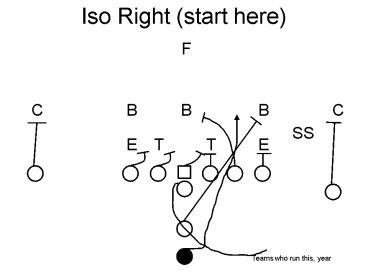
Buck Sweep PowerPoint PPT Presentation
1 / 12
Title: Buck Sweep
1
(No Transcript)
2
How to proceed
- If I were you, Id print this out as handouts and
keep it handy until you get comfortable with it. - To do this, click File/Print then when that
window pops up look lower left for Print What
and click the down arrow to see your options,
select Handouts - Just to the right of that says Slides per page,
select a number per page. 6 per slide is pretty
good but Id do 4 per slide and youll be able to
ready it easily. Hit OK
3
How to make your own
- I would click File/Save As and rename this file
to anything you like. By doing this, you are not
destroying my file but making another copy to
use. - On the left part of the screen, delete slides 2
12 and read your directions you printed to make
your own cards. You can right click on each
slide one by one and select delete slide or
click on 2 then scroll down and hold the shift
key and left click on 12, then right click on 3
and select delete slide it will get rid of all
of them.
4
How to make your defense
- Start with the template I made for you (slide 1)
- Move your base defenders where you want them and
name them whatever you like.
5
How to align defense on a slide
- If you want to make things line up either
horizontally or vertically (like LBs at the same
depth or stack over a lineman), then click the
objects you want to align (I usually use at least
3 reference points) by clicking each one as you
hold the shift key. Next make sure in the
lower left corner of your screen shows a Draw
button. If not, go to View/Toolbars and make
sure Drawing is checked - Now, click on your people as described above and
then click Draw/Align or Distribute and choose
the one you want to do. If you mess up, they all
look in a pile or something like that, then just
go to Edit/Undo great tool, I wish do-overs
in life were that easy.
6
How to draw the offensive play
- Use the drawing tools to make the play you want.
- Click on Autoshapes/Lines and put the cursor at
the top of the Lines box. When the cursor
looks like this drag it somewhere on the
desktop. Youll use this box over and over again
so instead of 3 clicks you now can do it in 1
click.
7
How to make a new offensive play the opposite
direction
- Now you are ready to make the play go left in a
matter of clicks instead of drawing it all over
again. - Go back to slide 1 (or whatever slide you want
to flip. Go to Insert/Duplicate Slide
8
How to flip the offensive play
- Now you are ready to make the play go left in a
matter of clicks instead of drawing it all over
again. - Click on the slide you want to flip now and
click somewhere on the white screen of the slide.
Go to Edit/Select All or Control A for you
shortcut guys - If everything on your screen is selected, then
you can go to the next slide. If nothing got
selected, try it again, click somewhere in the
middle of the slide you want to copy and flip and
select Edit/Select All
9
How to flip the offensive play (2)
- Hold down the shift key and right click
somewhere on the screen. If things got
deselected, then go back one step and select them
again. From the right click, select
Grouping/Group - Now all your little selection marks go away and
they are now around the outside of the screen. - From here, click Draw/Rotate or Flip/Flip
Horizontal - You now have a flipped play, dont forget to
change the name of the play
10
Shortcuts
- You can also put a Rotate or Flip box on your
desktop by clicking Draw/Rotate or flip going
to the top of that box until this appears
then dragging the box on the screen up next to
the Lines box you did earlier. These 2 boxes
will be used a ton so why not use shortcuts?
11
More Hints
- If youd like to change the lower right hand
corner, click view/master/slide master - In the lower right corner, youll see what I
typed in there, change it to whatever you like an
then look at the top middle of your slide. There
should be a box that says Slide Master View at
its top. Lower right of that box says Close
Master View and now whatever you typed will
appear on EVERY SLIDE.
12
More Hints
- Coaches, from here, click back on the slide you
want to duplicate and go through the process
again. - Now you dont want it to be between your left and
right for the 1st play, so click down the left
side of the screen on the new play you duplicated
and drag it below the left version of the play.
If you do it right, you will see a very light
grey line below the 2nd slide indicating that is
where you want to drop it, then let go and you
have just copied it and moved it to where you
want it. From there, do the whole process again
to make a new play and keep going. - Any questions, email me at jmurdock_at_citlink.net

