Casio Exilim Digital Camera - PowerPoint PPT Presentation
1 / 15
Title:
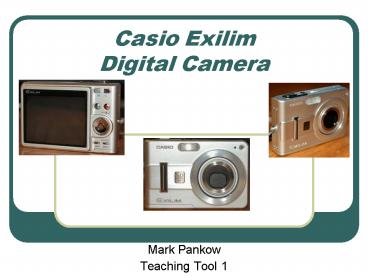
Casio Exilim Digital Camera
Description:
Casio Exilim. Digital Camera. Mark Pankow. Teaching Tool 1. Parts and Accessories ... Casio Camera. Rechargeable Battery. USB/Charging Cradle. USB Cable. AC Adapter ... – PowerPoint PPT presentation
Number of Views:96
Avg rating:3.0/5.0
Title: Casio Exilim Digital Camera
1
Casio Exilim Digital Camera
- Mark Pankow
- Teaching Tool 1
2
Parts and Accessories
- Before you take any pictures, make an inventory
of the 5 main components you will need - Casio Camera
- Rechargeable Battery
- USB/Charging Cradle
- USB Cable
- AC Adapter
- Optional SD Memory Card (Camera has built in
memory that will store up to 30 pictures)
3
Insert the Batteries
- Open the battery compartment door
- Slide battery into compartment. Name label should
face up with arrow indicator facing towards
compartment. - Close door.
4
Turning on Camera
- Turn on camera by depressing the ON/OFF button
located left of the shutter button. - The lens will protrude out and the monitor
screen will display an image when powered up.
5
Zoom Features
- Zoom buttons are located in the top right corner
of camera. - In REC mode it will select the zoom factor.
- In PLAY mode, it will switch from the actual
picture size to an enlarged screen.
6
Shutter Button
- Take the picture by holding down the shutter
button.
7
Auto Focus
- After you have selected your subject and zoomed
into the proper factor, it may appear a bit
fuzzy. - Hold down the shutter halfway and the auto focus
will activate. - When ready, a green square will appear on the
display screen and a beep will sound. Continue to
push down and the picture will be taken.
8
Upload Photos to PC
- Connect the USB and power cord to the USB Cradle.
- Plug power cord into outlet and USB cord into
available USB port on pc. - With the display panel facing you, slide camera
onto the USB jack.
9
Upload to PC Contd.
- Press the USB button on the USB stand.
- The PC will make a sound and start to communicate
with the camera. - You should receive a window that looks like the
following
10
Upload to PC Contd.
- Choose the first option. This is usually the best
choice. - Follow the upload wizard to complete the process
of uploading your photos.
11
Charge the Batteries!!!
- To charge the battery, connect the camera to the
USB stand. The battery will start to charge
automatically. This is indicated by the red
light.
12
Unsure? Use BestShot Feature!
- If you are unsure on what to do to get your
camera set for the best possible picture, use the
BestShot feature. - Has 23 different scenarios built into camera
memory for the correct camera settings for the
best possible outcomes.
13
Set Up BestShot
- Press the Menu button on the back of the camera.
It is located in the lower right corner. - Press the down arrow to REC Mode.
14
Set Up BestShot Contd
- Press the right arrow to reveal your different
recording settings. - Arrow down to the BestShot option and then push
the SET button.
15
Set Up BestShot Contd
- You will now see the different BestShot setups
available. - Browse through the different settings and select
the best option by pushing the SET button. - Take photo!


