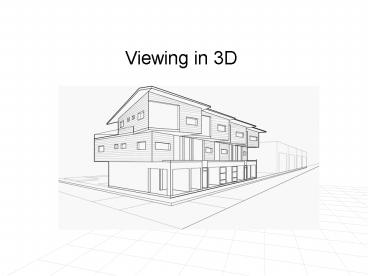
Viewing in 3D PowerPoint PPT Presentation
1 / 25
Title: Viewing in 3D
1
Viewing in 3D
2
Projections
- Display device (a screen) is 2D
- How do we map 3D objects to 2D space?
- 2D to 2D is straight forward
- 2D window to world.. and a viewport on the 2D
surface. - Clip what won't be shown in the 2D window, and
map the remainder to the viewport. - 3D to 2D is more complicated
- Solution Transform 3D objects on to a 2D plane
using projections
3
Projections
- In 3D
- View volume in the world
- Projection onto the 2D projection plane
- A viewport to the view surface
- Process
- 1 clip against the view volume,
- 2 project to 2D plane, or window,
- 3 map to viewport.
4
Projections
- Conceptual Model of the 3D viewing process
5
Projections
- Projections key terms
- Projection from 3D to 2D is defined by straight
projection rays (projectors) emanating from the
'center of projection', passing through each
point of the object, and intersecting the
'projection plane' to form a projection.
6
Types of projections
- 2 types of projections
- perspective and parallel.
- Key factor is the center of projection.
- if distance to center of projection is finite
perspective - if infinite parallel
7
Perspective v Parallel
- Perspective
- visual effect is similar to human visual
system... - has 'perspective foreshortening'
- size of object varies inversely with distance
from the center of projection. - angles only remain intact for faces parallel to
projection plane. - Parallel
- less realistic view because of no foreshortening
- however, parallel lines remain parallel.
- angles only remain intact for faces parallel to
projection plane.
8
Perspective Projections
- Any parallel lines not parallel to the projection
plane, converge at a vanishing point. - There are an infinite number of these, 1 for each
of the infinite amount of directions line can be
oriented. - If a set of lines are parallel to one of the
three principle axes, the vanishing point is
called an axis vanishing point. - There are at most 3 such points, corresponding to
the number of axes cut by the projection plane.
9
Perspective Projections
- Example
- if z projection plane cuts the z axis normal to
it, so only z has a principle vanishing point, as
x and y are parallel and have none. - Can categorise perspective projections by the
number of principle vanishing points, and the
number of axes the projection plane cuts.
10
Perspective Projections
- 2 different examples of a one-point perspective
projection of a cube. - (note x and y parallel lines do not converge)
11
Perspective Projections
- Two-point perspective projection
- This is often used in architectural, engineering
and industrial design drawings. - Three-point is used less frequently as it adds
little extra realism to that offered by two-point
perspective projection.
12
Perspective Projections
- Two-point perspective projection
13
Perspective Projections
d
z
C
(xs,ys)
ps
By similar triangles
p
(x,y,z)
Projection plane
y
14
Perspective Projections
15
Parallel Projections
- 2 principle types
- orthographic and oblique.
- Orthographic
- direction of projection normal to the
projection plane. - Oblique
- direction of projection ! normal to the
projection plane.
16
Parallel Projections
- Orthographic (or orthogonal) projections
- front elevation, top-elevation and
side-elevation. - all have projection plane perpendicular to a
principle axes. - Useful because angle and distance measurements
can be made... - However, As only one face of an object is shown,
it can be hard to create a mental image of the
object, even when several view are available.
17
Parallel Projections
- Orthogonal projections
18
Parallel Projections
- Oblique parallel projections
- Objects can be visualised better then with
orthographic projections - Can measure distances, but not angles
- Can only measure angles for faces of objects
parallel to the plane - 2 common oblique parallel projections
- Cavalier and Cabinet
19
Parallel Projections
- Cavalier
- The direction of the projection makes a 45 degree
angle with the projection plane. - Because there is no foreshortening, this causes
an exaggeration of the z axes.
20
Parallel Projections
- Cabinet
- The direction of the projection makes a 63.4
degree angle with the projection plane. This
results in foreshortening of the z axis, and
provides a more realistic view.
21
Oblique Parallel Projections
- Cavalier, cabinet and orthogonal projections can
all be specified in terms of (a, ß) or (a, ?)
since - tan(ß) 1/?
? sin(a)
P
ß
?
a
P(0, 0, 1)
? cos(a)
22
Oblique Parallel Projections
23
Oblique Parallel Projections
Consider the point P P can be represented in 3D
space - (0,0,1) P can be represented in 2D
(screen coords) - (xs,ys)
y
(0,0,1)
P
(xs,ys)
l
a
x
24
Oblique Parallel Projections
- At (0,0,1)
- xs l cos a
- ys l sin a
- Generally
- multiply by z and allow for (non-zero) x and y
- xs x z.l.cos a
- ys y z.l.sin a
25
Oblique Parallel Projections

