How to Flat Roof - Five Essential Components PowerPoint PPT Presentation
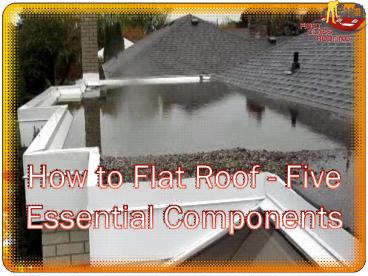
Title: How to Flat Roof - Five Essential Components
1
How to Flat Roof - Five Essential Components
2
First Class Roofing uses only the best materials
and pairs them with exceptional workmanship from
seasoned roofing veterans. With our strong focus
on customer satisfaction, you can be assured that
your roofing project will be executed quickly and
correctly making you wonder just what you were
so worried about.
3
(No Transcript)
4
If you're looking for "flat roof" information,
you've come to the right place. Here are some
pointers on the five essential components.
How to Flat Roof The Slope
How to Flat Roof The Base Sheet
How to Flat Roof The Smooth-surfaced Mid-ply
How to Flat Roof The Drip Edge
How to Flat Roof The Granular-surfaced Cap Sheet
5
Positive drainage is the first and most important
factor to consider with any low-slope roofing
system. You don't need much slope, just ¼"12 is
sufficient. That's enough to keep water from
ponding on the roof, which can cause leaks and
premature roof failure. If the slope isn't in the
structure, install a tapered system between the
roof deck and the roofing.
How to Flat Roof The Slope
6
(No Transcript)
7
How to Flat Roof The Base Sheet
The low-slope roofing system I use and recommend
is the three-ply, self-adhering type. It gives
you a professional grade roof without the hazards
of torches and hot asphalt. I recommend a
mechanically attached base sheet, so the roofing
can be removed when the time comes.
Be sure to follow the required nailing pattern,
as the fasteners will be the only thing holding
the roof down. If there is an adjacent sloped
roof, remove enough shingles so you can run the
base sheet about 16" up the slope.
8
Be sure to use a mid-ply, so your roof doesn't
suffer from the inherent weakness of single-ply
roofing systems. It gives you a protective
back-up layer in case water penetrates a seam on
the cap sheet.
How to Flat Roof The Smooth-surfaced Mid-ply
9
Start with a half-wide course, so the seams will
end up staggered when you put the cap sheet on.
That will prevent a big "hump" at the side laps,
obstructing the smooth flow of water off the
roof. If there is an adjacent sloped roof, run
the mid-ply about 14" up the slope so it doesn't
terminate at the exact same place as the base
sheet.
10
After you have the mid-ply rolled down nice and
tight, it's time to install the drip edge. Lap
the metal at least 3" and seal under the lap with
asphalt roofing cement. After the metal is tacked
on, go down to the ground to take a look. The
drip edge is about all you see of the flat roof
from the ground, so you want it looking good.
How to Flat Roof The Drip Edge
11
Then nail the metal off with regular roofing
nails spaced no more than 6" apart. After the
drip edge is nailed down, coat it with asphalt
primer using a paint brush or small roller. Be
careful it doesn't drip down the face of the drip
edge.
12
How to Flat Roof The Granular-surfaced Cap Sheet
13
When installing the cap sheet, start with a full
width course and let it overhang the drip edge by
about ¼". After it's on, you can trim it off nice
and flush with a straight blade in your utility
knife. Be sure to use MB (modified bitumen)
cement on the end laps, as regular flashing
cement is not compatible. Terminate the cap sheet
12" up any adjacent sloped roof. By staggering
the three plies in this manner it avoids a hump
under your shingles that could hold water and
leak.
14
- First Class Roofing1386 E. Hanley
Rd. Mansfield, OH 44903Phone (888)
699-9321 Email Info_at_Weseal.It - Office Hours
- 9am 5pmMonday Saturday
http//first-class-roofing.com/flat-roof-replaceme
nt-cincinnati-ohio/
15
(No Transcript)

