
DIY Mouse Pad with Scrapbook Paper PowerPoint PPT Presentation
Title: DIY Mouse Pad with Scrapbook Paper
1
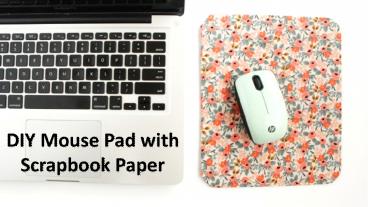
DIY Mouse Pad with Scrapbook Paper
2
Make Your Own Mouse Pad
There are different parts to this DIY mouse pad-
the top and base. In this one, the base is a cork
circle round that you get from any dollar store.
You can buy pre cut cork circles that makes it
easy to make your mouse pad easily. You want
something that is large enough to be used as a
mouse pad. You can get the base by cutting a
circle out of cardboard. It may not be as sturdy
as cork circle depending on the cardboard type
you use.
3
Step 1 Trace Cork Circle
You can find cork circles at dollar stores. You
get these in pack of two or three. No wonder it
can be a total bargain for you. You can buy as
many as you want and keep for later use. Trace
out the circle on the back of the scrapbook paper
and then cut it out. It makes wonderful scrapbook
paper crafts. You can use fabric too for this
project. Cut the fabric down on a piece of wax
paper or silicone and paint a layer of mod podge
over it. Dry it and cut it in 30 minutes.
4
Step 2 Add Scrapbook Paper
You can add stylish and fancy scrapbook paper.
You can cover the top part of the cork and back
of the scrapbook paper with mod podge. Gently
place the paper on the cork. Next, smooth down
the top with your fingers to keep all bubbles
from popping up. Also, press down the sides.
Allow it to dry for 20 minutes. Do the same thing
for the other side of the mouse pad and let it
dry for 20 minutes.
5
Step 3 Add Your Ribbon
You can add that extra detail to your mousepad.
For instance, you can add some ribbon around the
edge. It looks amazing. If you dont have the
perfect color you want, you can paint. Paint the
ribbon on both sides with your choice of color.
Add the ribbon to the edge of the mouse pad and
cover it in Mod Podge and start wrapping it
around the side of the mouse pad. Mod podge keeps
it in place.
6
Step 4 Finishing Touches
Finally, let everything dry for about half an
hour to be safe. You can use it right away, but
it feels really tacky after drying. You can seal
it with a brush on or acrylic spray sealer. You
will love the fact that you have decoupage both
sides of your DIY mouse pads and you can switch
sides easily when you want to. No wonder the art
craft supplies from dollar stores work wonders.
7
Thank You
To know more visit https//dollar-king.net/arts-a
nd-crafts/scrapbook-paper.html
Recommended
