
Toro Groundsmaster 62 220 217D Mower Service Repair Manual Instant Download
Title: Toro Groundsmaster 62 220 217D Mower Service Repair Manual Instant Download
1
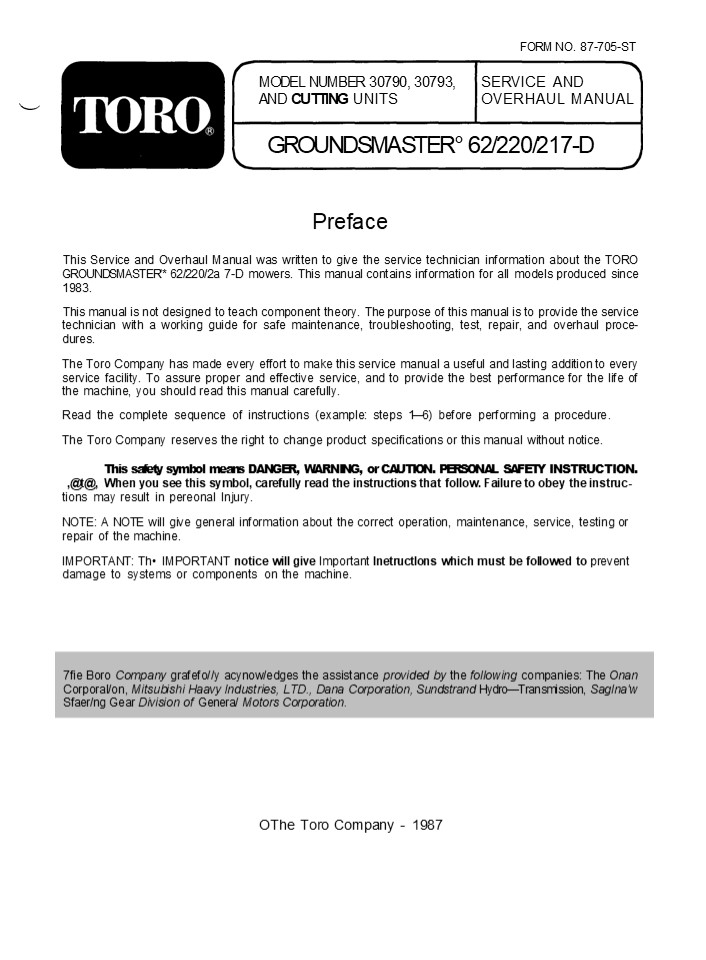
FORM NO. 87-705-ST
MODEL NUMBER 30790, 30793, AND CUTTING UNITS
SERVICE AND OVERHAUL MANUAL
GROUNDSMASTER 62/220/217-D
Preface This Service and Overhaul Manual was
written to give the service technician
information about the TORO GROUNDSMASTER'
62/220/2a 7-D mowers. This manual contains
information for all models produced since
1983. This manual is not designed to teach
component theory. The purpose of this manual is
to provide the service technician with a working
guide for safe maintenance, troubleshooting,
test, repair, and overhaul proce- dures. The Toro
Company has made every effort to make this
service manual a useful and lasting addition to
every service facility. To assure proper and
effective service, and to provide the best
performance for the life of the machine, you
should read this manual carefully. Read the
complete sequence of instructions (example steps
16) before performing a procedure. The Toro
Company reserves the right to change product
specifications or this manual without
notice. This safety symbol means DANGER, WARNING,
or CAUTION. PERSONAL SAFETY INSTRUCTION. ,_at_t_at_,
When you see this symbol, carefully read the
instructions that follow. Failure to obey the
instruc- tions may result in pereonal
Injury. NOTE A NOTE will give general
information about the correct operation,
maintenance, service, testing or repair of the
machine. IMPORTANT Th IMPORTANT notice will
give Important Inetructlons which must be
followed to prevent damage to systems or
components on the machine.
7fie Boro Company grafefo//y acynow/edges the
assistance provided by the following companies
The Onan Corporal/on, Mitsubishi Haavy
Industries, LTD., Dana Corporation, Sundstrand
HydroTransmission, Saglna'w Sfaer/ng Gear
Division of Genera/ Motors Corporation.
OThe Toro Company - 1987
2
Table of Contents
Chapter 1 - SAFETY INSTRUCTIONS Chapter 2 -
PRODUCT RECORDS AND MANUALS Product Record Form
..................... 2-1 Equivalents and
Conversions ............... 2-2 Torque
Specifications ..................... 2-3 Service
Interval Charts .................... 2-4
Chapter 7 - DIFFERENTIAL Introduction
............................. 7-1 Torque
Specifications ....................
7-2 Maintenance ............................
7-3 Repairs ................................
7-3 Chapter 8 - WHEELS AND TIRES Specifications
........................... 8-2 Traction Unit
Maintenance ................. 8-3 Traction Unit
Repairs ..................... 8-3 Cutting Unit
Maintenance .................. 8-5 Cutting Unit
Repairs ...................... 8-6 Chapter 9 -
STEERING SYSTEM Introduction .....................
........ 9-2 Specifications ......................
..... 9-3 Maintenance ............................
9-4 Troubleshooting .........................
9-5 Adjustments ............................
9-6 Repairs ................................ 9-7
Chapter 3 - ONAN ENGINE Introduction
............................. 3-1 Maintenance
............................ 3-2 Adjustments
............................ 3-9 Repairs
............................... 3-10 Chapter 4 -
MITSUBISHI ENGINE Introduction ...................
.......... 4-2 Specifications ....................
....... 4-3 Special Tools ........................
... 4-9 Maintenance ...........................
4-10 Troubleshooting ........................
4-23 Testing ................................
4-26 Preparation For Engine Overhaul ..........
4-31
Chapter 10 - BRAKE SYSTEM Introduction
............................ 10-2 Maintenance
........................... 10-3 Repairs
............................... 10-4 Chapter 11 -
ENGINE TO TRANSMISSION COUPLER
External Engine Component Repair ........ 4-32 ,
Fuel System Repairs .................... 4-37
Removing and Replacing the Engine ....... 4-46
Cylinder Head Overhaul ..................
4-48 Cylinder Block Overhaul ..................
4-52
Chapter 5 - HYDRAULIC SYSTEM Introduction
............................. 5-2 Specifications
........................... 5-3 Special Tools
........................... 5-4 Maintenance
............................ 5-4 Troubleshooting
........................ 5-12 Testing
................................ 5-16 Adjustments
........................... 5-22 Repairs
............................... 5-24
Introduction ............................
11-1 Special Tools ..........................
11-2 Maintenance ...........................
11-2 Troubleshooting ........................
11-2 Adjustments ...........................
11-3 Repairs ............................... 11-5
Chapter 12 - P.T.O. SYSTEM Introduction
............................ 12-1 Maintenance
........................... 12-4 Troubleshooting
........................ 12-5 Adjustments
........................... 12-5 Repairs
............................... 12-7
Chapter 6 - ELECTRICAL SYSTEM Introduction
............................. 6-1 Wiring
Schematics ....................... 6-4 Special
Tools ...........................
6-6 Maintenance ............................
6-6 Troubleshooting .........................
6-8 Testing ................................
6-21 Repairs ............................... 6-26
3
Table of Contents Chapter 14 - CLEANING AND
SEASONAL
Chapter 13 - CUTTING UNITS
STORAGE Cleaning ..............................
14-1 Seasonal Storage ....................... 14-1
Introduction ............................
13-1 Specifications ..........................
13-3 Maintenance ...........................
13-4 Troubleshooting ........................
13-6 Adjustments ...........................
13-7 Repairs ............................. 13-14
4
https//www.ebooklibonline.com Hello dear
friend! Thank you very much for reading. Enter
the link into your browser. The full manual is
available for immediate download. https//www.ebo
oklibonline.com
5
SAFETY INSTRUCTIONS
Chapter 1
- Remove all debris or other objects that might be
picked up and thrown by the cutting unit blades
or other attached implements. Keep all bystanders
away from the area of operation. - Keep all shields and safety devices in place. If
a shield, safety device or decal is missing,
defective or damaged, repair or replace it before
operating. Make sure the machine is in safe
operating condition. Tighten any loose nuts,
bolts, and screws. - Always wear long pants and sturdy shoes. Do not
operate the machine while wearing sandals, tennis
shoes, sneakers, or short pants. Do not wear
loose clothing. Loose clothing can get caught in
moving parts. Wearing safety glasses, safety
shoes, and a helmet is recommended and also
required by some local ordinances and insurance
regulations. - Make sure that all the interlock switches
operate correctly so the engine cannot be started
unless the traction pedal is reieased (NEUTRAL
position) and the P.T. 0 lever is in the
DISENGAGED position. Replace any failed switch
before operating tha machine. - Fill the fuel tank before starting the engine.
Avoid spilling any fuel. Gasoline and diesel fuel
is flammable. Handle fuel carefully. DO NOT
SMOKE. - Use an approved fuel container.
- Do not fill the fuel tank when the engine is hot
or running. - Do not smoke while handling fuels or
lubricants. - Fill the tank to one inch (25 mm) from the
BOTTOM of the filler neck. Do not overfill. - Wipe up any spilled fuel. Install the fuel
container cap and the machine fuel tank cap
securely before starting the engine. - While Operating
- Do not run the engine in a confined area without
adequate ventilation. EXHAUST FUMES CAN KILL.
Read and understand the following safety
instructions before operating, maintaining,
testing, servicing, or repairing the
GROUNDSMASTER mowers.
- The GROUNDSMASTER 62/220/217-D Mowers
- have been tested and verified for compliance with
the B71.4 specifications of the American National
Standards Institute (ANSI) at the time of
manufacture for that model. However, improper use
or maintenance by the owner or operator of the
machine can result in personal injury. Failure to
operate the machine in accordance with the
following Safety Instructions MAY RESULT IN
PERSONAL INJURY. - Before Operating
- Read and understand the Operator's Manual before
starting, operating, or repairing the
machine. Become familiar with all controls and
know how to stop the machine quickly. Additional
Operator's Manuals are available through - The Toro Company Publications Department 8111
Lyndale Avenue South Minneapolis, MN 55420 - Use the model number and serial number when
referring to your machine. If you have questions
about this Service and Repair Manual please
contact - The Toro Company Service Department
- 8111 Lyndale Avenue South
- Minneapolis, MN 55420
- Never allow children or adults unfamiliar
operation of these machines operate them. Keep
everyone, especially children and pets, away from
the area of operation.
with
Page 1 - 1
6
Safety Instmctions engine OFF. Use an object with
a long handle to remove the obstruction.. 15.
Never raise the cutting unit or other attached
implement while the blades or other parts are
9. Before staring the engine
A. Engage the parking brake.
rotating.
B. Make sure the traction pedal is in the NEUTRAL
position and the P.T.O. lever is in the
DISENGAGED position.
- If the cutting blades or other implement
components strike a solid object, or if the
machine vibrates abnormally, disengage the P.T.O.
lever, move the throttle to SLOW, set the parking
brake, and turn the engine OFF. Remove the key
from the ignition switch (all models) and
disconnect the high tension wires from the spark
plugs (gasoline engine models) to prevent the
possibility of accidental starting. Check the
cutting unit or other implement and traction unit
for damage and defective parts. Repair any damage
before restarting the engine and operating the
cutting unit or other implement. Be sure the
cutting unit blades are in good condition and the
blade bolts are tightened to the correct torque. - Do not touch the engine, muffler, or muffler
shroud while the engine is running or soon after
it has stopped. These areas could be hot enough
to cause a burn. - Lower the cutting unit or other attached
implement to the ground and remove the key from
the ignition switch when the machine is
left unattended. - Before getting off the seat
C. After the engine is started, release the
parking brake and keep your foot off the
traction pedal. The machine must not move. If
the machine moves, the neutral return
mechanism must be adjusted. Turn the engine
OFF and adjust the neutral return mechanism so
the machine does not move when the engine is
running and the traction pedal is released. (See
CHAPTER 6 - HYDRAULIC SYSTEM.)
- Sit on the seat when starting the engine and
operating the machine. - The maximum recommended seating capacity is one
person. Never carry passengers.
- Be alert when operating. To prevent loss of
control - Operate only in daylight or when there is good
artificial light.
- Watch for holes or other hidden hazards.
- Do not drive close to sand traps, ditches,
creeks, or other hazardous areas. - Reduce speed when making sharp turns and when
turning on hill sides.
A. Move the traction pedal to the NEUTRAL
POSITION and remove your foot from the pedal.
B. Move the throttle to the SLOW position.
C. Engage the parking brake and move the P.T.O.
lever to the DISENGAGED position.
- Avoid sudden stops and starts.
- Before backing up, look to the rear to make sure
no people or obstacles are behind the machine. - Watch out for traffic when near or going across
roads. Always yield the right of way.
D. Turn the engine OFF and remove the key from
the ignition switch. Wait for all movement to
stop before getting off the seat. While
Performing Maintenance 20. Remove the key from
the ignition switch and disconnect the positive
() cable from the battery. Secure the cable off
to the side. This will prevent accidental
starting of the engine when servicing, cleaning,
adjusting, or storing the machine.
13. Go across slopes carefully. Do not start or
stop suddenly when traveling uphill or downhill.
14. The grass deflector must always be installed
on the cutting unit. If the cutting unit
discharge area ever plugs, disengage the P.T.O.
and turn the
Page 1 - 2
7
Safety Instmctions
- If major repairs are ever needed, or assistance
is desired, contact an Authorized TORO
Distributor or Dealer. - To reduce potential fire hazards, keep the engine
free of excessive grease, grass, leaves, and
accumulation of dirt.
(with no load and engine coupled to the
transmission) is listed in CHAPTER 3 - ONAN
ENGINE SYSTEMS, and CHAPTER 4 - MITSUBISHI ENGINE
SYSTEMS
26. The engine must be stopped before checking
the oil level or adding oil to the crankcase.
23. Be sure the machine is in good operating
condition. Keep nuts, bolts, and screws tight.
Check all cutting blade mounting bolts frequently
for the proper torque 75 to 100 ft.lbs (10.4 to
13.8 KgM) .
27. At the time of manufacture, the
GROUNDSMASTERe 62/220/217-D mowers
conformed to safety standards in effect for riding
mowers. To assure optimum performance and safety
of the machine, always use genuine TORO
replacement parts and accessories. NEVER USE
- If the engine must be running to perform
maintenance or an adjustment, use extreme
caution. Keep hands, feet, clothing, and other
body parts away from the P.T.O. shaft, cutting
unit blades, and other moving pans. - Do not overspeed the engine by changing the
governor settings. The maximum engine speed
"WILL FIT" REPLACEMENT PARTS AND
ACCESSORIES MADE BY OTHER MANUFACTURERS.
Using unapproved replacement parts and
accessories could void the warranty of your TORO
MOWER.
8
Equivalents and Conversions Declmal and
Millimeter Equivalents Decimals mm Fractions
Fractions
1/64
0.015625 - 0.397 0.03125 - 0.794 0.046875 -
1.191 0.0625 - 1.588 0.078125 - 1.984 0.9375 -
2.381 0.109275 - 2.778 0.1250 -
3.175 5/8 0.140625 - 3.572 0.15625 -
3.969 0.171875 - 4.366 0.1875 - 4.762 0.203125 -
5.159 0.21875 - 5.556 0.234375 - 5.953 0.2500 -
6.350 3/4 0.265625 - 6.747 0.28125 -
7.144 0.296875 - 7.541 0.3125 - 7.541 0.328125 -
8.334 0.34375 - 8.731 0.359375 - 9.128 0.3750 -
9.525 7/8 0.390625 - 9.922 0.40625 -
10.319 0.421875 - 10.716 0.4375 - 1 .
112 0.453125 - 11.509 0.46875 - 11.906
33/64
0.515625 0.53125 0.546875 0.5625 0.578125 0.59375
0.609375 0.6250 0.640625 0.65625 0.671875 0.6875 0
.703125 0.71875 0.734375 0.7500 0.
T65625 0.78125 0.796875 0.8125 0.828125 0.84375 0.
859375 0.8750 0.890625 0.90625 0.921875 0.9375 0.9
53125 0.96875 0.984375 1.000
- 13.097 - 13.494 - 13.891 - 14.288 - 14.684 -
15.081 - 15.478 - 15.875 - 16.272 - 16.669 -
17.066 - 17.462 - 17.859 - 18.256 - 18.653 -
19.050 - \9.447 - 19.844 - 20.241 - 20.638 -
21.034 - 21.431 - 21.828 - 22.225 - 22.622 -
23.019 - 23.416 - 23.812 - 24.209 - 24.606 -
25.003 - 25.400
1/32
17/32
3/64
35/64
1/16
9/16
5/64
37/64
3/32
19/32
7/64
39/64
1/8
9/64
41/64
5/32
21/32
11/64
43/64
3/16
11/16
13/64
45/64
7/32
23/32
15/64
47/64
17/64
49/64
9/32
25/32
19/64
51/64
5/16
13/16
21/64
53/64 27/32-
11/32
23/64
55/64
3/8
25/64
57/64
13/32
29/32
27/64
59/64
7/16
JS/J6
29/64 15/32
61/64
31/32
31/64 0.484375 - 12.303
63/64
1/2
0.5000 - 12.700 1
1 mm - 0.03937 In.
0.001 In. - 0.0254 mm
U.S to Metric Conversions
To Convert Into Multiply By
Llnear Mlles Kilometers 1.609
Measurement Yards Meters 0.9144
Feet Meters 0.3048
Feet inches Inches lnchea
Centlmetera Meters Centimeters Mllllmeters
30.48 0.0254 2.54 25.4
Area
Square Mllee Square Feet Square Inches Acre
Square Kilometers Square Metere Square
Centimeters Hectare
2.59 0.0929 6.452 0.4047
Cublc Yards Cublc Feet Cublc lnchee
Cublc Meters Cubic Metere Cubic Centlmetere
0.7646 0.02832 16.39
Metric Tons Kilograms Grams
0.9078 0.4536 28.3495
Tone (Short) Pounds Ounces (Avdp. )
Pressure
Pounds/Sq. In.
Kllopascal
6.895
Newton-Meters Kilogram-Meters Kllogram-Centlmetere
1.356 0.1383 1.152144
Work
Foot-pounds Foot-pounds Inch-pounds
Liters Lltere
0.9463 3.785
Llquld Volume
Quarte Gallons
'"GallonsfMlnute
Llters/Minute '
" 3.785
Liquid Flow
- Subract 32
- Multiply by 5/9
Fahrenheit
Celsius
Temperature
Page 2 - 2
9
Torque Specifications Use these torque values
when specific torque values are not given. DO NOT
use these values in place of specified
values. The torque values listed below are for
lubricated threads. Plated threads are considered
to be lubricated.
Capscrew Markings and Torque Values - U.S. Customary Capscrew Markings and Torque Values - U.S. Customary Capscrew Markings and Torque Values - U.S. Customary Capscrew Markings and Torque Values - U.S. Customary Capscrew Markings and Torque Values - U.S. Customary Capscrew Markings and Torque Values - U.S. Customary Capscrew Markings and Torque Values - U.S. Customary Capscrew Markings and Torque Values - U.S. Customary Capscrew Markings and Torque Values - U.S. Customary
SAE Grade Number S S S S
Capscrew Head Marklnga
Capscrew Body Size ft-lb Capscrew Torque - Grade S Cast Iron Aluminum Nm ft-fb Nm Capscrew Torque - Grade S Cast Iron Aluminum Nm ft-fb Nm Capscrew Torque - Grade S Cast Iron Aluminum Nm ft-fb Nm ft-lb Capscrew Torque - Grade 8 Cast Iron Aluminum Nm ft-lb Nm Capscrew Torque - Grade 8 Cast Iron Aluminum Nm ft-lb Nm Capscrew Torque - Grade 8 Cast Iron Aluminum Nm ft-lb Nm
1/4-20 7 9 6 8 11 15 9 12
-28 9 12 7 9 13 18 10 14
5/16-18 15 20 12 16 22 30 18 24
24 17 23 14 19 24 33 19 25
3/8-16 30 40 20 25 40 55 30 40
-24 30 40 25 35 45 60 35 45
7/16-14 45 60 35 45 65 90 50 65
-20 50 65 40 55 70 95 55 75
1/2-13 70 95 55 75 95 130 75 100
-20 75 100 60 80 110 150 90 120
9/16-12 100 135 80 110 140 190 J10 150
-18 110 150 85 115 155 210 125 170
5/8-11 135 180 110 150 190 255 150 205
-18 155 210 12P 160 215 290 170 230
3/4-10 240 325 190 255 340 460 270 365
-16 270 365 210 285 380 515 300 410
7/8-9 360 490 280 380 550 745 440 600
-14 390 530 310 420 610 825 490 660
1-8 530 720 420 570 820 1100 660 890
-14 590 800 480 650 890 1200 710 960
Capscrew Markings and Torque Values - Metric Capscrew Markings and Torque Values - Metric Capscrew Markings and Torque Values - Metric Capscrew Markings and Torque Values - Metric Capscrew Markings and Torque Values - Metric Capscrew Markings and Torque Values - Metric Capscrew Markings and Torque Values - Metric Capscrew Markings and Torque Values - Metric Capscrew Markings and Torque Values - Metric Capscrew Markings and Torque Values - Metric Capscrew Markings and Torque Values - Metric Capscrew Markings and Torque Values - Metric Capscrew Markings and Torque Values - Metric Capscrew Markings and Torque Values - Metric
Commercial Commercial Steel Class 8.8 Class 8.8 Class 8.8 10.9 10.9 10.9 10.9 12.9 12.9 12.9 12.9
Capscrew Head Markings Capscrew Head Markings Capscrew Head Markings Capscrew Head Markings Capscrew Head Markings Capscrew Head Markings 10.9 10.9 10.9 10.9 12.9 12.9 12.9 12.9
Thread Diameter mm Capscrew Torque - Clasa 8.8 Cast Iron Aluminum ft-lb Nm ft-lb Nm Capscrew Torque - Clasa 8.8 Cast Iron Aluminum ft-lb Nm ft-lb Nm Capscrew Torque - Clasa 8.8 Cast Iron Aluminum ft-lb Nm ft-lb Nm Capscrew Torque - Clasa 8.8 Cast Iron Aluminum ft-lb Nm ft-lb Nm Capscrew Torque - Clasa 8.8 Cast Iron Aluminum ft-lb Nm ft-lb Nm Capscrew Torque - Class 10.9 Cast Iron Aluminum ft-lb Nm ft-lb Nm Capscrew Torque - Class 10.9 Cast Iron Aluminum ft-lb Nm ft-lb Nm Capscrew Torque - Class 10.9 Cast Iron Aluminum ft-lb Nm ft-lb Nm Capscrew Torque - Class 10.9 Cast Iron Aluminum ft-lb Nm ft-lb Nm Capscrew Torque - Class 12.9 Cast Iron Aluminum ft-lb Nm ft-lb Nm Capscrew Torque - Class 12.9 Cast Iron Aluminum ft-lb Nm ft-lb Nm Capscrew Torque - Class 12.9 Cast Iron Aluminum ft-lb Nm ft-lb Nm Capscrew Torque - Class 12.9 Cast Iron Aluminum ft-lb Nm ft-lb Nm
6 5 5 9 4 7 9 14 7 11 9 14 7 11
7 9 9 14 7 11 14 18 11 14 18 23 14 18
8 18 18 25 14 18 23 32 18 25 27 36 21 28
10 30 30 40 25 30 45 60 35 45 50 70 40 55
12 55 55 70 40 55 75 105 60 80 95 125 75 100
14 85 85 115 65 90 120 160 95 125 145 195 110 150
16 130 130 180 100 140 175 240 135 190 210 290 165 220
18 170 170 230 135 180 240 320 185 250 290 400 230 310
Page 2 - 3
10
Service Interval Chart Groundsmaster 62 / 220
Date
Hour Meter Reading
SERVICE INTERVAL V 10 25 50 100 150 200 250 300 350 400 450
Blower Screen, Clean Dally
OII Level, Check, Engine Dally
Oil Level, Check, Hydraulic Daily
Safety Interlock, Check Dally
Transmlselon Filter, Replace, Initial S
Brake Pedal Travel, Check, lnltlal 10
Tighten any Loose Fastenere, Initial 10
Front Wheel Lug Nute, Tighten, lnltlal 10
Engine OII, Replace, Initial 25
Lubrlcatlon, Grease/Oil 25
Tire Pressure, Check 12 psi (83 kPa) 25
Hydraulic Hoses, Lines, Fittings Pump, Check for Leaks or Damage 25
Engine Oh Filter, Replace, Routine (More when cond. are hot or dirty) 50
Battery, Check 50
PTO Belt Tenslon, Check 50
Air Cleaner (Dust Cup and Baffle) (More when conditions are dirty) 50
Engine Coollng Fine, Clean 50
Front Wheel Lug Nuts, Tighten, InItlaI 100
Brakes, Check 100
Spark Plug, Check 100
Transmlesion Oh and Filter, Replace 250
Fuel Syetem, Check 250
Fuel Filter, Replace 250
Points, Replace 250
Condenser, Replace 250
Timing, Check 250
Valves, Adjust 250
Englne rpm, Check 250
Air Cleaner (Filter) Service 250
Combustion Chamber, Clean (Leaded Fuel) 250
Breather Valve, Clean 250
Steering, Check 250
Rear Wheel Toe-In, Check 250
Front Wheel Lug Nuts, Tighten, Routlne 250
Rear Wheel Bearings , Repack and Adjuet 500
Transmlsslon By-Pass Plns, Grease 500
Combustlon Chamber, Clean (Unleaded Fuel) 500
Interlock Switches, Replace All (2 years) 1000
Page 2 - 4
11
Service Interval Chart Groundsmaster 62 / 220
Date
Hour Meter Reading
SERVICE INTERVAL V 500 550 800 650 700 750 800 850 900 950 1000
Blower Screen, Clean Dally
Oil Level, Check, Englne Dally
OII Level, Check, Hydraulic Dally
Safety Interlock, Check Dally
Transmlsslon Filter, Replace, Initial S
Brake Pedal Travel, Check, Inltlal 10
Tighten any Loose Fasteners, Initial 10
Front Wheel Lug Nuts, Tighten, initial 10
Englne OII, Replace, Initial 25
Lubrication, Grease/Oh 25
Tire Pressure, Check 12 psl (83 kPa) 25
Hydraulic Hoees, Llnee, Flttlngs Pump, Check for Leake or Damage 25
Englne OII Filter, Replace , Routlne (More when cond. are hot or dirty) 50
Battery, Check 50
PTO Belt Tenslon, Check 50
Air Cleaner (Dust Cup and Baffle) (More when condltlone are dlrty) 50
Engine Cooling Fine, Clean 50
Front Wheel Lug Nuts, Tighten, Initial 100
Brakes, Check 100
Spark Plug, Check 100
Transmission OII and Filter, Replace 250
Fuel System, Check 250
Fuel Filter, Replace 250
Points, Replace 250
Condenser, Replace 250
Timing, Check 250
Valves, Adjust 250
Engine rpm, Check 250
Air Cleaner (Filter) Service 250
Combustion Chamber, Clean (Leaded Fuel) 250
Breather Valve, Clean 250
Steering, Check 250
Rear Wheel Toe-In, Check 250
Front Wheel Lug Nute, Tighten, Routine 250
Rear Wheel Bearings , Repack and AdJuet 500
Transmlsslon By-Pass Plns, Grease 500
Combustlon Chamber, Clean (Unleaded Fuel) 500
Interlock Swltches, Replace All (2 years) 1000
Page 2 - 5
12
Service Interval Chart Groundsmaster 217-D
Date
Hour Meter Reading
SERVICE INTERVAL V 10 25 50 100 150 200 250 300 350 400 450
Oh Level, Englne , Check Dally
Oil Level, Transmission, Check Dally
Safety Interlock, Check Dally
Water Separator, Check Daily
Radiator and Coolant, Check (More when condltions are dlrty) Dally
Transmission Filter, Replace, Initial S
Brake Pedal Travel, Check, Initial 10
Tighten any Loose Fasteners, lnitlal 10
Front Wheel Lug Nute, Tighten, Initial 10
Lubrication, Grease/Oil 25
Tire Pressure, Check 12 psl (83 kPa) 25
Hydraulic Hosee, Lines, Fittings Pump, Check for Leaks or Damage 25
Englne OII Filter, Replace , Inltlal 50
Englne OII, Replace (More often in dlrty condltlons) 50
Battery, Check 50
PTO Belt Tenslon, Check 50
Air Cleaner (Dust Cup and Baffle) (More when conditions are dlrty) 50
Valve Clearance , Check, Intltal 50
Englne OII Filter, Replace, Routine 100
Englne Fan and Alternator Belts, Check 100
Front Wheel Lug Nuts, Tlghten, lnltlal 100
Brakes, Check 100
Transmission OII and Fllter, Replace 250
Englne rpm, Check 250
Alr Cleaner (Filter) Service 250
Steerlng, Check 250
Rear Wheel Toe-in, Check 250
Front Wheel Lug Nuts, Tlghten, Routlne 250
Fuel Filter, Replace 400
Fuel Pump Filter, Replace 400
Fuel Lines and Connections, Check 400
Fuel Tank, Drain and Clean 400
Valve Clearance, Check, Routine 400
Rear Wheel Bearings, Repack and Adjust 500
Transmlsslon By-Pass Pins, Grease 500
Interlock Swltchee, Replace All (2 years) 1000
Cooling Syetem, Drain and Flush (2 years) 1000
Page 2 - 6
13
Service Interval Chart Groundsmaste 217-D
Date
Hour Meter Reading
SERVICE INTERVAL V 500 550 600 650 700 750 800 850 900 950 1000
Oil Level, Englne , Check Dally
Oll Level, Transmlsslon, Check Dally
Safety Interlock, Check Dally
Water Separator, Check Dally
Radiator and Coolant, Check (More when condltlons are dlrty) Dally
Transmission Fllter, Replace, Initial S
Brake Pedal Travel, Check, Initial 10
Tlghten any Loose Fasteners, Initial 10
Front Wheel Lug Nute, Tighten, Initial 10
Lubrication, Grease/Oll 25
Tire Pressure, Check 12 psi (83 kPa) 25
Hydraulic Hoees, Lines, Flttlngs Pump, Check for Leaks or Damage 25
Englne OII Filter, Replace, lnltlal 50
Engine OII, Replace (More often In dlrty condltlons) 50
Battery, Check 50
PTO Belt Tenslon, Check 50
Alr Cleaner (Dust Cup and Baffle) (More when condltlons are dirty) 50
Valve Clearance, Check, lntltal 50
Englne OII Filter, Replace , Routine 100
Englne Fan and Alternator Belts, Check 100
Front Wheel Lug Nute, Tighten, InItIaI 100
Brakee, Check 100
Transmlselon Oll and Filter, Replace 250
Englne rpm, Check 250
Air Cleaner (Filter) Service 250
Steering, Check 250
Rear Wheel Toe-In, Check 250
Front Wheel Lug Nuts, Tlghten, Routlne 250
Fuel Fllter, Replace 400
Fuel Pump Fllter, Replace 400
Fuel Llnes and Connections, Check 400
Fuel Tank, Drain and Clean 400
Valve Clearance, Check, Routine 400
Rear Wheel Bearings, Repack and Adjust 500
Transmission By-Pass Pine, Grease 500
Interlock Switches, Replace All (2 years) J000
Cooling System, Drain and Flush (2 years) 1000
Page 2 - 7
14
Service Interval Chart Cutting Units
Date
Hour Meter Reading
SERVICE INTERVAL W 10 25 50 100 150 200 250 300 350 400 450
Deck, Remove Covers and Wash Daily
Blades and Fastener Torque, Check Dally
Caster Arm Bushings, Lubricate Dally
Caster Wheel Bearings, Lubrlcate Dally
Pneumatic Caster Tires, Check Pressure 12 psi (83 kPa) 25
Grease Fittings, Lubricate 50
Cuttlng Unit, Clean 50
Blade Drive Belte, Check 50
Gear Box Oil, Check 50
Gear Box Oil, Replace 500
Date
Hour Meter Reading
SERVICE INTERVAL W 500 550 600 650 700 750 800 850 900 950 1000
Oeck, Remove Covere and Wash Dally
Blades and Fastener Torque, Check Dally
Caster Arm Bushings, Lubricate Dally
Caeter Wheel Bearings, Lubricate Dally
Pneumatic Caster Tlree, Check Pressure 12 psi (83 kPa) 25
Grease Flttlngs, Lubricate 50
Cutting Unit, Clean 50
Blade Drive Belts, Check 50
Gear Box Oll, Check 50
Gear Box Oh, Replace 500
Page 2 - 8
15
ONAN ENGINE
Chapter 3
INTRODUCTION ............................
1 MAINTENANCE ............................
2 Filling the Fuel Tank With Gasoline ........ 2
Checking Oil Level ...................... 2
General Air Cleaner Maintenance .......... 3
Servicing Air Cleaner Dust Cup and Baffle .. 3
Servicing Air Cleaner Filter ............... 4
Inspecting Air Cleaner Filter Element ....... 4
Changing Oil and Filter ..................
5 Cleaning Cylinder Head Fins .............. 5
Cleaning Combustion Chamber ...........
7 Replacing Fuel Filter .................... 7
Checking and Replacing Spark Plugs ...... 7
Servicing Breaker Points and Condenser ... 8
Servicing Crankcase Breather ......... .. 8
ADJUSTMENTS ............................
9 Adjusting Carburetor ....................
9 Adjusting Low Speed Idle ...............
10 Adjusting High Speed Idle ............... 10
REPAIRS ................................
10 Removing Fuel Tank ....... ,...........
10 Installing Fuel Tank ....................
11 Ramoving the Engine ..................
11 Installing the Engine ................... 12
Introduction
This chapter gives specifications, maintenance,
troubleshooting and repair instructions for
the engine used in the GROUNDSMASTER_at_ 62 and 220
mowers.
the engine name plate. (Sea Eneine Model
Reference in the GENERAL INFORMATION section of
the Onan Service Manual.) Always use this number
and the serial number when referring to your
engine for service or parts. The Onan Service
Manual for this engine is provided at the end of
this chapter.
The engine used in the gasoline powered mower is
manufactured by Onan. Identify your engine by
referring to the MODEL and SPEC. NO. as shown on
Figure 1
Page 3 - 1
16
Maintenance
Filling the Fuel Tank With Gasoline
1. Tip the seat forward and prop it so it cannot
fall accidentally. Use a clean rag to clean the
area around the fuel tank cap (Fig. 2) .
The Toro Company strongly recommends the use of
clean, fresh UNLEADED regular gasoline in Toro
gasoline powered products. Unleaded gasoline
burns cleaner, extends engine life, and promotes
2. Remove the cap from the fuel tank and fill
the tank to 1 inch (25 mm) below the bottom of
the filler neck with gasoline. Install the fuel
tank cap securely. The capacity of the fuel tank
is 6 gallons (22.7 liters) .
good starting by reducing the build-up of
combustion chamber deposits. Leaded gasoline
can be used if unleaded is not available.
3. Wipe up any gasoline that may have spilled to
prevent a fire hazard. Remove the support from
under the seat and allow the seat to pivot down
to its normal position.
To assure volatility, do not buy more than a 30
day supply of gasoline.
IMPORTANT Never use METHANOL, gasoline
containing methanol, gasohol containing more
than 10 ethanol, gasoline additives, premium
gasoline, or white gas. Engine or fuel system
damage could result.
DANGER
Because gasoline is flammable, caution must
be used when storing or handling it. Do not fill
the fuel tank while the engine is running, hot or
when the machine is in an enclosed area. Vapors
may build up and be ignited by a spark or flame
source many feet away. DO NOT SMOKE while filling
the fuel tank to prevent the possibility of an
explosion. Always fill the fuel tank outside and
wipe up any spilled gasoline before starting the
engine. Use a funnel or spout to prevent spilling
gasoline before starting the engine. Fill the
tank to approximately 1 inch (25 mm) below the
bottom of the filler neck. Store gasoline in
a clean safety-approved container and keep
the cap in place on the container. Keep
gasoline in a cool, well-ventilated placei never
in an enclosed area such as a hot storage shed.
Gasoline is a fuel for internal combustion
engines. Do not use it for any other purpose.
Since many children like the smell of
gasoline, keep it out of their reach. Gasoline
fumea are explosive and dangerous to inhale.
Figure 2 1. Fuel tank cap
Checking Oil Level
Check the engine crankcase oil level before every
day of operation. Check more often if necessary.
NOTE If checking the oil level after the engine
has been running, allow a minimum of 10 minutes
after stopping the engine for the oil to flow
down to the sump before checking.
1. Put the machine on a level surface. Stop the
engine (see NOTE above) .
2. Disengage the hood latches and open the
hood.
3. Clean the area around the dipstick and filler
neck. Unscrew the dipstick and wipe it with a
clean rag. Screw the dipstick into the filler
neck and make sure it is seated fully. Unscrew
the dipstick out of the filler neck and check the
level of the oil (Fig. 3) . If the oil level is
low, add enough oil to raise the level to the
FULL (upper) mark on the dipstick.
Page 3 - 2
17
- Maintenance
- Make sure the hose between the air cleaner and
carburetor is clamped securely. Replace the hose
if it is cracked or punctured. - Check the air cleaner body for dents and other
damage which could possibly cause an air leak.
Replace a damaged air cleaner body. - Make sure the dust cup is sealing around the
bottom of the air cleaner body. - Mounting screws and nuts holding the air cleaner
in place must be tight.
5. The inlet cap must be free of obstructions.
Figure 3
Servicing Air Cleaner Dust Cup and Baffle
I . 0/pSf/CA 2. Fllt8f n8Ch
NOTE If the the oil level is at the ADD (lower)
mark on the dipstick, add 1 pint (0.47 L) of oil
to raise the level to FULL. Do not overkill. 4.
Pour the oil into the filler neck until the level
is at the FULL (upper) mark on the dipstick. The
Onan engine uses high-quality detergent motor oil
having the American Petroleum Institute (API)
classification
lnspect the dust cup and rubber baffle after
every 50 hours of operation or once a week. Daily
or more frequent inspection is required when
operating conditions are extremely dusty and
dirty. Never allow dust to build up closer than
one inch (25 mm) from the rubber baffle.
be selected temperatures
SF. Oil viscosity (weight) must according to
anticipated ambient (Fig. 4) .
NOTE If conditions are extremely dusty and
dirfiy, begin by checking the dust cup and baffle
after each day of operation. Use this information
to find out how long it takes before the dust cup
should be emptied. Closer maintenance intervals
for emptying the dust cup may be necessary when
a rear discharge cutting unit is being used. 1.
Loosen the thumb screw until the dust cup and
baffle can be removed (Fig. 5) . Separate the
dust cup and baffle (Fig. 5) .
r -to 0 20 40 fi 80 DOD c
-3o -2o -to a to 2o 3o o TEMPERATURE RANGE YOU
EXPECT BEFORE NEXT OIL CHANGE
Figure 4 5. Install the dipstick. Make sure the
dipstick is
seated tightly in the filler neck to prevent oil
leakage. General Air Cleaner Maintenance lnspect
the air cleaner and hose periodically to
- Figure 5
- Thumb screw
- Dump the dust out of the dust cup. After cleaning
the dust cup and baffle, assemble and reinstall
both parts.
maintain maximum engine protection and service
life.
18
Maintenance
Servlclng Air Cleaner Fllter Service the air
cleaner filter aftar each 250 hours of operation.
Service more frequently in extreme dusty or
dirty conditions. Replace the element after every
six cleanings, 1500 hours of operation, or
annually, whichever comes first.
CAUTION The filter cleaner may cause burns and Is
harmful if swallowed. Keep out of reach of
children. Contains eodium metasilicate. Follow
manufacturer's instructions.
- Remove and service the dust cup. (See Dust Cup
and Baffle in this chapter of the book.) - Remove the wing nut with gasket. Pull the filter
element out of the air cleaner body (Fig. 6) .
B. After soaking the filter for 15 minutes,
rinse it with clear water. Maximum water pressure
must not exceed 40 psi (276 kPa) to prevent
damage to the filter element.
C. Allow the element to air dry, or dry the
filter element using warm, flowing air (160 F
(71 C) maximum) . Do not use compressed air or a
light bulb to dry the filter element. This will
damage the element. lnspect the element after
dust and dirt are removed. (See Inspecting Air
Cleaner Filter Element in this section of the
book.) Compressed Air Method IMPORTANT Do not
attempt remove the plastic fin assembly or the
filter will be damaged. Back-blowing with
compressed air removes dust from beneath the
fins. A. Blow compressed air from the inside to
the outside of the dry filter element. Do not
exceed 100 psi (689 kPa) to prevent damage to the
element.
Figure 6
- F//ter element
- Air cleaner 6ody
2. Ball/e
3. Clean the element by the washing method or
compressed air method.
NOTE The compressed air method is recommended
when the element must be used
immediately after servicing because a washed
element must be dried before it is used. The
washing method is a more thorough method of
cleaning. The filter MUST be washed when exhaust
soot is plugging the filter pores. Washing Method
CAUTION Warn other personnel in the area before
using compresged air. To prevent injury, wear
safety glasses, goggles or a face shield.
IMPORTANT Do not attempt to remove the
plastic fin assembly or the filter will be
damaged. Washing removes dust from beneath
fins. A. Prepare a solution of of filter cleaner
(Toro Part No. 27-7720) and water. Soak the
filter element approximately 15 minutes. Refer to
the directions on the filter cleaner carton
for complete information.
B. Keep the air hose nozzle at least one inch (25
mm) away from the pleated paper. Move the nozzle
up and down while rotating the filter element.
Inspect the element after dust and dirt are
removed. (See Inspecting Air Cleaner Filter
Element in this section of the book.)
Page 3 - 4
19
Maintenance 4. Wipe the inside of the air
cleaner body with a damp cloth to remove excess
dust. Slide the filter into the air cleaner body.
Install the wing nut and gasket.
CAUTION
5. Install the dust cup and baffle. Move the
thumb screw to a position behind the air cleaner
body and tighten it securely. Inspecting Air
Cleaner Filter Element 1. Put a bright light
inside the filter element.
Hot crankcase oil ean cauee burns If It spilled
or splashed on skin. Keep fingers and hands
away from hot oil when removing the oil drain
plug.
4. Remove the oil drain plug and let the oil flow
into the drain pan. Remove and discard the oil
filter (Fig. 8) .
- Rotate the filter element slowly while checking
for cleanliness, ruptures, holes and tears.
Replace the element if it is damaged. - Check the fin assembly, gasket and screen for
damage. Replace the element if any of these parts
are damaged. - Changing Oil and Filter
- Change the oil and oil filter after every 50
hours of operation. Change the oil and filter
more frequently when the engine is operated in
dusty or dirty conditions. - 1, Operate the engine until it is at operating
temperature. This will suspend contaminants in
the oil and allow the oil to flow more easily
when draining. Put the machine on a level surface
and stop the engine. - 2. Disengage the hood latch and open the hood.
Put a drain pan under the engine crankcase drain
plug (Fig. 7) ,
- Figure 8
- 1. Englne oil fllter
- Clean the filter mounting surface. Apply a thin
film of oil to the gasket on the new filter.
Install the element by hand until the gasket just
touches the mounting surface, then turn down an
additional 1/4 to 1/2 turn. Do not over tighten. - After the oil is drained, install the plug.
- Fill the crankcase with the correct oil. Engine
oil capacity is 1.8 qt. (1.7 L) . (See Checking
Oil Level in this section of the book.) - Cleaning Cylinder Head Fins
- To avoid overheating and possible engine damage,
clean the cooling fins on the engine cylinder
head after every 50 hours of operation if
necessary. A shorter maintenance intareval may be
required in dusty or dirty conditions.
Figure 7 I . Oll dra/n ptUg 3. Clean the area
around the drain plug and filter.
1. Open the hood. Pull the high tension wires off
the spark plugs.
Page 3 - 5
20
Maintenance
5. Remove the self tapping screw securing the
voltage regulator to the sheet metal housing on
the left side of the engine (Fig. 11) . Move the
voltage regulator to allow acess into the
cylinder fin area.
2. Remove the self tapping screw retaining the
top of the sheet metal housing on the right side
of the engine (Fig. 9) .
- Figure 9
- Self tapping screw
- Right eng/ne housing
3. Pull the housing away from the engine and
clean dirt, grass and chaff from the outside of
the cylinder head and cylinder head fins (Fig.
10) .
- Figure 11
- Self tapping screw
- Voltage regulator
- 6. Clean dirt, grass and chaff from the outside
of the cylinder and cylinder head fins through
the opening (Fig. 12) . The sheet metal housing
may be removed for easier access.
Figure 12
Figure 10 1. Cylinder fins
1. Cylinder fins
7. Reinstall the voltage regulator with the
self tapping screw.
4. Reinstall the engine housing with the
self tapping screws.
Page 3 - 6
21
Suggest For more complete manuals. Please go to
the home page. https//www.ebooklibonline.com If
the above button click is invalid. Please
download this document first, and then click the
above link to download the complete manual. Thank
you so much for reading
22
Maintenance 2. Loosen the hose clamps (Fig. 13)
at both ends of the filter and pull the fuel
lines off the filter. every 250
Cleaning Combustlon Chamber Clean the combustion
chamber after hours of operation if regular leaded
- Remove the capscrew and lockwasher holding the
filter clamp to the engine (Fig. 13) . Slide the
filter out of the clamp. - Slide the new filter into the clamp and mount it
in place with the capscrew and lockwasher. Be
sure the arrow on the side of the filter points
toward the fuel pump. - Slide the hose clamps onto the ends of the fuel
lines. Push the fuel lines onto the fuel filter
and secure them with the hose clamps. - Checking and Replacing Spark Plugs
- Since air gap between center and side electrodes
increases gradually during normal engine
operation, check the condition of the electrode
after every 100 hours of operation. The correct
spark plugs are Champion RS-14YC or equivalent.
Correct air gap is 0.025 in. (0.64 mm) .
gasoline is
used, or every 500 hours of operation if unleaded
gasoline is used. (See CYLINOER HEADS in the
Engine Disassembly section of the Onan Service
Manual.) A gradual buildup of carbon and lead
deposits will form in the combustion chamber
causing the the valves to not seat properly. The
engine will lose power. Periodic cleaning will
lengthen valve life and make sure the engine is
reliable. While Engine Is Removed Cleaning the
combustion chamber will require engine removal.
(See Removing the Engine in the Repairs section
of this chapter.) The valves and seats should be
inspected when the combustion chamber is cleaned.
If your engine is equipped with an inertia type
starter, clean the starter motor drive pinion and
lubricate with GE Versilube while the engine is
removed. Build up of debris could prevent
- Clean the area around the spark plugs so dirt
does not fall into the cylinder when the plugs
are removed. - Pull the high tension wires (Fig. 14) off the
spark plugs. Remove the spark plugs from the
cylinder head.
the inertia type starter drive from engaging or
disengaging. The inertia type starter can
be replaced with a solenoid shift type
starter. Replacing Fuel Filter
Replace the fuel filter after every 250 hours of
operation or every year, whichever comes first.
1. Clamp both fuel lines that connect to the fuel
filter (Fig. 13) so gasoline cannot drain when
the lines are removed from the filter.
Figure 14 l. High tenslon wire (right side)
- Check the condition of the center and side
electrodes to determine the operating temperature
of the engine. - Light brown insulator tip indicates correct spark
plug and heat range.
Figure 13 s. Capscrew and lockvvasher 4. Clamp
- F-uel I//fer
- Hose clamp
Page 3 - 7
23
Maintenance
- Black or oily insulator tip indicates an
excessively rich fuel mixture, possibly caused by
a dirty air cleaner element or a carburetor that
is set too rich. - Light gray or blistered-white insulator
Manual for information.)
replacement and
adjustment
POINT GAP
indicates overheating caused by a lean carburetor
setting or incorrect spark plug (heat
range too high) . IMPORTANT A cracked, fouled,
or dirty spark plug must be replaced. Do not
sandblast, scrape or clean electrodes by using a
wire brush. Grit may release from the plug
and enter the combustion chamber causing engine
damage. 4. After setting air gap (Fig. 15) at
0.025 in. (.064 mm) , install the spark plugs in
the cylinder head. Tighten the spark plugs to a
torque of 22 ft-lb (30 Nm) . Push the high
tension wires onto the spark plugs.
Figure 16 Servicing Crankcase Breather If the
crankcase becomes pressurized as indicated by oil
leaks at the seals, clean the pack and valve in
solvent. Check and clean the valve and baffle
after every 250 hours of operation (Fig. 17)
Figure 15 Servicing Breaker Points and
Condenser NOTE For maximum engine
efficiency, it is recommended that the
breaker points and condenser be replaced with
new parts every 250
hours of operation. Since breaker point gap
controls engine timing, set the gap at 0.020 in.
(0.508 mm) whenever the points are replaced or
serviced (Fig. 16) . If not replacing the
points, clean the points with a carborundum
contact point stone. Insert a hard finished card
or piece of paper between the points, Close and
open the points so the paper absorbs any dirt or
filings on the points. Replace points that are
burned or excessively pitted. (See BREAKER POINTS
in the Ignition and Battery Charging section of
the Onan Service
Figure 17
Page 3 - 8
24
https//www.ebooklibonline.com Hello dear
friend! Thank you very much for reading. Enter
the link into your browser. The full manual is
available for immediate download. https//www.ebo
oklibonline.com
Recommended
