
John Deere 828D Walk-Behind Snowblowers Service Repair Manual Instant Download (TM1612)
Title:
John Deere 828D Walk-Behind Snowblowers Service Repair Manual Instant Download (TM1612)
Description:
John Deere 828D Walk-Behind Snowblowers Service Repair Manual Instant Download (TM1612) –
Number of Views:0
Title: John Deere 828D Walk-Behind Snowblowers Service Repair Manual Instant Download (TM1612)
1
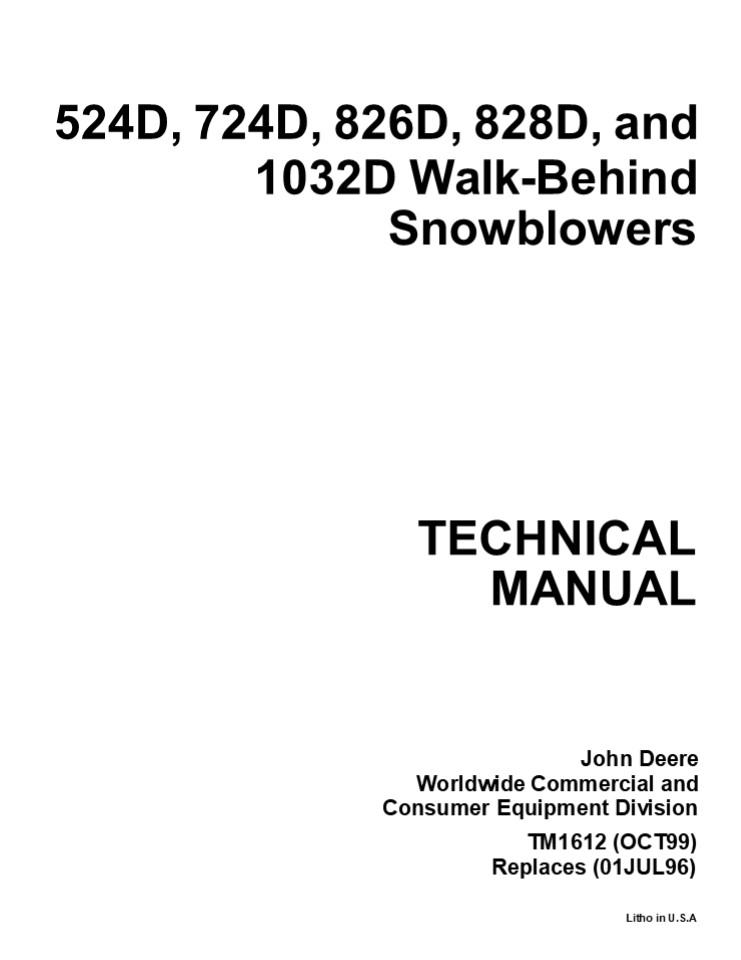
524D, 724D, 826D, 828D, and
1032D Walk-Behind
Snowblowers
TECHNICAL MANUAL
John Deere Worldwide Commercial and Consumer
Equipment Division TM1612 (OCT99) Replaces
(01JUL96)
Litho in U.S.A
2
Walk-Behind Snowblowers
Model 524D
Model 724D
Model 826D
Model 1032D
Model 828D
3
INTRODUCTION
This technical manual is written for an
experienced technician and contains sections that
are specifically for this product. It is a part
of a total product support program.
Safety
Specifications and Information
- The manual is organized so that all the
information on a particular system is kept
together. The order of grouping is as follows - Table of Contents
- Specifications
- Component Location
- System Schematic
- Theory of Operation
- Troubleshooting Chart
- Diagnostics
- Tests Adjustments
- Repair
Engine
Electrical
Note Depending on the particular section or
system being covered, not all of the above groups
may be used.
Power Train
Each section will be identified with a symbol
rather than a number. The pages within a section
will be consecutively numbered. Headings in
each section indicate the job being
performed. A heading with no model designation
applies to all the models in this manual.
Headings followed by model designations apply
only to those models. All information,
illustrations and specifications in this manual
are based on the latest information available at
the time of publication. The right is reserved to
make changes at any time without notice. We
appreciate your input on this manual. To help,
there are postage paid post cards included at the
back. If you find any errors or want to comment
on the layout of the manual please fill out one
of the cards and mail it back to us.
All information, illustrations and specifications
in this manual are based on the latest
information available at the time of publication.
The right is reserved to make changes at any time
without notice.
Miscellaneous
COPYRIGHT 1999 Deere Co. John Deere Worldwide
Commercial and Consumer Equipment
Division Horicon, Wisconsin All rights
reserved Previous Editions COPYRIGHT 1996,1995
1-1
9/30/99
4
https//www.ebooklibonline.com Hello dear
friend! Thank you very much for reading. Enter
the link into your browser. The full manual is
available for immediate download. https//www.ebo
oklibonline.com
5
SAFETY
HANDLE FLUIDS SAFELY-AVOID FIRES
HANDLE CHEMICAL PRODUCTS SAFELY
- BE PREPARED FOR EMERGENCIES
TS291
Direct exposure to hazardous chemicals can cause
serious injury. Potentially hazardous chemicals
used with John Deere equipment include such items
as lubricants, coolants, paints, and adhesives. A
Material Safety Data Sheet (MSDS) provides
specific details on chemical products physical
and health hazards, safety procedures, and
emergency response techniques. Check the MSDS
before you start any job using a hazardous
chemical. That way you will know exactly what the
risks are and how to do the job safely. Then
follow procedures and recommended equipment.
TS227
- DISPOSE OF WASTE PROPERLY
- Improperly disposing of waste can threaten
the environment and ecology. Potentially harmful
waste used with John Deere equipment include such
items as oil, fuel, coolant, brake fluid,
filters, and batteries. Use leakproof containers
when draining fluids. Do not use food or
beverage containers that may mislead someone
into drinking from them. Do not pour waste onto
the ground, down a drain, or into any water
source. Inquire on the proper way to recycle or
dispose of waste from your local environmental or
recycling center, or from your John Deere dealer.
When you work around fuel, do not smoke or work
near heaters or other fire hazards. Store
flammable fluids away from fire hazards. Do not
incinerate or puncture pressurized
containers. Make sure machine is clean of trash,
grease, and debris. Do not store oily rags they
can ignite and burn spontaneously. Be prepared if
a fire starts. Keep a first aid kit and fire
extinguisher handy. Keep emergency numbers for
doctors, ambulance service, hospital, and fire
department near your telephone.
1-2
9/30/99
6
SAFETY
USE SAFE SERVICE PROCEDURES
- PARK MACHINE SAFELY
- WEAR PROTECTIVE CLOTHING
- Wear close fitting clothing and safety equipment
appropriate to the job. - Prolonged exposure to loud noise can cause
impairment or loss of hearing. Wear a suitable
hearing protective device such as earmuffs or
earplugs to protect against objectionable or
uncomfortable loud noises. - Operating equipment safely requires the full
attention of the operator. Do not wear
radio or music headphones while operating
machine.
TS230
- Before working on the machine
- Lower all equipment to the ground.
- Stop the engine and remove the key.
- Disconnect the battery ground strap.
- Hang a DO NOT OPERATE tag in operator station.
- SUPPORT MACHINE PROPERLY AND USE PROPER LIFTING
EQUIPMENT - TS229
- SERVICE MACHINES SAFELY
If you must work on a lifted machine or
attachment, securely support the machine or
attachment. Do not support the machine on cinder
blocks, hollow tiles, or props that may crumble
under continuous load. Do not work under a
machine that is supported solely by a jack.
Follow recommended procedures in this
manual. Lifting heavy components incorrectly can
cause severe injury or machine damage. Follow
recommended procedure for removal and
installation of components in the manual.
JD6508
- USE PROPER TOOLS
- Use tools appropriate to the work. Makeshift
tools and procedures can create safety hazards.
Use power tools only to loosen threaded parts and
fasteners. For loosening and tightening hardware,
use the correct size tools. DO NOT use U.S.
measurement tools on metric fasteners. Avoid
bodily injury caused by slipping wrenches. Use
only service parts meeting John Deere
specifications.
- WORK IN CLEAN AREA
- Before starting a job
- Clean work area and machine
- Make sure you have all necessary tools to do your
job. - Have the right parts on hand.
- Read all instructions thoroughly do not attempt
shortcuts.
1-3
9/30/99
7
SAFETY
- ILLUMINATE WORK AREA SAFELY
- Illuminate your work area adequately but safely.
Use a portable safety light for working inside or
under the machine. Make sure the bulb is enclosed
by a wire cage. The hot filament of an
accidentally broken bulb can ignite spilled fuel
or oil.
fibers are brake pads, brake band and
lining assemblies, clutch plates, and some
gaskets. The asbestos used in these components is
usually found in a resin or sealed in some way.
Normal handling is not hazardous as long as
airborne dust containing asbestos is not
generated. Avoid creating dust. Never use
compressed air for cleaning. Avoid brushing or
grinding material containing asbestos. When
servicing, wear an approved respirator. A
special vacuum cleaner is recommended to clean
asbestos. If not available, apply a mist of oil
or water on the material containing asbestos.
Keep bystanders away from the area.
- WORK IN VENTILATED AREA
- WARNING California Proposition 65 Warning
- Diesel engine exhaust and some of its
constituents are known to the State of California
to cause cancer, birth defects, and other
reproductive harm. - Gasoline engine exhaust from this product
contains chemicals known to the State of
California to cause cancer, birth defects, or
other reproductive harm.
- SERVICE TIRES SAFELY
- Explosive separation of a tire and rim parts can
cause serious injury or death. - Do not attempt to mount a tire unless you have
the proper equipment and experience to perform
the job. Always maintain the correct tire
pressure. Do not inflate the tires above the
recommended pressure. Never weld or heat a wheel
and tire assembly. The heat can cause an increase
in air pressure resulting in a tire explosion.
Welding can structurally weaken or deform the
wheel. - When inflating tires, use a clip-on chuck and
extension hose long enough to allow you to stand
to one side and NOT in front of or over the tire
assembly. Use a safety cage if available. - Check wheels for low pressure, cuts, bubbles,
damaged rims or missing lug bolts and nuts.
Engine exhaust fumes can cause sickness or death.
If it is necessary to run an engine in an
enclosed area, remove the exhaust fumes from the
area with an exhaust pipe extension. If you do
not have an exhaust pipe extension, open the
doors and get outside air into the area.
- REMOVE PAINT BEFORE WELDING OR HEATING
- Avoid potentially toxic fumes and dust. Hazardous
fumes can be generated when paint is heated by
welding, soldering, or using a torch. Do all work
outside or in a well ventilated area. Dispose of
paint and solvent properly. Remove paint before
welding or heating If you sand or grind paint,
avoid breathing the dust. Wear an approved
respirator. If you use solvent or paint stripper,
remove stripper with soap and water before
welding. Remove solvent or paint stripper
containers and other flammable material from
area. Allow fumes to disperse at least 15 minutes
before welding or heating.
- AVOID HARMFUL ASBESTOS DUST
- Avoid breathing dust that may be generated when
handling components containing asbestos
fibers. Inhaled asbestos fibers may cause lung
cancer. - Components in products that may contain asbestos
1-4
9/30/99
8
FRICTION DRIVE CLUTCH ADJUSTMENT828D 1032D
POWER TRAIN
TESTS AND ADJUSTMENTS
FRICTION DRIVE CLUTCH ADJUSTMENT828D
1032D Adjust friction clutch to compensate for
wear of friction disk when slippage occurs. 1.
Park snowblower on a hard, smooth surface. Stop
engine, remove key, wait for moving parts to stop
and remove wire from spark plug to prevent
accidental starting.
Clutch Lever
Selector Lever
c CAUTION Remove enough fuel from fuel tank so
that no spillage will occur when unit is tipped
up onto housing.
M78995
- Put speed selector lever in 1 (First gear).
- Make sure friction clutch lever is disengaged.
Clutch Cable
Adjustment Lock Nut
Housing
M766081
M79008
- Turn drive wheels by hand. Tighten adjustment
lock nut until wheels begin to drag. - Engage and release friction clutch lever to align
clutch linkage. - Repeat procedure as necessary.
- When wheel drag is obtained with linkage
alignment, loosen adjustment lock nut 3 full
turns. Drive wheels will then turn freely. - NOTE Insure that clutch cable is slack when
clutch lever is disengaged. Clutch lever should
move approximately 13 mm (0.5 in.) before clutch
mechanism is activated.
2. Tip machine forward onto auger housing.
.
Access Panel
Upper Bolts
- Engage clutch lever and check to make sure that
friction disk engages friction plate. - Replace cover. Tilt machine back onto wheels and
reconnect spark plug.
Lower Bolts
M79009
3. Remove 2 upper bolts and loosen 2 lower bolts
to remove access panel.
5- 13
9/30/99
9
FRICTION DRIVE CLUTCH ADJUSTMENT524D, 724D 826D
POWER TRAIN
FRICTION DRIVE CLUTCH ADJUSTMENT524D, 724D
826D 1. Park snowblower on a hard, smooth
surface. Stop engine, remove key, wait for moving
parts to stop and remove wire from spark plug to
prevent accidental starting.
Bracket
c CAUTION Remove enough fuel from fuel tank so
that no spillage will occur when unit is tipped
up onto housing.
3.18-4.76 mm 0.125-0.188 in.
Spring Pin
M76870
826D
Housing
Bracket
M79008
3.18-4.76 mm 0.125-0.188 in.
2. Tip machine forward onto auger housing.
Spring Pin
M76922
524D 4. Check for proper adjustment by measuring
the distance between the spring pin and the
friction rod bracket. With the clutch engaged the
distance should be 3.18-4.76 mm (0.125-0.188 in.).
Access
Upper
Panel
Bolts
Lower
Bolts
M76871
3. Remove 2 upper bolts, and loosen 2 lower
bolts. Remove access panel.
5- 14
9/30/99
10
DRIVE CHAIN ADJUSTMENT828D 1032D
POWER TRAIN
.
Upper Bolts
Access Panel
Retaining Nut
Cable Adjuster
Lower Bolts
M76867
- If adjustment is not correct loosen the retaining
nut on the cable adjuster. Turn the adjuster
clockwise to increase the adjustment or
counterclockwise to decrease the adjustment. - Tighten the retaining nut when adjustment is
correct. - Replace cover. Tilt machine back onto wheels and
reconnect spark plug.
M79009
- Remove 2 upper bolts and loosen 2 lower bolts to
remove access panel. - Drive chain and driven chain should be taut with
little or no play.
DRIVE CHAIN ADJUSTMENT828D 1032D 1. Park
snowblower on a hard, smooth surface. Stop
engine, remove key, wait for moving parts to stop
and remove wire from spark plug to prevent
accidental starting.
Drive Chain
Driven Chain
Nut
Nut
c CAUTION Remove enough fuel from fuel tank so
that no spillage will occur when unit is tipped
up onto housing.
M79014
- To adjust chain tightness, loosen nuts and move
reduction sprocket up or down equally in slot as
necessary. - Tighten nuts to 20 Nm (180 lb-in.).
- Install access panel.
Housing
M79008
2. Tip machine forward onto auger housing.
5- 15
9/30/99
11
DRIVE CONTROL LINKAGE828D 1032D
POWER TRAIN
DRIVE CONTROL LINKAGE828D 1032D Use the
diagram below as a reference for component
location. The drive control linkage has no
adjustments. If the unit is not operating
correctly, i.e. not enough belt tension, replace
the spring and check the linkage and assembly, or
idler assembly. Handle
Housing
Arm Idler
M79008
Drive Belt
2. Tip machine forward onto auger housing.
Interlock
Brake
Cable Spring Linkage
Brake Spring Driven Sheave
M76683
Shift Lever
For brake adjustment. (See IMPELLER BRAKE
ADJUSTMENT828D 1032D on page 12 of
MISCELLANEOUS SECTION.)
M78995
SPEED / SHIFT LINKAGE ADJUSTMENT828D 1032D SN
( - 190000) 1. Park snowblower on a hard, smooth
surface. Stop engine, remove key, wait for moving
parts to stop and remove wire from spark plug to
prevent accidental starting.
3. Move shift lever into 6 (6th gear) position.
Cotter Pin
c CAUTION Remove enough fuel from fuel tank so
that no spillage will occur when unit is tipped
up onto housing.
Shift Rod
Adjust. Nut
Lower Shift Rod
M85220
- Remove cotter pin from shift rod stud to remove
shift rod assembly from shift lever linkage. - Loosen adjustment nut.
- Push lower shift rod into housing as far as it
will go and hold it in this position until rod
adjustment is made.
5- 16
9/30/99
12
SPEED / SHIFT LINKAGE ADJUSTMENT828D 1032D SN
(190001 - )
POWER TRAIN
SPEED / SHIFT LINKAGE ADJUSTMENT828D 1032D SN
(190001 - ) 1. Park snowblower on a hard, smooth
surface. Stop engine, remove key, wait for moving
parts to stop and remove wire from spark plug to
prevent accidental starting.
13 mm (0.5 in.)
Shift Lever Linkage
Lower Shift Rod
c CAUTION Remove enough fuel from fuel tank so
that no spillage will occur when unit is tipped
up onto housing.
M85223
- Adjust the length of shift rod until it is
approximately 13 mm (0.5 in.) away from the
shift lever linkage hole. - Release lower shift rod and install shift rod
into shift lever linkage. - Install cotter pin into shift rod. Bend tines of
cotter pin over. - Tighten nut to secure shift rod.
Access Panel
Friction Drive Lever
Housing
M79008
Neutral
Speed Select Lever
2. Tip machine forward onto auger housing and
remove access panel.
Shift Lever
M78995
NOTE The neutral position (N) of the speed
selector lever can be anywhere between R1 and
the first forward speed (1). With speed
selector lever in Neutral (N) and the friction
drive lever engaged, the unit should not creep
forward or backward.
- Return unit to its upright operating position.
- Start engine and check for proper operation of
the speed selector lever - put speed selector lever in Neutral (N),
- move friction drive lever to engaged position,
- unit should not creep forward or backward.
- 13. If necessary, repeat steps 1-11 to eliminate
any neutral creep.
M96143
3. Move shift lever to the 6 (6th gear)
position.
5- 17
9/30/99
13
SPEED / SHIFT LINKAGE ADJUSTMENT828D 1032D SN
(190001 - )
POWER TRAIN
Shift Lever Linkage
Shift Lever Linkage
Shift Rod
Quick Pull Pin
Shift Rod
Adjustment Stud
Headlight
Mx1515
Housing
8. Turn adjustment stud on top end of shift rod
to align with shift lever linkage, then fasten
with quick pull pin as shown.
Mx1515
IMPORTANT To prevent damage to headlight
housing, install quick pull pin so open ends
point up toward Operators Station.
Friction Drive Lever
- Remove quick pull pin to remove adjustment stud
from shift lever linkage. - Push shift rod down into drive housing as far as
it will go and hold it in this position while
rod adjustment is made in following steps.
Neutral
Speed Select Lever
Friction Wheel Rubber
Shift Rod
Quick Pull Pin
M96143
Flat Washer
NOTE The neutral position (N) of the speed
selector lever can be anywhere between R1 and
the first forward speed (1).
Traction Drive Linkage
With speed selector lever in Neutral (N) and
the friction drive lever engaged, the unit should
not creep forward or backward.
Mx1528
- Return unit to its upright operating position.
- Start engine and check for proper operation of
the speed selector lever - put speed selector lever in Neutral (N),
- move friction drive lever to engaged position,
- unit should not creep forward or backward.
- If necessary, repeat steps 1-11 to eliminate any
neutral creep. - Install access panel.
IMPORTANT To prevent damage to friction wheel
rubber, install quick pull pin so open ends point
away from friction wheel rubber. This will
prevent open ends from gouging the rubber.
- Check that quick pull pin is installed with open
ends away from friction wheel rubber. If not,
change it to correct position shown once
adjustment is complete. - Push on friction wheel to ensure all slack is
taken out of linkage. Hold this position.
5- 18
9/30/99
14
SPEED / SHIFT LINKAGE ADJUSTMENT524D, 724D,
826D
POWER TRAIN
SPEED / SHIFT LINKAGE ADJUSTMENT524D, 724D,
826D QUICK CHECK 1. Park snowblower on a hard,
smooth surface. Stop engine, remove key, wait for
moving parts to stop. Remove wire from spark plug
to prevent accidental starting.
- When the bracket is parallel to the case tighten
the rod nuts. - Tilt machine back onto wheels and reconnect spark
plug. - Start engine and check for proper operation of
the speed selector lever.
ADJUSTMENT If additional adjustment is required,
use the following procedure 1. Park snowblower
on a hard, smooth surface. Stop engine, remove
key, wait for moving parts to stop and remove
wire from spark plug to prevent accidental
starting.
c CAUTION Remove enough fuel from fuel tank so
that no spillage will occur when unit is tipped
up onto housing.
c CAUTION Remove enough fuel from fuel tank so
that no spillage will occur when unit is tipped
up onto housing.
2. Move the gear selector to the 1 (first gear)
position.
2. Move the gear selector to the R2 (second
gear reverse) position.
Housing
M79008
Housing
3. Tip machine forward onto auger housing.
Gear Case Edge
M79008
Selector Rod
3. Tip machine forward onto auger housing.
Nuts
Shift Bracket Edge
Shift Bracket
Nuts
M76869
- With the selector in the 1 (first gear)
position the edge of the shift bracket should be
parallel to the edge of the gear case. - If not parallel loosen the nuts on the selector
rod and adjust the shift bracket accordingly.
M76869
4. Loosen the nuts on the selector rod.
5- 19
9/30/99
15
V-BELTS
POWER TRAIN
REPAIR
V-BELTS V-belts transmit power by friction and a
wedging action against the sheaves. Belts are
subject to wear through periodic heavy load and
should be checked often to be certain belt wear
is normal. All belts and sheaves wear with use.
Normal wear can be recognized as even wearboth
on the belt and sides of the sheave. A slight
raveling of the belt covering does not indicate
premature failure. Cut off the raveling if the
covering peels at the lap. Check for the causes
of unusual belt wear. Lumpy V-belts can cause
vibration. Check belts for swells and lumps.
Install only factory-recommended V-belts of the
proper length.
Access
Upper
Panel
Bolts
Lower
Bolts
M76871
5. Remove 2 upper bolts, and loosen 2 lower
bolts. Remove access panel.
SHEAVES Examine sheaves for bent or chipped
sidewalls. Check also for excessive sidewall
wear. Damaged sheaves cause rapid belt wear. A
bent sheave reduces the gripping power of the
belt. Replace sheaves having any of the above
defects. Check to be sure dirt has not lodged and
packed in sheave V-groove. Loosen dirt so it will
fallout when machine is started.
Friction Disk
Hex Shaft
Reverse Limiting Spring Pin
PULLEY ALIGNMENT AND DRIVE BELT
TENSION Misaligned sheaves will result in shorter
belt life. Use a straightedge to check sheave
alignment. More belts fail from under-tension
than over-tension. Loose belts slip, heat and
burn, causing premature failure. Replace weak or
stretched idler springs if belt drives are so
equipped. Excessive belt tension stretches and
weakens belts. It also puts an excessive load on
shaft bearing. Adjust belts to tension specified
in operators manual for each machine.
M76892
- Slide the hex shaft right to remove end play.
- Slide the friction disk left against the reverse
limiting spring pin. - Tighten the nuts on the selector rod.
- Confirm correct operation
- With the selector in R2 the hub of the friction
disk should contact the reverse limiting spring
pin. - The F6 (sixth gear) setting should not result
in the friction disk traveling beyond the
diameter of the friction plate. - 10. Replace the access panel, and return the
machine to operating position.
DRIVE BELT CLEANING Clean belts by wiping
them with a clean cloth. Immediately wipe off
any spilled oil or grease. Do not use solvents
because they will soften the belt and cause the
clutch to grab. Do not use belt dressings.
Dressings often give only temporary gripping
action, while softening the belt and causing
eventual deterioration, and shorter belt life.
Dressings also will cause the clutch to grab.
5- 20
9/30/99
16
FRICTION DRIVE BELT REPLACEMENT828D 1032D
POWER TRAIN
FRICTION DRIVE BELT REPLACEMENT 524D, 724D,
826D 1. Remove auger drive belt. (See AUGER
DRIVE BELT REPLACEMENT524D, 724D, 826D on
page 21 of MISCELLANEOUS SECTION.)
c CAUTION DO NOT attempt to clean the belts while
machine is running.
Loosen tension as much as possible when removing
and replacing V-belts. Check alignment and
condition of sheaves as outlined above. Place
belt in the sheave groove by hand.
Engine Sheave
Friction Drive Belt Idler
IMPORTANT Never pry belt over edge of sheave
because this may rupture belt cords and
shorten belt life.
Friction Drive Belt
FRICTION DRIVE BELT REPLACEMENT828D 1032D 1.
Remove auger drive belt. (See AUGER DRIVE BELT
REPLACEMENT828D 1032D on page 19 of
MISCELLANEOUS SECTION.)
Auger Removed for Clarity
M76898
Drive Belt
- Remove the friction drive belt and install new
belt. It is necessary to hold back the friction
drive belt idler to replace the belt. - Install auger drive belt.
- Reassemble to specification.
Idler
WHEEL REPLACEMENT828D 1032D 1. Park snowblower
on a hard, smooth surface. Stop engine, remove
key, wait for moving parts to stop and remove
wire from spark plug to prevent accidental
starting.
M85212
- Pull back spring loaded idler and remove friction
drive belt from engine drive sheave. Install new
belt. - Install auger drive belt.
- Reassemble to specification.
c CAUTION Remove enough fuel from fuel tank so
that no spillage will occur when unit is tipped
up onto housing.
5- 21
9/30/99
17
Suggest If the above button click is invalid.
Please download this document first, and then
click the above link to download the complete
manual. Thank you so much for reading
18
WHEEL REPLACEMENT524D, 724D, 826D
POWER TRAIN
Housing
Housing
M79008
M79008
2. Tip machine forward onto auger housing.
2. Tip machine forward onto auger housing.
Cap Screws (Nuts)
Nut
Wheel
Cap Screw
M76658
M76868
- Remove cap screws (nuts on older models)
securing wheel. - Replace wheel and secure with 4 cap screws
(nuts). Torque to 67 Nm (50 lb-ft.). - Tilt unit back on wheels.
- Reconnect spark plug. Check engine oil.
- Remove nut and cap screw.
- Replace wheel, and secure with cap screw and nut.
Torque to 17 Nm (12.5 lb-ft.). - Tilt unit back on wheels.
- Reconnect spark plug. Check engine oil.
WHEEL REPLACEMENT524D, 724D, 826D 1. Park
snowblower on a hard, smooth surface. Stop
engine, remove key, wait for moving parts to stop
and remove wire from spark plug to prevent
accidental starting.
c CAUTION Remove enough fuel from fuel tank so
that no spillage will occur when unit is tipped
up onto housing.
5- 22
9/30/99
19
https//www.ebooklibonline.com Hello dear
friend! Thank you very much for reading. Enter
the link into your browser. The full manual is
available for immediate download. https//www.ebo
oklibonline.com
Recommended
CrystalGraphics Presentations


