

New Holland T2320 Tractor Service Repair Manual Instant Download PowerPoint PPT Presentation
Title: New Holland T2320 Tractor Service Repair Manual Instant Download
1
(No Transcript)
2
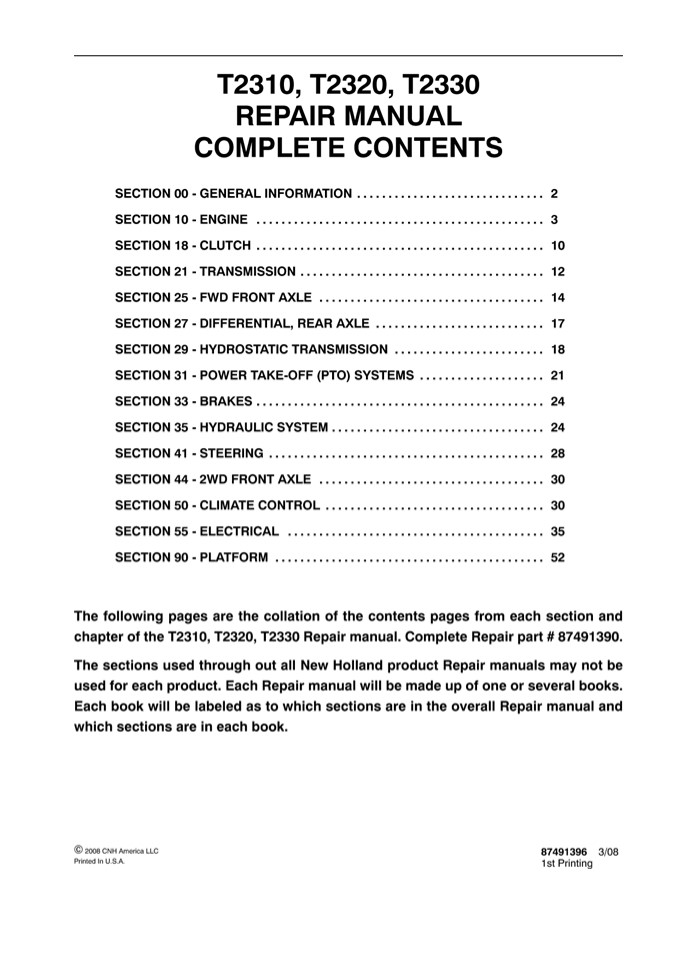
SECTION 00 - GENERAL INFORMATION - CHAPTER
1 SECTION 00 - GENERAL INFORMATION Chapter 1 -
General Information CONTENTS
Description Page Introduction
..................................................
................. 3 Precautionary Statements
..................................................
..... 4 Personal Safety .........................
....................................... 4 Machine
Safety ..........................................
...................... 4 Information
..................................................
.................. 4 Technical Information
..................................................
......... 5 Hardware ............................
.........................................
5 General ......................................
............................. 5 Plating
..................................................
.................. 5 Nut Tightening
..................................................
............ 5 Locknuts ........................
.......................................... 5 Jam
Nuts ............................................
...................... 5 Thread Lubrication
..................................................
........ 5 Safety ...............................
.........................................
6 Precautionary Statements .......................
................................ 6 The Tractor
..................................................
.............. 6 Servicing the Tractor
..................................................
...... 6 Operating the Tractor ...................
..................................... 7 Driving
the Tractor .....................................
..................... 7 Operating the PTO
..................................................
........ 8 Diesel Fuel ..........................
...................................... 8 Safety
Frame (ROPS) .....................................
.................. 8 Decals - T2310, T2320,
T2330 with 12x12 Transmission ....................
........ 9 Safety Decals .......................
.......................................
9 Instruction Decals - T2310, T2320, T2330 with
12x12 Transmission .............. 11 Decals -
T2310, T2320 with HST ............................
................... 14 Safety Decals
..................................................
.......... 14 Instruction Decals - T2310, T2320
with HST Transmission ..................... 16
Universal Symbols ...............................
............................ 20 Specifications -
T2310, T2320, T2330 with 12x12 Gear Transmission
............... 21 General Dimensions
..................................................
........ 28
Section
00-1
3
SAFETY
SECTION 00 - GENERAL INFORMATION - CHAPTER 1
PRECAUTIONARY STATEMENTS
A careful operator is the best operator. Most
accidents can be avoided by observing certain
precautions. To help prevent accidents, read and
take the following precautions before operating
this tractor. Equipment should be operated only
by those who are responsible and instructed to
do so.
- Keep the tractor and equipment, particularly
brakes and steering, maintained in a reliable and
satisfactory condition to ensure your safety and
comply with legal requirements. - Keep open flame or cold weather starting aids
away from the battery to prevent fires or
explosions. Use jumper cables according to
instructions to prevent sparks which could cause
explosion. - Stop the engine before performing any service on
the tractor. - Escaping hydraulic/diesel fluid under pressure
can penetrate the skin causing serious injury. If
fluid is injected into the skin, obtain medical
attention immediately or gangrene may result.
THE TRACTOR
- Read the Operators Manual carefully before
using the tractor. Lack of operating knowledge
can lead to accidents. - Use an approved roll bar and seat belt for safe
operation. Overturning a tractor without a roll
bar can result in death or injury. If your
tractor is not equipped with a roll bar and seat
belt, see your New Holland Dealer. - Always use the seat belt. The only instance when
the seat belt should not be used is if the roll
bar has been removed from the tractor or folding
ROPS is in down position. - If a front end loader is to be installed, always
use a FOPS (Falling Object Protective Structure)
canopy to avoid injury from falling objects. - Use the handholds and step plates when getting
on and off the tractor to prevent falls. Keep
steps and platform cleared of mud and debris. - Do not permit anyone but the operator to ride on
the tractor. There is no safe place for extra
riders. - Keep all safety decals clean of dirt and grime,
and replace all missing, illegible, or damaged
safety decals. See the list of decals in the
Decal section of this manual.
- DO NOT use your hand to check for leaks. Use a
piece of cardboard or paper to search for leaks. - Stop the engine and relieve pressure before
connecting or disconnecting lines. - Tighten all connections before starting the
engine or pressurizing lines.
- Do not modify or permit anyone else to modify or
alter this tractor or any of its components or
functions without first consulting a New Holland
Dealer. - The fuel oil in the injection system is under
high pressure and can penetrate the skin.
Unqualified persons should not remove or attempt
to adjust a pump, injector, nozzle, or any other
part of the fuel injection system. Failure to
follow these instructions can result in serious
injury. - Continuous long-term contact with used engine
oil may cause skin cancer. Avoid prolonged
contact with used engine oil. Wash skin promptly
with soap and water.
SERVICING THE TRACTOR
- The cooling system operates under pressure which
is controlled by the radiator cap. It is
dangerous to remove the cap while the system is
hot. Always turn the cap slowly to the first stop
and allow pressure to escape before removing
the cap entirely. - Keep any type of open flame away from the
tractor and do not smoke while refueling. Wait
for the engine to cool before refueling.
00-6
4
https//www.ebooklibonline.com Hello dear
friend! Thank you very much for reading. Enter
the link into your browser. The full manual is
available for immediate download. https//www.eb
ooklibonline.com
5
SECTION 00 - GENERAL INFORMATION - CHAPTER 1
10. Some components of your tractor, such as
gaskets and friction surfaces (brake linings,
clutch linings, etc.) may contain asbestos.
Breathing asbestos dust is dangerous to your
health. You are advised to have any mainte-
nance or repair on such components carried out
by an authorized New Holland Dealer. However, if
service operations are to be undertaken on parts
that contain asbestos, the essential precautions
listed below must be observed
- Pull only from the drawbar or the lower link
drawbar in the down position. Use only a drawbar
pin that locks in place. Pulling from the tractor
rear axle or any point above the axle may cause
the tractor to upset. - 1If the front end of the tractor tends to rise
when heavy implements are attached to the three-
point hitch, install front end or front wheel
weights. Do not operate the tractor with a light
front end. - Always set the hydraulic selector lever in
position control when attaching or transporting
equip- ment. Ensure hydraulic couplers are
properly mounted and will disconnect safely in
case of accidental detachment of implement. - Do not leave equipment in the raised position.
- Use the flasher/turn signal lights and SMV signs
when traveling on public roads both day and
night (unless prohibited by law). - When operating at night, adjust lights to prevent
blinding oncoming drivers.
- Work out of doors or in a well ventilated area.
- Dust found on the tractor or produced during
work on the tractor should be removed by
extraction, not by blowing. - Dust waste should be dampened, placed in a
sealed container, and marked to ensure safe
disposal. - If any cutting, drilling, etc. is attempted on
materials containing asbestos, the item should
be dampened and only hand tools or low speed
power tools used.
OPERATING THE TRACTOR
DRIVING THE TRACTOR
- Before starting the tractor, apply the parking
brake, place the PTO lever in the OFF position,
the lift control lever in the down position, the
remote control valve levers in the neutral
position, and the transmission in neutral. - Always sit in the tractor seat when starting the
engine or operating controls. Do not start the
engine or operate controls while standing beside
the tractor. - Do not bypass the neutral start switches. Consult
your New Holland Dealer if your neutral start
controls malfunction. Use jumper cables only in
the recommended manner. Improper use can result
in tractor runaway. - Avoid accidental contact with the gear shift
lever while the engine is running, as this can
cause unexpected tractor movement. - Before getting off the tractor, disengage the
PTO, turn the engine off, and apply the parking
brake. Never get off the tractor while it is in
motion. - Do not park the tractor on a steep incline.
- Do not operate the tractor engine in an enclosed
building without adequate ventilation. Exhaust
fumes can cause death or illness. - If the power steering or engine ceases operating,
stop the tractor immediately.
- Watch where you are going, especially at row
ends, on roads, around trees and low hanging
obstacles. - To avoid upsets, drive the tractor with care and
at a safe speed. Use extra caution when
operating over rough ground, when crossing
ditches or slopes, and when turning corners. - To provide two-wheel braking, lock tractor brake
pedals together when transporting on roads. - Do not coast or free wheel down hills. Use the
same gear when going downhill as is used when
going uphill. - Any towed vehicle with a total weight exceeding
that of the towing tractor should be equipped
with brakes for safe operation. - If the tractor becomes stuck or the tires become
frozen to the ground, back up the tractor to
prevent upset. - Always check overhead clearance, especially when
transporting the tractor. - When operating at night, adjust lights to prevent
blinding oncoming drivers.
6
SECTION 00 - GENERAL INFORMATION - CHAPTER 1
- Wipe up spilled fuel immediately.
- Always tighten the fuel tank cap securely.
- If the original fuel tank cap is lost, replace it
with a New Holland approved cap. A non-approved,
proprietary cap may not be safe. - Keep equipment clean and properly maintained.
OPERATING THE PTO
- When operating PTO driven equipment, shut off
the engine and wait until the PTO stops before
getting off the tractor and disconnecting the
equipment. - Do not wear loose clothing when operating the
power take-off or when near rotating equipment. - When operating stationary PTO driven equip-
ment, always place all gear shift levers in
neutral position. - Apply the tractor parking brake, and block the
rear wheels front and back. - To avoid injury, do not clean, adjust, unclog, or
service PTO driven equipment when the tractor
engine is running. - Ensure the PTO master shield is installed at all
times. Always replace the PTO shield cap when
the PTO is not in use.
- Do not drive equipment near open fires.
- Never use fuel for cleaning purposes.
- Arrange fuel purchases so that winter grade fuels
are not held over and used in the spring.
SAFETY FRAME (ROPS) Your New Holland tractor is
equipped with a safety frame. It must be
maintained in a serviceable condition. Be
careful when driving through doorways or working
in confined spaces with low headroom. UNDER NO
CIRCUMSTANCES should you
DIESEL FUEL
- modify, drill, or alter the safety frame in any
way. Doing so may render you liable to legal
prosecution. - attempt to straighten or weld any part of the
main frame or retaining brackets which have
suffered damage. Doing so may weaken the
structure and endanger your safety. - secure any parts on the main frame or attach
your safety frame with anything other than the
special high tensile bolts and nuts specified. - attach chains or ropes to the main frame for
pulling purposes. - take unnecessary risks even though your safety
frame affords you the maximum protection
possible.
- UNDER NO CIRCUMSTANCES should gaso- line,
alcohol, or blended fuels be added to diesel
fuel. These combinations can create an increased
fire or explosive hazard. Such blends are more
explosive than pure gasoline in a closed
container such as a fuel tank. DO NOT USE THESE
BLENDS. - Never remove the fuel cap or refuel with the
engine running or hot. - Do not smoke while refueling or when standing
near fuel. - Maintain control of the fuel filler pipe nozzle
when filling the tank. - Do not fill the fuel tank to capacity. Allow room
for expansion.
WHEN YOU SEE THIS SYMBOL IT MEANS
ATTENTION! BECOME ALERT! YOUR SAFETY IS
INVOLVED!
7
SECTION 10 - ENGINE - CHAPTER 1 SECTION 10 -
ENGINE Chapter 1 - Engine CONTENTS
Description Page Specifications
..................................................
................ 6 Metric Bolt Torque
Specifications ...................................
............ 15 Special Tools ....................
............................................
16 Compression Test and Tools ....................
............................ 17 Description of
Operation ........................................
.............. 18 Troubleshooting
..................................................
............ 19 Cylinder Head and Valve Train
Components .................................. 23
Separating the Tractor at the Clutch
Housing/Engine - 12x12 Transmission ....... 24
Removal ..........................................
................... 24 Separating the Tractor at
the Engine/Frame .................................
. 28 Installation ...............................
............................. 30 Attaching the
12x12 Transmission to the Engine
............................... 34 Overhaul
..................................................
.................. 39 Engine .....................
.............................................
39 Fuel Injector and Glow Plug ...................
............................. 39 Removal
..................................................
........... 39 Oil Pressure Switch
..................................................
..... 39 Temperature Sending Switch and
Alternator .................................. 39
Removal ..........................................
................... 39 Fan, Water Pump, and
External Oil Tube ................................
..... 40 Removal ................................
............................. 40 Air Inlet
Manifold .........................................
................. 40 Removal .....................
........................................
40 Rocker Arm Shaft and Support Bracket
...................................... 41
Removal ..........................................
................... 41 Cylinder Head
..................................................
.......... 41 Removal ............................
................................. 41 Valve Tappet
..................................................
........... 41 Removal ...........................
.................................. 41 Fuel
Shutoff Solenoid .................................
..................... 42 Removal
..................................................
........... 42
Section
10-1
8
SECTION 10 - ENGINE - CHAPTER 1
Description Page Engine Timing Gear Cover, Timing
Gears, and Cam Shaft ...................... 42
Timing Gear Cover Removal ........................
.................... 42 Timing Gears and Camshaft
................................................
44 Removal .......................................
...................... 44 Oil Sump
..................................................
.............. 45 Removal ........................
..................................... 45 Oil
Suction Pipe and Strainer ........................
....................... 45 Removal
..................................................
........... 45 Balancer Assembly
..................................................
..... 46 Removal .................................
............................ 46 Connecting Rods,
Bearings, and Pistons, Rings .....................
.......... 46 Removal ...........................
.................................. 46 Flywheel
..................................................
............... 47 Removal .......................
......................................
47 Backplate and Oil Seal ........................
............................ 47 Removal
..................................................
........... 47 Crankshaft and Main Bearings
..............................................
47 Removal .......................................
...................... 47 Cylinder Head
..................................................
.......... 48 Disassembly ........................
.................................. 48 Inspection
and Repair .......................................
........... 48 Valve Seats .......................
....................................... 49 Valves
..................................................
................. 50 Valve Guides
..................................................
........... 51 Valve Springs .....................
....................................... 52 Rocker
Arms .............................................
................ 52 Push Rods ....................
...........................................
53 Cylinder Head .................................
........................... 53 Assembly
..................................................
.......... 53 Cylinder Block .....................
.......................................
54 Pistons .......................................
........................... 54 Disassembly and
Inspection .......................................
..... 54 Piston Rings ............................
................................. 57 Connecting
Rods .............................................
............ 57 Pin to Bushing Clearance
...............................................
58 Connecting Rod Bearing ........................
........................... 59 Clearance Check
..................................................
.... 59 Pistons, Rings, and Connecting Rod
.........................................
60 Assembly ......................................
...................... 60
Section
10-2
9
SECTION 10 - ENGINE - CHAPTER 1
Description Page Crankshaft - Main Bearing and
Thrust Washer ................................ 61
Removal and Inspection ..........................
...................... 61 Crankshaft
..................................................
............. 62 Bearing (Bushing)
..................................................
....... 63 Replacement ...........................
.............................. 63 Main Bearing
..................................................
........... 64 Assembly ..........................
.................................. 64 Port Block
..................................................
............. 65 Removal .........................
....................................
65 Installation ..................................
.......................... 65 Timing Gear
..................................................
............ 66 Camshaft .........................
.......................................
66 Disassembly ...................................
....................... 66 Inspection
..................................................
.......... 66 Assembly ...........................
................................. 67 Flywheel
..................................................
............... 67 Timing Gear Housing
..................................................
.... 68 Front Oil Seal and Steering Pump Seal
...................................... 68
Replacement ......................................
................... 68 Crankshaft and Bearing
Holder ...........................................
.. 69 Installation ...............................
............................. 69 Rear Oil Seal
and Backplate ....................................
............ 69 Installation .....................
.......................................
69 Flywheel ......................................
........................... 70 Installation
..................................................
.......... 70 Pistons and Connecting Rods
..............................................
70 Installation ..................................
.......................... 70 Balancer Assembly
(N844 and N844L Engines) .........................
...... 71 Installation ..........................
.................................. 71 Balancer
Shims ............................................
........... 71 Oil Suction Pipe and Suction
Strainer ........................................
72 Installation .................................
........................... 72 Oil Sump
..................................................
.............. 72 Installation ...................
.........................................
72 Camshaft and Camshaft Gear ....................
.......................... 72 Installation
..................................................
.......... 72 Idler Gear, Oil Pump, and Injection
Timing .................................... 73
Installation .....................................
....................... 73 Timing Gear Cover
..................................................
...... 73 Installation ...........................
................................. 73
Section
10-3
10
SECTION 10 - ENGINE - CHAPTER 1
Description Page Crankshaft Pulley
..................................................
....... 73 Installation ..........................
.................................. 73 Fuel
Injection Pump ...................................
.................... 74 Installation
..................................................
.......... 74 Hydraulic Oil Pump
..................................................
..... 74 Installation ............................
................................ 74 Power
Steering Pump ....................................
................. 75 Installation
..................................................
.......... 75 Head Gasket Selection
..................................................
.. 75 Selection Chart ............................
............................ 75 Cylinder Head
..................................................
.......... 76 Installation .......................
..................................... 76 Valve
Clearance ........................................
.................. 76 Adjustment
..................................................
......... 76 Valve Cover .........................
.....................................
77 Installation ..................................
.......................... 77 Water Pump and
Cooling Fan ......................................
........ 77 Installation .........................
................................... 77 External
Oil Tube .........................................
................ 77 Assembly .....................
....................................... 77 Glow
Plug and Connector ...............................
................... 78 Installation
..................................................
.......... 78 Fuel Injector ......................
.......................................
78 Installation ..................................
.......................... 78 Fuel Piping
..................................................
............. 78 Installation ....................
........................................
78 Alternator and Temperature Sender Switch
................................... 79
Installation .....................................
....................... 79 Exhaust Manifold
..................................................
....... 79 Installation ..........................
.................................. 79 Description
of Operation - Engine Lubrication System
............................. 80 Oil Filter
..................................................
............... 83 Construction and Function
..............................................
83 Maintenance ...................................
....................... 83 Oil Pump
..................................................
.............. 83 Removal ........................
.....................................
83 Inspection ....................................
........................ 83 Installation and
Adjustment .......................................
...... 84 Engine Oil Pressure ....................
................................... 85
Section
10-4
11
SECTION 10 - ENGINE - CHAPTER 1
Description Page Oil Pressure Relief Valve
..................................................
. 86 Removal .....................................
........................ 86 Installation
..................................................
.......... 86 Oil Consumption ....................
......................................
86 Description of Operation - Cooling System
...................................... 87
Maintenance ......................................
....................... 89 Coolant
..................................................
................ 89 Radiator Cap
..................................................
........... 89 Thermostat ........................
...................................... 90 Water
Pump .............................................
................ 90 Cooling Fan
..................................................
............ 90 Overhaul - Cooling System
..................................................
.. 91 Radiator ...................................
.............................. 91 Removal
..................................................
........... 91 Inspection and Repair
..................................................
92 Installation .................................
........................... 92 Water Pump
..................................................
........... 93 Removal ...........................
.................................. 93 Inspection
and Repair .......................................
........... 95 Installation ......................
......................................
95 Thermostat ....................................
.......................... 96 Removal
..................................................
........... 96 Inspection and Repair
..................................................
96 Installation .................................
........................... 97 Cab Heater
..................................................
............ 97 Installation .....................
....................................... 97
Section
10-5
12
SECTION 10 - ENGINE - CHAPTER 1 CYLINDER HEAD AND
VALVE TRAIN COMPONENTS The cylinder head
incorporates the valve assem- blies, rocker
arms, rocker shaft, push rods, and lift- ers. A
swirl chamber located between the injector as-
sembly and the main combustion chamber of the
cylinders provides improved starting and greater
fuel efficiency. Initial combustion starts in
the precombus- tion chamber and as the expansion
occurs a strong swirl pattern is created in the
main combustion cham- ber for more complete
combustion of the air-fuel mix- ture. The air
intake manifold is separate from the cast
aluminum valve cover on all these engines. The
ex- haust manifold is bolted on the left-hand
side of the cylinder head on each of the models.
Cylinder heads have integral valve guides.
Standard size valves only are used. The cylinder
block assembly contains the pistons, connecting
rods, crankshaft, timing gears, and en- gine oil
pump. The crankshaft is supported on five main
bearings. The front bearing is positioned in a
bore in front of the block. The other bearings
are split liners located in holders bolted to
the block. The cam- shaft is supported on four
ball bearings located in the block.
76076249
76076250
MODEL N844 and N844L
4
13
SECTION 10 - ENGINE - CHAPTER 1 SEPARATING THE
TRACTOR AT THE CLUTCH HOUSING/ENGINE - 12X12
TRANSMISSION Removal
- Remove the negative (-) battery cable, 1, and the
positive () battery cable, 2, from the battery. - Drain all of the hydraulic fluid from the
transmis- sion and the differential into a
suitable container. - Disconnect the headlight wire harness plug and
remove the hood from the tractor. - Remove the seat, and the seat base assembly from
the tractor. - Remove the light bars from the fenders and the
ROPS. - If equipped, remove the remote loader control
valve, 1, and the connecting hydraulic tubes from
the right fender. - Remove the left and right fenders from the
tractor.
1
2
30997558
5
1 30997555
6
- Remove the left, 1, and right, 2, rear hood side
panels. - Disconnect and remove the throttle cable from
the foot throttle control pedal, located on the
right deck.
2
1
- Remove the left and the right deck from the trac-
tor. - Disconnect the throttle cable from the dash
mounted throttle control lever. - 10000864
7
14
SECTION 10 - ENGINE - CHAPTER 1
12. Loosen and remove the two or four instrument
panel retaining screws, 1. Remove the instru-
ment panel, 2, from the dash housing. Discon-
nect the wiring connector from the instrument
panel.
1
1
2
1
2 1
76075175
10034980
8
- Drive the roll pin, 1, from the lower shuttle
shift shaft, 2. Remove the retaining ring, 3,
and the roll pin, 4, from the lower main shift
shaft, 5. Loosen and remove the retaining bolts,
6, securing the main shift bracket, 7, and the
shuttle shift brack- et, 8, to the steering
column, 9. Remove the shift shaft assemblies by
feeding the control levers down through the dash
housing. - Remove the dash housing from the firewall. Dis-
connect the wiring connectors from the dash
switches. - Disconnect the main wiring harness connector.
9
6
8
7
6
2
5
4
1
3
10996566
9
16. Remove the firewall support bracket, 1, from
the firewall, 2, and the clutch housing, 3.
2 1 3 20000908
10
15
SECTION 10 - ENGINE - CHAPTER 1
- Disconnect the power steering return hose, 4,
from the hydraulic system inlet tube, 1. Remove
the hydraulic system inlet tube, 1, from the hy-
draulic pump, 2. - Remove the hydraulic system pressure tube, 3,
from the hydraulic pump, 2, and the diverter
valve.
1
4
2
3
76075731
11
19. Disconnect the wires, 1, on the starter, 2,
and re- move the starter from the tractor.
2
1
30997565
12
- If equipped with FWD, remove the roll pins, 1,
from the front and rear of the FWD driveshaft, 2,
and remove the driveshaft from the tractor. - Drain the engine oil into a suitable container
and remove the oil filter.
2
1
1
20000904
13
16
SECTION 10 - ENGINE - CHAPTER 1
- Remove the fuel supply, 1, and return, 2, lines
from the fuel filter, 3. - Drain the fuel tank into a suitable container.
2 1
76075737
14
24. Attach a chain sling, 1, to the two hoist
eyes, 2 and 3, on the engine.
1 2 3
76075738
15
- Attach a suitable hoist, 1, to the chain sling,
2. - NOTE The hoist is used for supporting the engine
and axle assembly, not for lifting. - Roll a floor jack under the tractor from the rear
of the tractor, and place under the clutch
housing. Raise the jack enough to support the
drive train.
1 2
76075739
16
17
SECTION 10 - ENGINE - CHAPTER 1
- Remove the buckle-up bolts, 1, that secure the
engine, 2, to the clutch housing, 3. - NOTE The hoist and/or the floor jack may need to
be raised or lowered to allow the separation of
the en- gine from the clutch housing. - Carefully roll the drive train away from the en-
gine, using the floor jack for support.
1
1
3
2
20000905
17
SEPARATING THE TRACTOR AT THE ENGINE/FRAME 1.
Use jack stands under the frame rails to support
the front frame/engine assembly.
10000870
WARNING
Make sure the front frame/engine assembly is se-
curely supported before removing the chain sling
from the engine.
2. Remove the chain sling from the two hoist eyes
on the engine.
18
3. Remove the power steering lines, 1, from the
power steering control motor, 2, the frame, 3,
and the power steering pump, 4.
2
3
4
1
76075732
19
18
Suggest If the above button click is invalid.
Please download this document first, and then
click the above link to download the complete
manual. Thank you so much for reading
19
SECTION 10 - ENGINE - CHAPTER 1
4. Remove the air cleaner assembly, 1, from the
firewall, 2.
1
2
20002366
20
5. Remove the muffler guard, 1, from the tractor.
1 3 2
30996394
21
- Remove the muffler, 1, and the exhaust pipe, 2,
from the tractor. - Drain the coolant from the radiator into a
suitable container. - Remove the top and the bottom radiator hoses.
- Remove the radiator and the oil cooler (if
equipped) from the tractor.
1 2 20002367
22
10-29
20
https//www.ebooklibonline.com Hello dear
friend! Thank you very much for reading. Enter
the link into your browser. The full manual is
available for immediate download. https//www.eb
ooklibonline.com
Recommended

