EClassroom Instructional Guide - PowerPoint PPT Presentation
1 / 12
Title:
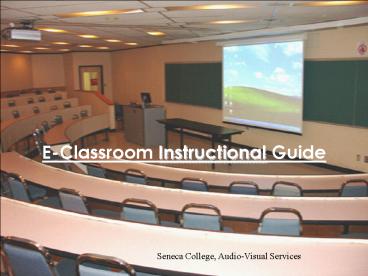
EClassroom Instructional Guide
Description:
Enter the access code using the keypad to open the cabinet. ( when you hear a click push the door in and then pull open to release the magnetic lock) ... – PowerPoint PPT presentation
Number of Views:25
Avg rating:3.0/5.0
Title: EClassroom Instructional Guide
1
E-Classroom Instructional Guide
Seneca College, Audio-Visual Services
2
Crestron Touch Panel E-Classrooms
3
STEP 1 Logging into the system
- Activate the panel by pressing anywhere on the
screen. - Enter the access code using the keypad to open
the cabinet. (when you hear a click push the door
in and then pull open to release the magnetic
lock) - Access codes are given to faculty only by
Audio-Visual Services, and are found on the
Electronic Classroom Status module on
MySeneca.
Note In the Markham campus lecture hall the
cabinet is located on the back wall, behind the
podium.
4
STEP 2 Selecting a source
- Select a source (choose between DVD, Computer
etc.) by pressing one of the tab options on the
touch panel screen. The projector, screen and
lights will automatically switch to the
pre-assigned settings.
- Volume, Lighting and Screen controls are
available on the left and right hand sides of the
touch panel screen.
5
STEP 3 Showing a DVD/VHS
- When selecting the DVD tab the DVD menu will
appear on the screen. This has all of the
play/stop/fast forward and rewind options on it.
- By pressing the More button (above), a new menu
will appear. This menu (right) has the
traditional arrow buttons that help navigate
through the DVD menus.
- The menu under the VHS tab works the same way
6
STEP 4 Using the Document Camera
Markham/S_at_Y Campus
- Once you have selected Document Camera press
the power switch to turn the unit on. - Press the Lamp button to change from the top
light (for showing opaque items) to the base
light (for showing transparencies)
Power Switch
Lamp Button
Newnham/King/S_at_Y Campus
- Pull up on the lens head until the supporting arm
is fully extended and - locked into place
- Point lens head down to the white base of the
document camera - Place item you want to display onto the white
base and adjust the - zoom control
- When finished, fold document camera back down and
close - drawer. Collapse camera by grasping ring and
pull toward you
Note in e-Classrooms the document cameras are
kept in the drawer on the side of the podium.
Power Switch
7
STEP 5 Using external devices
- Classroom computers support floppy
disks, CDs and DVDs. There are two USB ports
located on the front of the computer for use with
USB flash memory keys.
- There is another panel on the podium for
connecting external devices such as video
cameras, laptop internet, microphones etc.
8
STEP 6 Plugging in your Laptop
- A VGA cable is available on top of the podium for
connecting laptop computers. Once plugged in, the
image from the laptop will automatically display.
If you do not see a picture you will have to
trigger the laptop. This is done by pressing a
combination of the Fn (Function) button on the
laptop with the appropriate F key. An example is
above. - F keys are marked with a symbol of a monitor or
the words LCD/CRT - For Laptop audio, plug the audio cable attached
to the VGA cable into the headphone jack on your
laptop computer.
9
STEP7 Turning off the system
- Once the PWR OFF button has been selected, the
shutdown menu appears. If you want to shut down
press on YES. Pressing NO will return to the
main menu.
- When shutting down the system make sure you
manually shut down the computer. This is done by
clicking on Start, and selecting Shut Down.
You must also press the PWR OFF button on the
bottom right hand corner of the touch screen
panel.
10
Troubleshooting Computer Audio
All the equipment is on but there is still no
Audio.
- Make sure that the volume on the computer is
turned up and not muted.
- To do this double click on the speaker icon
located on the bottom right hand corner of your
screen. A fader bar will appear. Make sure the
Mute option is not marked and turn the level to
the highest point.
11
Troubleshooting (cont.) Computer Audio
All the equipment is on, and the computer volume
is up, yet there is still no audio when I play my
computer movie files.
- Each Media player has its own volume and mute
control. Please make sure that your levels are up
- The Mute button is indicated with a icon of a
speaker - The Volume is indicated by a fader that moves
from left to right.
12
Contact Us!
Pressing the ? will open a new page with A/Vs
information.
If you have any further problems, do not hesitate
to contact Audio-Visual Services at your campus
Library. An Audio-Visual technician will be more
than happy to help.
Markham Campus Telephone 416-491-5050 ext. 7523
Email avrequest_MK_at_senecac.on.ca
King Campus Telephone 416-491-5050 ext. 5110
Email avrequest_KG_at_senecac.on.ca
Newnham Campus Telephone 416-491-5050 ext. 2598
Email avrequest_at_senecac.on.ca
York Campus Telephone 416-491-5050 ext. 3054
Email avrequest_SY_at_senecac.on.ca


