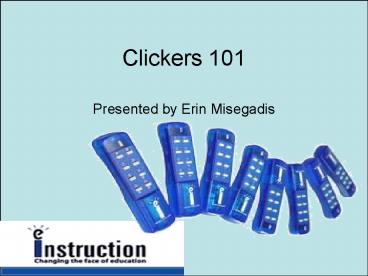
Clickers 101 PowerPoint PPT Presentation
1 / 28
Title: Clickers 101
1
Clickers 101
- Presented by Erin Misegadis
2
IR vs RF Clickers
- IR clickers are best used when for teacher led
activities when students can see the response
screen.
Old Clicker New Clicker
3
IR vs RF Clickers
- RF clickers are usually used for assessments,
have a LCD screen and can input letters, symbols,
or numbers for question answers.
Old Clicker
New Clicker
4
Opening CPS
- When starting CPS for the first time you will
need to Create a new database. - Create a name for your database that has meaning
or significance for your purposes, and save it
where you will remember where to find it.
5
Opening CPS
6
Opening CPS
7
Databases and Classes
- When creating new databases and uploading classes
to your databases, you may be asked for your
CPSOnline user id and password. - Every teacher that has been entered into eSIS
already has a user id and password. - You may change your CPSOnline user id and
password if you like, but ITD can not access your
new information if you change it. You will have
to call CPS customer service if you forget your
password or user id.
8
CPS Online Password
- sssYour 3-digit building ID
- F1st letter of the teachers first name
- LLLL1st four letters of teachers last name
- MMteachers birth month
- YYteachers birth year (197878)
- 134134. This is a unique district identifier
from CPS. - Ex 214emise0278134
9
Creating Classes in CPS
- If you have been entered into eSIS then you can
upload your class lists on CPSOnline as follows - Open CPS, select the Prepare tab, select the
Classes and Students tab, and click Import.
10
Creating Classes in CPS
11
Creating Classes in CPS
12
Creating Classes in CPS
13
Creating Classes in CPS
- Click Done on the next screen to appear, and
you can now view your classes. - You may also create a class by yourself by
following these steps - From the same screen where you started class list
import find the New tab and select it.
14
Creating Classes in CPS
15
Creating Classes in CPS
16
Creating Classes in CPS
17
Creating Classes in CPS
Name your class and click Next.
18
Creating Classes in CPS
- Click Next on the following screen, and Done
on the screen that says Congratulations. - You are now ready to start adding students to
your class.
19
Adding Students to a Class
From the same screen, select New and Student.
20
Adding Students to a Class
You may now start entering student information.
When you have completed one students
information, you may either click New and then
Student again, or you may simply hit the
Enter key.
21
Creating Lessons
22
Creating Lessons
23
Creating Lessons
24
Creating Lessons
Select your font style, size, and color. You may
then begin typing your question and answer
options. Be sure to select the correct answer
option.
25
Creating Lessons
26
Engaging Lessons
- Engaging lessons will be demonstrated by your
presenter today, as we do not all have clickers
sets to use.
27
Reviewing Reports
- Reviewing reports will also be demonstrated by
your presenter today because you do not have any
reports to view, as you have not engaged any
lessons.
28
WPS Clicker Resources
- To get online resources for clickers, go to
www.usd259.com - Next go to the Instructional Technology website.
- Select the Clickers resource tab.

