
9. Modify the coding for the SelectedIndexChanged event procedure PowerPoint PPT Presentation
1 / 97
Title: 9. Modify the coding for the SelectedIndexChanged event procedure
1
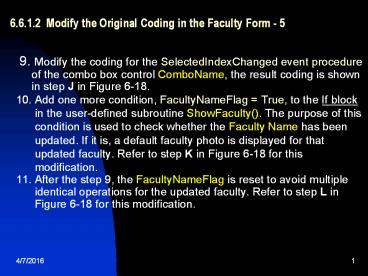
6.6.1.2 Modify the Original Coding in the
Faculty Form - 5
- 9. Modify the coding for the SelectedIndexChanged
event procedure - of the combo box control ComboName, the
result coding is shown - in step J in Figure 6-18.
- 10. Add one more condition, FacultyNameFlag
True, to the If block - in the user-defined subroutine
ShowFaculty(). The purpose of this - condition is used to check whether the
Faculty Name has been - updated. If it is, a default faculty photo
is displayed for that - updated faculty. Refer to step K in Figure
6-18 for this - modification.
- 11. After the step 9, the FacultyNameFlag is
reset to avoid multiple - identical operations for the updated
faculty. Refer to step L in - Figure 6-18 for this modification.
2
6.6.1.2 Modify the Original Coding in the
Faculty Form - 6
- Another important point to be noted is that some
event types may be lost for some command buttons
event procedures such as Select.Click,
Back.Click, Insert.Click, combo boxs Drop-Down
and combo boxs SelectedIndexChanged in the code
window of the Faculty form since we performed a
copy-paste operation for this form in section
6.5.1.1 in this Chapter. To fix these bugs, just
open the code window of the Faculty form and add
the associated event types for each event
procedure. An example of adding the event type
for the Select buttons Click event procedure is
shown below (the added part is highlighted with
the blue color) - Private Sub cmdSelect_Click(ByVal sender As
System.Object, ByVal e As System.EventArgs)
Handles cmdSelect.Click
3
6.6.1.2 Modify the Original Coding in the
Faculty Form - 7
Figure 6-18
4
6.6.1.3 Develop Codes to Update Data
- As we mentioned in the previous sections, to
update or delete data using this project, one can
insert a new record into the database and then
that inserted record can be updated or deleted
completely (including update the primary key).
Another way is to update an existing record from
our sample database without touching the primary
key. To update or delete an existing record from
our related tables, one must follow three steps
listed in section 6.1.1. - Open the Update buttons Click event procedure on
the Faculty form by double clicking the Update
button from the Faculty form window and enter the
following codes that are shown in Figure 6-19
into this event procedure.
5
6.6.1.3 Develop Codes to Update Data - 2
6
6.6.1.3 Develop Codes to Update Data - 3
- The only explanation to this piece of coding is
step K. - The coding for the TextChanged event procedure
of the Faculty Name textbox is very simple. If a
TextChanged event occurs, which means that a new
faculty name is entered into this textbox and the
user wants to update the faculty name. Before we
can set the FacultyNameFlag, we must check and
confirm whether this event is triggered by the
Update buttons Click or the Select buttons
Click event procedure since both procedures can
trigger this event. We only take care of the
event triggered by the Update buttons Click
event procedure because that means an update
occurs. The FacultyNameFlag is set only for that
situation and it is used for the validation of
this updating (step J in Figure 6-18). Also reset
the SelectFlag if it is set to avoid multiple
duplicated operations.
7
6.6.1.4 Validate the Data Updating
- We do not need to add any new form window to
perform this data validation, and we can use the
Faculty form to perform this job. By clicking the
Select button on the Faculty form window, we can
perform the selection query to retrieve back the
updated faculty record from the database and
display it on the Faculty form. A small change to
the coding of the Select buttons Click event
procedure is shown in step G in Figure 6-17. - Before we can run the project to test the data
updating functionality, we want to complete the
coding for the data deleting operation first.
8
6.6.2 Delete Data From the Faculty Table for the
SQL Server Database
- To delete data from our database, we have two
ways to go one way is first to insert a new
record into the Faculty table and then delete
that new inserted data. Another way is to delete
existing data from our related tables by
following two steps - 1. First delete records from the child tables
(LogIn and Course tables) - 2. Second delete record from the parent table
(Faculty table) - The topics of deleting existing data from our
related tables are discussed in sections 6.8.4
and 7.7.4 by calling the stored procedures. An
example of deleting a faculty member from the
Faculty table, LogIn table and the Course table
is used to illustrate how to perform this data
deleting among related tables. The databases we
will use are the Oracle database (section 6.8.4)
and the SQL Server database (section 7.7.4). In
this section we only concentrate on deleting a
new inserted record from our database.
9
6.6.2.1 Develop Codes to Delete Data
- The data deleting functionality is performed by
using the Delete buttons Click event procedure
in the Faculty form window. - Open the Delete buttons Click event procedure
and enter the following codes that are shown in
Figure 6-20 into this event procedure.
10
6.6.2.2 Validate the Data Updating and Deleting
- As we did for the validation for the data
updating in the last section, we do not need to
create any new form to do this validation, and we
can use the Faculty form to perform this data
validation. - Before we can run the project, make sure that a
default faculty photo file 'Default.jpg' has been
stored in the default folder in our project. In
this application, this default folder is the
folder in which the executable file of our Visual
Basic.NET project is located. - Click the Start Debugging button to start our
project, enter the suitable username and password
to the LogIn form, and select the item Faculty
Information from the Selection form to open the
Faculty form window. Click the Insert button to
open the Insert Faculty Form window to first
insert a new faculty record, which is shown
below, into the Faculty table.
11
6.6.2.2 Validate the Data Updating and Deleting
- 2
- The finished new faculty information window is
shown in Figure 6-21. Click the Insert button to
insert this new record into the Faculty table. - Click the Back button to return to the Faculty
form to validate this data insertion. Click the
drop-down arrow on the combo box control
ComboName, you can find that the new inserted
faculty name Peter Jones has been in there. Click
and select it, click the Select button to
retrieve back this new inserted record and
display it in this form.
12
6.6.2.2 Validate the Data Updating and Deleting
- 3
- Now lets test the data updating functionality by
perform the following modifications to this new
faculty record - Peter Steff Faculty Name textbox
- Professor Title textbox
- MTC-358 Office textbox
- 750-378-5577 Phone textbox
- Click the Update button to update this record in
the Faculty table. - To confirm this data updating, go to the combo
box control ComboName and you can find this
updated name. To test this data updating, first
lets select another faculty name from the box
and click the Select button to show all
information for that faculty. Then go to the
combo box again and select our updated faculty
name from the box, and click the Select button to
retrieve back that updated information for that
faculty.
13
6.6.2.2 Validate the Data Updating and Deleting
- 4
- Immediately you can find that all updated
information related to that faculty is displayed
in this form. This means that our data updating
is successful. Your updated faculty information
window is shown in Figure 6-22.
14
6.6.2.2 Validate the Data Updating and Deleting
- 5
- Now lets test the data deleting functionality by
clicking the Delete button to try to delete this
updated faculty record from the Faculty table. - Click Yes to the message box and all updated
faculty information stored in seven textboxes is
gone. - Is our data deleting successful?
- To answer this question, click the Select button
again to try to retrieve back that updated
faculty information from the Faculty table. - What happened after you click the Select button?
A message No matched faculty found is shown up,
and this means that the updated faculty
information has been successfully deleted from
the Faculty table. Yes, our data deleting is
successful.
15
6.7 Update and Delete Data for Oracle Database
Using the Run Time Objects
- Because of the coding similarity between the SQL
Server and Oracle databases for the data updating
and deleting, we only show the differences with
those coding for SQL Server database. - The main differences between the SQL Server and
Oracle databases are the query strings for data
deleting and updating. In this section, we
concentrate on these query strings. - We want to modify the project SQLUpdateDeleteRTObj
ect we developed in the last section to create
our new project OracleUpdateDeleteRTObject in
this section. Open that project and perform the
following operations to make it a new project. - Open the Windows Explorer and create a new folder
Chapter 6 if you have not, copy the project
SQLUpdateDeleteRTObject to the new folder
C\Chapter 6. Change the name of the project from
SQLUpdateDeleteRTObject to OracleUpdataDeleteRTObj
ect. Double click the OracleUpdataDeleteRTObject.v
bproj to open this project.
16
6.7 Update and Delete Data for Oracle Database
Using the Run Time Objects - 2
- On the opened project, perform the following
modifications - Go to ProjectOracleUpdataDeleteRTObject
Properties menu item to open the projects
property window. Change the Assembly name from
SQLUpdateDeleteRTObject to OracleUpdataDeleteRTObj
ect and the Root namespace from to
OracleUpdataDeleteRTObject, respectively. - Click the Assembly Information button to open the
Assembly Information dialog box, change the
Title and the Product to OracleUpdataDelete-RTOb
ject. Click the OK to close this dialog box. - Go to the FileSave All to save those
modifications. Now we are ready to develop our
codes based on our new project OracleUpdataDeleteR
TObject. - We can use all graphical user interfaces from
this modified project, and the only modifications
we need to do are the coding parts for each form
window.
17
6.7 Update and Delete Data for Oracle Database
Using the Run Time Objects - 3
- Basically we need to perform the following
modifications on the coding - 1. Add the Oracle namespace reference to the
project - 2. Modify the Imports commands
- 3. Modify the connection string in the LogIn
form - 4. Modify the SELECT query string for the LogIn
buttons Click event procedure in the LogIn form - 5. Modify the SELECT query string for the
Select buttons Click event procedure in the
Faculty form - 6. Modify the UPDATE query string for the
Update buttons Click event procedure in the
Faculty form
18
6.7 Update and Delete Data for Oracle Database
Using the Run Time Objects - 4
- Basically we need to perform the following
modifications on the coding - 7. Modify the DELETE query string for the
Delete buttons Click event procedure in the
Faculty form - 8. Modify the parameters names for the UPDATE
and the DELETE command objects in the Faculty
form. - 9. Modify two SELECT query strings for the
Select buttons Click event procedure and the
SelectedIndexChanged event procedure of the
Course listbox in the Course form - 10. Modify the INSERT query string for the
Insert buttons Click event procedure in the
Insert Faculty Form window - 11. Modify the parameters names for the INSERT
command object in the Insert Faculty Form window - 12. Modify all prefixes for all Oracle classes
and objects used in this project
19
6.7.1 Add Oracle Namespace Reference and Modify
Imports Command
- Open the project and go to the Solution Explorer
window, right click the project and select Add
Reference item to open the Add Reference dialog
box. Browse down along the list until you find
the item System.Data.OracleClient, select it by
clicking it and click the OK button to add this
reference to our project. - Open the code windows of the following forms
- LogIn
- Faculty
- Course
- Insert Faculty Form
- Replace the Imports commands Imports
System.Data.SqlClient, which is located at the
second line at the top of each code window, with
the new command Imports System.Data.
OracleClient for all four form windows. Since we
will not use the Student and the SP Forms for
this project, leave them unchanged.
20
6.7.2 Modify Connection String and Query String
for the LogIn Form
- The modifications to the LogIn form can be
divided into three parts - Modifications to the connection string in the
Form_Load event procedure. - Modifications to the SELECT query string in the
TableAdapter LogIn buttons Click event
procedure. - Modifications to the SELECT query string in the
DataReader LogIn buttons Click event procedure.
21
6.7.2.1 Modify Connection String in the Form
Load Event Procedure
- Open the Form_Load event procedure of the LogIn
form and change the connection string to - Dim oraString As String "Data SourceXE" _
-
"User IDsystem" "Passwordreback" - Also change the prefixes of all data classes from
Sql to Oracle, the prefixes of all data objects
from sql to ora, respectively. - 6.7.2.2 Modify the SELECT Query String
in TabLogIn Button Event Procedure - Open the TabLogIn buttons Click event procedure
and change the SELECT query string to - Dim cmdString1 As String "SELECT user_name,
pass_word, faculty_id, student_id FROM LogIn " - Dim cmdString2 As String "WHERE
user_nameParam1 AND pass_wordParam2" - Also change the prefixes of all data classes and
objects from Sql to Oracle, and from sql to ora.
Change two dynamic parameters names from _at_Param1
to Param1, and from _at_Param2 to Param2.
22
6.7.2.3 Modify SELECT Query String in ReadLogIn
Button Event Procedure
- Open the ReadLogIn buttons Click event procedure
and change the SELECT query string to - Dim cmdString1 As String "SELECT user_name,
pass_word, faculty_id, student_id FROM LogIn " - Dim cmdString2 As String "WHERE user_namename
AND pass_wordword" - Also change the prefixes of all data classes from
Sql to Oracle, the prefixes of all data objects
from sql to ora. Change two dynamic parameters
names from _at_name to name, and from _at_word to word,
respectively. - 6.7.3 Modify the Query Strings for the
Faculty Form - This modification can also be divided into three
parts Modifications to the query string for the
Select buttons Click event procedure,
modifications to the query string for the Update
buttons Click event procedure and modifications
to the query string for the Delete buttons Click
event procedure.
23
6.7.3.1 Modify SELECT Query String for Select
Button Event Procedure
- Open the Select buttons Click event procedure
and change the query string to - Dim cmdString1 As String "SELECT
faculty_id,name,office, phone, college, title,
email FROM Faculty " - Dim cmdString2 As String "WHERE
namefacultyName" - Also change the prefixes of all data classes from
Sql to Oracle, the prefixes of all data objects
from sql to ora. Change the dynamic parameters
name from _at_facultyName to facultyName.
24
6.7.3.2 Modify UPDATE Query String for Update
Button Event Procedure
- Open the Update buttons Click event procedure
and change the query string to - Dim cmdString As String "UPDATE Faculty SET
faculty_idfaculty_id, namename " _
officeoffice, phonephone, collegecollege,
titletitle, emailemail " _ - "WHERE (name Param1)
- Change the prefixes of all data classes from Sql
to Oracle, the prefixes of all data objects from
sql to ora. Also modify the data types and the
names of the dynamic parameters inside the
UpdateParameters() subroutine as below - 1. Change the data type for all parameters from
SqlDbType to OracleType - 2. Remove the _at_ symbol before all parameters
names
25
6.7.3.3 Modify DELETE Query String for Delete
Button Event Procedure
- Open the Delete buttons Click event procedure
and change the query string to - Dim cmdString As String "DELETE FROM Faculty
WHERE (name Param1)" - Change the prefixes of all data classes from Sql
to Oracle, the prefixes of all data objects from
sql to ora. Also change the dynamic parameters
name from _at_Param1 to Param1, the data type from
SqlDbType to OracleType.
26
6.7.4 Modify the Query Strings for the Course
Form
- The modification to this form can be divided into
two parts modifications to the query string for
the Select buttons Click event procedure and
modifications to the query string for the Course
Listboxs SelectedIndexChanged event procedure. - 6.7.4.1 Modify SELECT Query String for Select
Button Event Procedure - Open the Select buttons Click event procedure
and change query string to - Dim cmdString1 As String "SELECT
Course.course_id, Course.course FROM Course,
Faculty " - Dim cmdString2 As String "WHERE
(Course.faculty_idFaculty.faculty_id) AND
(Faculty.namename)" - Change the prefixes of all data classes from Sql
to Oracle, the prefixes of all data objects from
sql to ora. Change dynamic parameters name from
_at_name to name, data type from SqlDbType to
OracleType. - Change the method GetSqlString() to
GetOracleString() in the user-defined subroutine
FillCourseReader().
27
6.7.4.2 Modify the SELECT Query String for
CourseList Event Procedure
- Open the Course Listboxs SelectedIndexChanged
event procedure and change the query string to - Dim cmdString1 As String "SELECT course_id,
credit, classroom, schedule, enrollment FROM
Course " - Dim cmdString2 As String "WHERE course_id
courseid - Change the prefixes of all data classes from Sql
to Oracle, the prefixes of all data objects from
sql to ora. Also change the dynamic parameters
name from _at_courseid to courseid, the data type
from SqlDbType to OracleType.
28
6.7.5 Modify the Query Strings for the Insert
Faculty Form
- Open the Insert buttons Click event procedure
from the Insert Faculty Form window and change
the query string to - Dim cmdString As String"INSERT INTO Faculty
(faculty_id,name, office, phone, - college, title, email) VALUES
(faculty_id,name,office,phone,college,title,
email) - Also modify the data types and the names of the
dynamic parameters inside the InsertParameters()
subroutine as below - Change the data type of the passed argument
command object from SqlCommand to OracleCommand - Change the data type for all parameters from
SqlDbType to OracleType - Remove the _at_ symbol before all parameters names
29
6.7.6 Other Modifications
- Change the prefixes of all data classes from Sql
to Oracle, the prefixes of all data objects from
sql to ora. These modifications include the
following procedures - Cancel buttons Click event procedure in the
LogIn form. - Form_Load event procedure of the Faculty form
- Form_Load event procedure of the Course form
- Form_Load event procedure of the Insert Faculty
Form - Exit buttons Click event procedure in the
Selection form - This modification also includes the data type of
nominal arguments passed into either subroutines
or functions in this project.
30
Testing the Data Updating and Deleting
- Click the Start Debugging button to run the
project. You may encounter some debug errors that
are caused by some old coding in the Student or
the SP form windows. Just comment out those lines
in this moment because we will not use those
coding. Finish the login process, and select the
item Faculty Information from the Selection form
to open the Faculty form window. Click the Insert
button to try to insert a new faculty record into
the database as shown in below.
31
Testing the Data Updating and Deleting - 2
- Click the Back button to return to the Faculty
form window to perform the data updating
operation. - Click the drop-down arrow from the combo box
control ComboName and you can find that the new
inserted facultys name has been there. Click it
to select it and click the Select button to
retrieve this new record back from the database
and display it in this form - Change the faculty information as follows
- Peter Jones Faculty Name textbox
- Professor Title textbox
- MTC-335 Office textbox
- 750-330-5555 Phone textbox
- Click the Update button to update this record in
the Faculty table in the database.
32
Testing the Data Updating and Deleting - 3
- To confirm this data updating, click the
drop-down arrow on the combo box control
ComboName, first we can select any other faculty
from the list and click the Select button to show
the information for that faculty. Then select the
updated faculty from the combo box control
ComboName and click the Select button to retrieve
back this updated faculty information and display
it in this form. Immediately you can find that
the faculty information has been updated and
displayed. Our data updating is successful. - Click the Delete button to delete this updated
faculty from the Faculty table in the database.
Click Yes to the confirmation message box, and
you can find that all information related to that
faculty is removed from all textboxes. To confirm
that data deleting, click the Select button to
try to retrieve back that deleted record from the
Faculty table, a message No matched faculty
found is displayed to indicate that that piece
of faculty information has been deleted from the
database.
33
6.8 Update and Delete Data Against Database
Using Stored Procedures
- Performing the data updating among related tables
is a very challenging topic. But the real issue
is that it is unnecessary to update the primary
key, or the faculty_id, in our Faculty table if
we want to update any faculty information from
the Faculty table in the database. Basically, it
is much better to insert a new faculty record
with a new faculty_id into the Faculty table than
updating that record because generally a primary
key is good for the lifetime of the database in
actual applications. Therefore, based on the
analysis above, we will perform the data updating
for all columns in the Faculty table except the
faculty_id in the following sections. - To delete records from related tables, we need to
perform two steps First delete records from the
child tables, and then delete those records from
the parent table. For example, if we want to
delete a record from the Faculty table, first we
need to delete those records that are related to
the record to be deleted from the Faculty table
from the LogIn and the Course tables (child
tables), and then we can delete the record from
the Faculty table (parent table).
34
6.8.1 Update Data For Access Database Using
Stored Procedures
- We want to modify the project SQLUpdateDeleteRTObj
ect to create our desired project
AccessUpdateRTObjectSP to discuss the data
updating to the Faculty table using the stored
procedures for the Microsoft Access database. - Copy that project SQLUpdateDeleteRTObject and
change the name, and perform the following tasks
to finish this project. - 1. Modify the existing project to access the
Microsoft Access database - 2. Create stored procedures in the Microsoft
Access database - 3. Call the stored procedure to update the
faculty information - 4. Confirm the faculty information updating
- Now lets start from the first part to modify the
project.
35
6.8.1.1 Modify the Existing Project
- Open Windows Explorer and create a new folder
Chapter 6 if you have not, and copy the project
SQLUpdateDeleteRTObject to the new folder
C\Chapter 6. Change the name of the project from
SQLUpdateDeleteRTObject to AccessUpdataRTObjectSP.
- Double click AccessUpdataRTObjectSP.vbproj to
open this project. - On the opened project, perform the following
modifications to get our desired project - Go to ProjectAccessUpdataRTObjectSP Properties
menu item to open the projects property window.
Change the Assembly name from SQLUpdateDeleteRTOb
ject to AccessUpdataRTObjectSP and the Root
namespace from SQLUpdateDeleteRTObject to
AccessUpdataRTObjectSP, respectively. - Click the Assembly Information button to open the
Assembly Information dialog box, change the
Title and the Product to AccessUpdataRTObjectSP.
Click the OK to close this dialog box.
36
6.8.1.1 Modify the Existing Project - 2
- Now we are ready to modify our codes based on our
new project AccessUpdataRTObjectSP. - The code modifications include the following
parts - 1. Change the Imports commands
- 2. Change the connection string in the LogIn
form - 3. Change the query strings for the LogIn
buttons event procedure in the LogIn form - 4. Change the query strings for the Select and
Update buttons event procedure in the Faculty
form - 5. Change the prefixes of all data class from
Sql to OleDb, the prefixes of all data object
from sql to acc for the LogIn, Faculty and
Selection forms. - Lets start from the first modification modify
the Imports commands
37
6.8.1.1.1 Modify the Imports Command and
Connection String
- Now Replace the second Imports command with the
following command - Imports System.Data.OleDb
- At the top of the LogIn and Faculty forms.
- Open the Form_Load event procedure of the LogIn
form and change the connection string as - Dim accString As String "ProviderMicrosoft.Jet.
OLEDB.4.0" _ -
"Data SourceC\database\CSE_DEPT.mdb" - Also change the prefixes of all data class from
Sql to OleDb, the prefixes of all data object
from sql to acc for the Form_Load event procedure.
38
6.8.1.1.2 Modify Query Strings for LogIn Button
Event Procedure
- There are two query strings located at two
different LogIn buttons event procedures the
TabLogIn and the ReadLogIn. Open these two event
procedures and modify these two query strings.
This modification is very easy and the only
change is to replace the keyword 'LIKE' in the
WHERE clause with the equal symbol ''. Perform
this modification to two query strings. - Also change the prefixes of all data class from
Sql to OleDb, the prefixes of all data object
from sql to acc for these two event procedures.
39
6.8.1.1.3 Modify Query Strings for Select and
Update Buttons
Event Procedures
- Open the Select and the Update buttons Click
event procedures to modify the query strings.
This modification is very easy and the only
change is to replace the keyword 'LIKE' in the
WHERE clause with the equal symbol '' for both
query strings. - Change the prefixes of all data class from Sql to
OleDb, the prefixes of all data object from sql
to acc for these two event procedures. - Other modifications for this form include
changing the data type of the passed argument
FacultyReader from the SqlDataReader to the
OleDbDataReader in the user-defined subroutine
FillFacultyReader(), changing the data type of
the passed argument cmd from the SqlCommand to
the OleDbCommand in the user-defined subroutine
UpdateParameters(). Also change the data type of
all parameters from the SqlDbType to the
OleDbType in the same subroutine.
40
6.8.1.1.4 Other Modifications
- Change the prefixes of all data class from Sql to
OleDb, the prefixes of all data object from sql
to acc for the following event procedure - Cancel buttons Click event procedure in the
LogIn form - Form_Load event procedure in the Faculty form
- Delete buttons Click event procedure in the
Faculty form - Exit buttons Click event procedure in the
Selection form - Because we will not use other forms in this
project such as the Course, Student, Insert
Faculty Form and the SP forms, so we do not need
to make modifications to those forms. One
possible problem is that you may encounter some
debug errors when you run this project because of
some un-modified codes in those forms. To solve
this problem, just comment out those codes that
have not been modified.
41
6.8.1.2 Create Stored Procedures in Microsoft
Access Database
- Open our sample database CSE_DEPT.mdb, and copy
that database and paste it in a folder in your
root drive, such as C\database. - On the opened database, select the Faculty table
from the list and click the Queries tab from the
Object list, double click the Create query in
Design view to open the Query Builder dialog box.
Then click the Close button to close the Show
Table dialog box. - Right click on the top pane and select the item
SQL View from the popup menu to open the SQL
window, which is shown in Figure 6-25. Enter the
Update statement that is shown in Figure 6-25
into this window as our stored procedure.
42
6.8.1.2 Create Stored Procedures in Microsoft
Access Database - 2
- Go to FileSave menu item to save this stored
procedure as AccessUpdateSP. - To confirm this stored procedure, we can run this
query inside the Access environment. Right click
the new created stored procedure AccessUpdateSP
from the list and select the Open item from the
popup menu, click the Yes to the message box to
begin to run this query. - Enter following updating faculty data to each
parameter input box - Frank Tailor name parameter
- MTC-228 office parameter
- 750-378-1220 phone parameter
- University of Miami college parameter
- Associate Professor title parameter
- ftailro_at_college.edu email parameter
- Ying Bai facultyName dynamic parameter
43
6.8.1.2 Create Stored Procedures in Microsoft
Access Database - 3
- After finish entering these new data, click the
Yes button to confirm that we want to perform
this data updating. - Now click the Tables from the Object list and
then double click the Faculty table to open it to
confirm our data updating. You can find that the
old record for the faculty named Ying Bai has
been replaced by our updated record, which is
shown in Figure 6-26.
44
6.8.1.2 Create Stored Procedures in Microsoft
Access Database - 4
- Now recover the original record for this faculty
with the following information since we want to
keep our data unique - Ying Bai name column
- MTC-211 office column
- 750-378-1148
phone column - Florida Atlantic University college column
- Assistant Professor title column
- ybai_at_college.edu email column
- At this point, we finished creating the stored
procedure in Microsoft Access database. Click the
FileSave menu item to save our original database
and close the sample database. Next lets develop
the codes in Visual Basic.NET to call this stored
procedure to perform the data updating action
against the database.
45
6.8.1.3 Call the Stored Procedure to Update the
Faculty Information
- First we need to add one more form-level variable
UpdateFlag as a monitor to indicate whether a
data updating has been occurred. This variable is
used later by the Select buttons event procedure
to validate the data updating action. - Then open the Update buttons Click event
procedure and add the following codes that are
shown in Figure 6-27 into this procedure.
46
6.8.1.3 Call the Stored Procedure to Update the
Faculty Information - 2
- The detailed coding for the subroutine
UpdateParameters() is shown in Figure 6-28. - Basically the coding is identical with the coding
we did for the last project. Two modifications
have been made The first parameter faculty_id
has been removed from this subroutine since we do
not need to update it. Second the name of the
dynamic parameter has been changed from _at_Param1
to _at_facultyName since the name we used for the
dynamic parameter in our stored procedure is
_at_facultyName. So the name used here must be
identical with the name we used in the stored
procedure.
47
6.8.1.4 Confirm the Faculty Information Updating
- We still use the Faculty form, exactly the Select
buttons Click event procedure in the Faculty
form, to perform the data validation for this
data updating. The only modification to this form
is that we add an Or condition to the If block in
the subroutine ShowFaculty() to detect whether
the UpdateFlag has been set. If it is, which
means that a data updating occurred, and we need
to display a default faculty photo for that data
updating. The modified coding is shown in Figure
6-29.
48
Test the Data Updating Using Stored Procedures -
1
- Click the Start Debugging button to start our
project. Finish the login process and select the
Faculty Information item from the Selection form
window to open the Faculty form. Keep the default
faculty name 'Ying Bai' from the combo box
control, click the Select button to display the
information for the selected faculty. - To update this faculty, enter the following
information into the associated textboxes to
perform this data updating - Frank Tailor Name textbox
- Associate Professor Title textbox
- MTC-228 Office textbox
- 750-378-1220 Phone textbox
- University of Miami College textbox
- ftailor_at_college.edu Email textbox
- Click the Update button to call the stored
procedure to update this faculty information in
the Faculty table in the database.
49
Test the Data Updating Using Stored Procedures - 2
- To confirm this updating, click the drop-down
arrow of the combo box control ComboName and
select any other faculty from the box, click the
Select button to display the information related
to that selected faculty. Then re-open the combo
box control Combo-Name and select our new updated
faculty name 'Frank Tailor' from the box. Click
the Select button to retrieve back that updated
faculty information from the database. The
updated faculty information is returned and
display, as shown in Figure 6-30.
50
Test the Data Updating Using Stored Procedures - 3
- In order to keep our database neat, you can open
the sample database and the Faculty table to
replace the updated faculty information by
entering the following data into the associated
columns - Ying Bai name column
- MTC-211 office column
- 750-378-1148 phone
column - Florida Atlantic University college column
- Assistant Professor title column
- ybai_at_college.edu email column
51
6.8.2 Update Data For SQL Server Database Using
Stored Procedures
- To update data using stored procedures developed
in the SQL Server database is very similar to the
data updating we performed in the last section.
With a small modification to the existing project
SQLUpdateDeleteRTObject, we can easily create our
new project SQLUpdateRTObjectSP to perform the
data updating by calling stored procedures
developed in the SQL Server database. - To develop a new project, we divide it into three
sections - 1. Modify the existing project
SQLUpdateDeleteRTObject to create our new project
SQLUpdateRTObjectSP. - 2. Develop the stored procedure in the SQL
Server database. - 3. Call the stored procedure to perform the
data updating and validate the updated faculty
information using the Faculty form window.
52
6.8.2.1 Modify the Existing Project to Create
Our New Project
- Create a new folder Chapter 6 if you have not,
and copy the project SQLUpdateDeleteRTObject to
the new folder C\Chapter 6. - Change the name of the project from
SQLUpdateDeleteRTObject to SQLUpdataRTObjectSP.
Double click the SQLUpdataRTObject-SP.vbproj to
open this project. - Perform the following modifications to get our
desired project - Go to ProjectSQLUpdataRTObjectSP Properties menu
item to open the projects property window.
Change the Assembly name from SQLUpdateDeleteRTOb
ject to SQLUpdataRTObjectSP and the Root
namespace from SQLUpdateDeleteRTObject to
SQLUpdataRTObjectSP, respectively. - Click the Assembly Information button to open the
Assembly Information dialog box, change the
Title and the Product to SQLUpdataRTObjectSP.
Click the OK to close this dialog box. - Go to the FileSave All to save those
modifications.
53
6.8.2.1 Modify the Existing Project to Create
Our New Project - 2
- The code modifications include the following
parts - 1. Add one more form-level variable UpdateFlag
to the Faculty form. This flag is used to
indicate whether an updating has been occurred
and it will be used later by the subroutine
ShowFaculty() to display a default faculty photo
for the updated faculty information. - 2. Add one more Or condition to the If block
in the subroutine ShowFaculty() to detect whether
the UpdateFlag has been set. If it is, which
means that a data updating occurred, and we need
to display a default faculty photo for that
updated faculty member. - 3. Change the query string for the Update
buttons event procedure in the Faculty form to
allow the procedure to call the stored procedure
to perform the data updating.
54
6.8.2.1 Modify the Existing Project to Create
Our New Project - 3
- Open the code window of the Faculty form and add
one more form-level variable UpdateFlag using
Private UpdateFlag As Boolean. - Open the user-defined subroutine ShowFaculty()
and add one more Or condition into this
procedure. Your finished modifications should
match those codes that are shown in Figure 6-31.
55
6.8.2.1 Modify the Existing Project to Create
Our New Project - 4
- Regularly the modification step 3 should be
performed after the stored procedure has been
created since we need some information from the
stored procedure to execute modifications in step
3, such as the name of the stored procedure and
names of the input parameters to the stored
procedure. To make this process simple, we
assumed that we have known those pieces of
information and we can put them into our
procedure later. These assumed information
includes - 1. The name of the stored procedure assume it
is dbo.UpdateFacultySP. - 2. The names of the input parameters assume
that the names of those input parameters are
identical with the columns names in the
database. - 3. The name of the input dynamic parameter
assume it is _at_facultyName.
56
6.8.2.1 Modify the Existing Project to Create
Our New Project - 5
- Based on these assumptions, we can first modify
our coding in the Update buttons Click event
procedure. - Open the Update button Click event procedure and
modify its coding. Your finished modifications to
this procedure should match those codes that are
shown in Figure 6-32. The modified parts have
been highlighted with the bold words.
57
6.8.2.1 Modify the Existing Project to Create
Our New Project - 6
- The modifications to the coding of the
user-defined subroutine UpdateParameters() is
shown in Figure 6-33. - Two modifications are performed for this
subroutine The first parameter faculty_id is
removed from this subroutine since we do not need
to modify this column when we performed a data
updating. Another modification is that the name
of the dynamic parameter has been changed from
the _at_Param1 to _at_facultyName since we must keep
all names of the input parameters to the stored
procedure identical with those parameters we used
in our coding in the Visual Basic.NET project.
58
6.8.2.2 Develop the Stored Procedure in the SQL
Server Database
- Open the Server Explorer in the Visual Studio
environment, and click the small plus icon before
our sample database CSE_DEPT.mdf to expand it.
Then right click the Stored Procedures folder and
select the item Add New Stored Procedure to open
the default procedure window. - Change the name of the stored procedure to
'dbo.UpdateFacultySP', which should be identical
with the name of the stored procedure we used in
our coding in the last section. Then add the
codes that are shown in Figure 6-34 into this
stored procedure.
59
6.8.2.2 Develop the Stored Procedure in the SQL
Server Database - 2
- Refer to section 2.5.2 in Chapter 2 for the data
types of those input parameters, and they should
be identical with those data types of the
associated columns defined in the Faculty table. - Go to the menu item FileSave StoredProcedure1 to
save our stored procedure. - To test stored procedure, right click new created
stored procedure dbo.UpdateFacultySP, which is
located under the Stored Procedure folder, and
select the item Execute to open the Run Stored
Procedure dialog box. Enter the following updated
information into each field on the Value column
of this dialog box - Frank Tailor Name Value
- MTC-228 Office Value
- 750-378-1220 Phone Value
- University of Miami College Value
- Associate Professor Title Value
- ftailor_at_college.edu Email Value
- Ying Bai facultyName Value
60
6.8.2.2 Develop the Stored Procedure in the SQL
Server Database - 3
- Click the OK button to run this stored procedure.
- To confirm this execution is successful, go to
the Server Explorer window and right click the
Faculty table, select Show Table Data to open the
Faculty table. You can find that our updated
record is in there, which is shown as a
highlighted row in Figure 6-36.
61
6.8.2.2 Develop the Stored Procedure in the SQL
Server Database - 4
- In order to keep our database neat, we prefer to
recover this updated faculty record with the
original data. To do that, enter the following
information into this updated row to recover it - Ying Bai name column
- MTC-211 office column
- 750-378-1148 phone
column - Florida Atlantic University college column
- Assistant Professor title column
- ybai_at_college.edu email column
- Save and close the database, and lets call this
stored procedure from our Visual Basic.NET
project to test this data updating functionality.
62
6.8.2.3 Call the Stored Procedure to Perform
the Data Updating and
Validate the Updated Information
- Start our project and finish the login process,
and then select the Faculty Information item from
the Selection form to open the Faculty form
window. Keep the default faculty name 'Ying Bai'
selected from the combo box control, click the
Select button to display the information for the
selected faculty. - To update this faculty information, enter the
following information into the associated
textboxes to perform this data updating - Frank Tailor Name textbox
- Associate Professor Title textbox
- MTC-228 Office textbox
- 750-378-1220 Phone textbox
- University of Miami College textbox
- ftailor_at_college.edu Email textbox
- Click the Update button to call the stored
procedure to update this faculty information in
the Faculty table in the database.
63
6.8.2.3 Call the Stored Procedure to Perform
the Data Updating and
Validate the Updated Information - 2
- To confirm this updating, click the drop-down
arrow of the combo box control ComboName and
select any other faculty from the box, click the
Select button to display the information related
to that selected faculty. Then re-open the combo
box control Combo-Name and select our new updated
faculty name 'Frank Tailor' from the box. Click
the Select button to retrieve back that updated
faculty information. Immediately you can find
that the updated faculty information is returned,
which is shown in Figure 6-37.
64
6.8.2.3 Call the Stored Procedure to Perform
the Data Updating and
Validate the Updated Information - 3
- In order to keep our database neat, you can open
the sample database and the Faculty table to
recover the updated faculty information by
entering the following data into the associated
columns - Ying Bai name column
- MTC-211 office column
- 750-378-1148 phone
column - Florida Atlantic University college column
- Assistant Professor title column
- ybai_at_college.edu email column
65
6.8.3 Update Data For Oracle Database Using
Stored Procedures
- To update data using stored procedures developed
in the Oracle database is very similar to the
data updating and deleting we performed in the
project developed in section 6.7. With a small
modification to the existing project
OracleUpdateDeleteRTObject, we can easily create
our new project OracleUpdateRTObjectSP to perform
the data updating by calling stored procedures
developed in the Oracle database. - To develop a new project, we can divide the
process to three sections - 1. Modify the existing project
OracleUpdateDeleteRTObject to create our new
project OracleUpdateRTObjectSP. - 2. Develop the stored procedure in the Oracle
database - 3. Call the stored procedure to perform the
data updating and validate the updated faculty
information using the Faculty form window.
66
6.8.3.1 Modify the Existing Project to Create
Our New Project
- Open the Windows Explorer and create a new folder
Chapter 6 if you have not, and copy the project
OracleUpdateDeleteRTObject to the new folder
C\Chapter 6. Change the name of the project from
OracleUpdateDeleteRTObject to OracleUpdataRTObject
SP. - Double click the OracleUpdataRTObjectSP.vbproj to
open this project. - Perform the following modifications to get our
desired project - Go to ProjectOracleUpdataRTObjectSP Properties
menu item to open the projects property window.
Change the Assembly name from OracleUpdateDeleteR
TObject to OracleUpdataRTObjectSP and the Root
namespace from OracleUpdateDeleteRTObject to
OracleUpdataRTObjectSP, respectively. - Click the Assembly Information button to open the
Assembly Information dialog box, change the
Title and the Product to OracleUpdataRTObjectSP.
Click the OK to close this dialog box. - Go to the FileSave All to save those
modifications.
67
6.8.3.1 Modify the Existing Project to Create
Our New Project - 2
- The code modifications include the following
parts - 1. Add one more form-level variable UpdateFlag
to the Faculty form. This flag is used to
indicate whether an updating has been occurred
and it will be used later by the subroutine
ShowFaculty() to display a default faculty photo
for the updated faculty information. - 2. Add one more Or condition to the If block in
the subroutine ShowFaculty() to detect whether
the UpdateFlag has been set. If it is, which
means that a data updating occurred, and we need
to display a default faculty photo for that
updated faculty member. - 3. Change the query string for the Update
buttons event procedure in the Faculty form to
allow the procedure to call the stored procedure
to perform the data updating.
68
6.8.3.1 Modify the Existing Project to Create
Our New Project - 3
- Open the code window of the Faculty form and add
a form-level variable UpdateFlag using Private
UpdateFlag As Boolean. - Open the subroutine ShowFaculty() and add an Or
condition into this procedure. Your finished
modifications are shown in Figure 6-38. The codes
we developed in the previous sections have been
highlighted with the gray color as the background
and the new added codes are indicated with the
bold words.
69
6.8.3.1 Modify the Existing Project to Create
Our New Project - 4
- Regularly modification step 3 should be performed
after the stored procedure has been created since
we need some information from the stored
procedure to execute modifications in step 3,
such as the name of the stored procedure and the
names of the input parameters to the stored
procedure. To make simple, we assumed that we
have known those information and we can put those
pieces of information into our procedure later.
The assumed information includes - 1. The name of the stored procedure
UpdateFaculty_SP. - 2. The names of the input parameters
identical with the columns names in the
database. - 3. The name of the input dynamic parameter
_at_facultyName.
70
6.8.3.1 Modify the Existing Project to Create
Our New Project - 5
- Based on these assumptions, we can modify our
coding in the Update buttons Click event
procedure. The key point is that we need to
remember the names of these parameters and the
name of the stored procedure and use them for our
stored procedure when it is developed later. - Open the Update button Click event procedure and
modify its coding. Your finished modifications
are shown in Figure 6-39. The modified parts have
been highlighted with the bold words.
71
6.8.3.1 Modify the Existing Project to Create
Our New Project - 6
- The modifications to the coding of the
user-defined subroutine UpdateParameters() is
shown in Figure 6-40.
72
6.8.3.1 Modify the Existing Project to Create
Our New Project - 7
- Two modifications are performed for this
subroutine - The parameter faculty_id is removed from this
subroutine since we do not need to modify this
column when we performed a data updating. - Another modification is that the name of the
dynamic parameter has been changed from the
Param1 to the FacultyName since we must keep all
names of the input parameters to the stored
procedure identical with those parameters we used
in our coding in the Visual Basic.NET project.
The reason why we changed the input parameters
names by adding a prefix 'in' before each of them
is that the PL-SQL is a case-insensitive
language. In order to distinguish between the
columns names of the Faculty table and the input
parameters names, we must add this prefix.
73
6.8.3.2 Develop the Stored Procedure in the
Oracle Database
- Open the Oracle Database 10g XE home page by
going to StartAll ProgramsOracle Database 10g
Express EditionGo To Database Home Page items.
This time we want to use the SQL Command page to
create our stored procedure. The reason for that
is because we can run and test the stored
procedure directly in the Oracle Database 10g XE
environment as soon as the stored procedure is
done, and that is very convenient for us and we
do not need to wait to test it by calling the
finished stored procedure later from the Visual
Basic.NET project. - To open the SQL Command page, click the SQL icon
and select the item SQL CommandsEnter Command to
open this page.
74
6.8.3.2 Develop the Stored Procedure in the
Oracle Database - 2
- Enter the following codes that are shown in
Figure 6-41 into this page as the body of our
stored procedure.
75
6.8.3.2 Develop the Stored Procedure in the
Oracle Database - 3
- Now highlight the whole codes of this stored
procedure and click the Run button to create our
stored procedure. Immediately you can find a
message is displayed in the bottom pane in the
Results tab to indicate that the stored procedure
is created, which is shown below - Procedure created.
- 0.19 seconds
- To call this stored procedure to test it, type
the codes that are shown in Figure 6-42 under the
codes of stored procedure. Then highlight those
codes and click the Run button to run the stored
procedure.
76
6.8.3.2 Develop the Stored Procedure in the
Oracle Database - 4
- Figure 6-42 The codes to run the stored procedure
77
6.8.3.2 Develop the Stored Procedure in the
Oracle Database - 5
- If the stored procedure is correctly created and
executed, the running result, which is shown
below, is displayed in the bottom pane under the
Results tab. - Statement processed.
- 0.13 seconds
- Now lets open our Faculty table to confirm that
the selected row has been updated after the
stored procedure UpdateFaculty_SP is executed.
Click the Home button that is located at the
upper-right corner of the page to return the Home
page. Click the drop-down arrow on the Object
Browser icon and select the item BrowseTables to
open the Tables page.
78
6.8.3.2 Develop the Stored Procedure in the
Oracle Database - 6
- Click the Faculty table from the table list, and
then click the Data tab to open the Faculty
table, which is shown in Figure 6-43.
79
6.8.3.2 Develop the Stored Procedure in the
Oracle Database - 7
- Before we can close the Oracle Database 10g XE
window, it is highly recommend to recover the
Faculty table to its original value. To do that,
click the Edit button before the fourth row, and
then click the Delete button to remove this row.
Then click the Insert Row button and enter the
following information into the associated box to
recover the fourth row - B78880 Faculty Id box
- Ying Bai Name box
- MTC-211 Office box
- 750-378-1148 Phone box
- Florida Atlantic University College box
- Assistant Professor Title box
- ybai_at_college.edu Email box
- Click the Create button to insert this new row
into the Faculty table.
80
6.8.3.3 Call Stored Procedure to Perform Data
Updating and Validation
- Run project and finish the Login process, and
then select the Faculty Information item from the
Selection form to open the Faculty form window.
Keep the default faculty name 'Ying Bai' selected
from the combo box control, click the Select
button to display the information for the
selected faculty. - To update this faculty, enter the following
information into the associated textboxes to
perform this data updating - Frank Tailor Name textbox
- Associate Professor Title textbox
- MTC-228 Office textbox
- 750-378-1222 Phone textbox
- University of Miami College textbox
- ftailor_at_college.edu Email textbox
- Click the Update button to call the stored
procedure to update this faculty information in
the Faculty table in the database.
81
6.8.3.3 Call Stored Procedure to Perform Data
Updating and Validation - 2
- To confirm this updating, click the drop-down
arrow of the combo box control ComboName and
select any other faculty from the box, click the
Select button to display the information related
to that selected faculty. Then re-open the combo
box control Combo-Name and select our new updated
faculty name 'Frank Tailor' from the box. Click
the Select button to retrieve back that updated
faculty information. you can find that the
updated faculty information is returned, which is
shown in Figure 6-44.
82
6.8.3.3 Call Stored Procedure to Perform Data
Updating and Validation - 3
- To keep our database unique and neat, we
recommend that you should recover the original
faculty information for the updated faculty. To
do that, enter the following original information
into the associated textbox - Ying Bai name column
- MTC-211 office column
- 750-378-1148 phone
column - Florida Atlantic University college column
- Assistant Professor title column
- ybai_at_college.edu email column
- Click the Update button to recover this
information. - Click the Back and then Exit buttons to close our
project.
83
6.8.4 Delete Data From the Oracle Database
Using Stored Procedures
- In this section we discuss how to delete an
existing record from the Oracle database using
the stored procedure. As we mentioned in the
previous sections, to delete data from related
tables, one must first delete data from the child
table, and then remove data from the parent
table. We use our Faculty table as an example to
show how to delete an existing record from
related tables. - In our sample database, there are two child
tables related to our Faculty table, the LogIn
table and the Course table. One child table is
related to the Course table, the StudentCourse
table. Two child tables are connected with the
Faculty table by using the faculty_id, which is a
primary key in the Faculty table and foreign keys
in two child tables. The connection between the
Course and the StudentCourse tables is the
course_id, which is a primary key in the Course
tab
Recommended
