Getting Started with PowerPoint PPT Presentation
Title: Getting Started with
1
(No Transcript)
2
- Getting Started with
- your Diagnostic Station
3
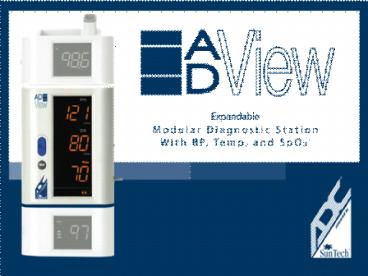
Your ADC ADVIEW Diagnostic Station
- Unpacking the contents, you will find
- Quick start guide (a printed version of these
instructions) - Tray of accessories for the configuration of the
diagnostic station you purchased - ADC ADVIEW in your chosen configuration.
BP
BP, Temperature
BP, SpO2
BP, SpO2, Temperature
4
Mounting the ADC ADVIEW
- Included with your ADC Adview is one of the
following mounts. Click to view mounting
instructions for each.
Wall mount
Tabletop stand
Mobile stand
Need Help?
5
Mounting to the tabletop stand
- Using the thumb screws, secure the rear panel of
the BP device to the tabletop stand. - Secure power supply with velcro strap provided
on bottom of the cradle.
Go to setup
Need Help?
6
Mounting on the wall
- Attach the bracket to the wall using 4 wall
screws, and the basket using 2 screws. - Attach the wall bracket
- adapter to the rear panel
- of the BP device using
- the 3 screws.
- Position the adapter onto
- the rivets of the wall bracket
- and slide the device down
- until it locks into place.
2
1
3
Go to setup
Need Help?
7
Mounting to the mobile stand
- Assemble the mobile stand according to the
manufacturers directions. - Using the three thumb screws, secure the rear
panel of the BP device to the stand.
2
1
Go to setup
Need Help?
8
First time setup
- If your Adview includes
- The temperature module
- Prepare it for use
- Set the unit for measurement
- The pulse oximetry module
- Connect the SpO2 sensor
- A rechargeable battery
- Charge the battery
1
Temperature
3
Battery (internal)
BP
SpO2
2
Follow the next four slides as they apply to the
configuration of your device.
Need Help?
9
Preparing the temperature module for use
- Remove tape from the temperature probe.
- Place the probe cover box into the holder.
2
1
Need Help?
10
Connecting the SpO2 sensor
- Connect the sensor to the extension cable.
- Flip the retention clip forward, towards the
display of the module. Connect the cable to the
device. - Finally, push the clip backward over the SpO2
connector to hold the connector in the device
2
3
1
Need Help?
11
Connecting power
- Connect the power supply to the BP module.
- Connect the power supply to an AC main power
source. The device will turn on automatically.
1
2
Note For devices with a rechargeable battery,
connect to an AC main power source for eight
hours in order to fully charge the battery.
Need Help?
12
Changing the unit of temperature measurement
- While the unit is powered on, use the end of a
paper clip or similar tool to press the recessed
button on the temp module. The icon for the
selected unit is displayed.
Need Help?
13
Attaching the Quick Reference Card to the Basket
- Use the four plastic ties to attach the numbered
cards to the front side of the basket.
Need Help?
14
Overview of the ADC Adview BP Module
Pressure column 1 bar 10mmHg
Systolic BP/ Cuff pressure
Diastolic BP
Automatic button
Manual button
Pulse rate icon
Warning icon
MAP icon
Pulse rate/ Mean Arterial Pressure (MAP)
Cuff/Hose Error icon
Need Help?
15
Overview of the fully configured ADC Adview
Temperature Mode button
Temperature Module
BP Module
Signal quality
SpO2 Module
Retention clip
Need Help?
16
Need help?
- Contact us by telephone
- 1.631.273.9600 or 1.800.232.2670
- Or by email
- CustomerService_at_adctoday.com
- Or find help on the Internet
- www.adctoday.com

