
PowerPoint 2002 in the Classroom - PowerPoint PPT Presentation
1 / 41
Title:
PowerPoint 2002 in the Classroom
Description:
Students are much more attentive to color, sound and animations ... If you want it in a subfolder, just double click on the subfolder prior to hitting 'save' ... – PowerPoint PPT presentation
Number of Views:76
Avg rating:3.0/5.0
Title: PowerPoint 2002 in the Classroom
1
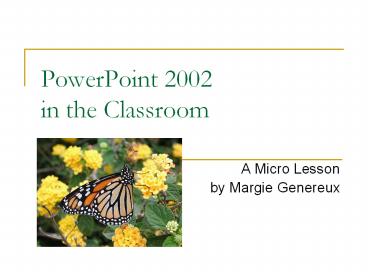
PowerPoint 2002in the Classroom
- A Micro Lesson
- by Margie Genereux
2
Why PowerPoint?
- Students are much more attentive to color, sound
and animations then to a textbook. - Teachers can save time and energy by editing
existing PowerPoints over the school year as the
assignments change.
3
continued
- Students who miss a class could watch a
corresponding PowerPoint to catch up. - Substitutes could readily teach a class if there
was a PowerPoint to show, with corresponding
assignments.
4
What are the steps involved?
- Start a new slideshow
- Add, format edit text
- Add new slide slide layout
- Choose design
- Save your work!
- Edit move slides
- All about graphics
- Slide transitions
- Viewing timing the show
- Custom Animations
- Print Notes Handouts
5
Start a New Slideshow
- Begin a brand new presentation by opening
PowerPoint, then clicking on Blank Presentation
in the New Presentation task pane. - A title slide will appear, ready for text.
6
Add Format Text
- PowerPoint walks you through it youll see
Click here to add text just click and add
your text. Its that simple. - You can change the size, font, style, placement
color of the text using the formatting toolbar.
7
Edit Text
- Text can be changed by simply clicking at the end
of the text in question, then backspacing to
delete, and retyping to fix it.
8
Adding a New Slide
- On the Formatting Toolbar, click New Slide, and
a brand new slide will appear in your slides
pane to the left, as well as directly in the
center of your page, ready for creation.
9
Slide Layout
- Using the dropdown menu in the Task Pane, change
to Slide Layout at any time to change the
layout of a slide. Office 2002 offers a large
variety of layouts, so you can add pictures,
diagrams, charts and tables easily.
10
Design Templates
- PowerPoint makes it simple to add impressive
designs to your entire slideshow in the blink of
an eye. You can change the color scheme and fonts
if youd like, or just pop in your design and
presto! you have a professional slideshow.
11
Save Your Work!
- Name your slideshow early on, so you wont lose
your work if the computer crashes (Windows XP
will bring up a recovered version of the
slideshow if your computer should crash, or if
you lose power).
12
saving continued
- Click on File at the top of your screen, then
Save As. It should default you to My
Documents, where you can give it a name of your
choosing. If you want it in a subfolder, just
double click on the subfolder prior to hitting
save.
13
Very Important
- Oh click on File then Save every so often
to keep saving your work as you add new slides.
14
Edit Move Slides
- Its easy to change the order of your slides by
simply clicking on the slide in question and,
while holding down that left mouse button,
dragging up or down until it lands where you want
it. This is done in the slide pane to your left.
15
Speaking of Panes.
- If you lose your Slide Pane, just click on View
then Normal and your pane will be restored. - If you lose the Task Pane, click on View then
Task Pane. Incidentally, this works in all
Office 2002 programs.
16
Adding Graphics
- Adding graphics such as clip art, photos or
animations is easy in PowerPoint, but there is
one thing to keep in mind.
17
Graphics continued
- Its important to choose a Slide Layout that
readily accepts graphics. Just look for the guy
with the big nose when choosing your slide layout!
18
More Graphics
- For more involved graphics, such as tables,
organizational charts, pie charts and column
graphs, choose a content layout. The next several
slides will demonstrate the types of data you can
present very easily
19
Tables
20
Pictures
Hi! Im your friend, the EFF Wheel!!!
21
Column Graphs
22
Venn Diagrams
23
Web Diagrams
24
Organization Charts
25
Slide Transitions
- Remember Home Improvement??? They had some
great transitions that occurred between scenes.
PowerPoint allows us to include these transitions
very easily.
26
transitioning
- First change your Task Pane window to Slide
Transition - Next, in the first section Apply to selected
slides, scroll to the very bottom until you see
Random Transitions. - Click on it, then at the bottom of the pane,
choose Apply to all slides
27
More involved transitions
- If you prefer, you can choose your own transition
effects from that long list. Try them out to see
what you think. Dont choose Apply to All
Slides unless you want the same effect
throughout the slideshow.
28
Viewing the Show
- This is a good time to see your work so far.
Anytime you want to view your show, simply click
on Slide Show at the top of your screen, then
View Show. Youll have to mouse-click through
the show unless you set up automatic timings. If
you need to stop at any time, just click ESC on
your keyboard.
29
Timing the Show
- While still in Slide Transitions, you may want
to set your show to automatically play. I dont
recommend this if you are speaking through the
show only if it will run like a movie. One
coughing fit can ruin your entire presentation if
you cant keep up.
30
timing
- Remove the check next to On mouse click then
click Automatically after. You can then choose
the number of seconds you want that slide to
play.
31
Last word on timing
- Apply to All Slides will set them all at, for
example, 10 seconds then you can adjust slides
to less or more time according to their content. - Have a friend or colleague view the show first to
see if the timings are right.
32
Animations
- Change your task pane to the custom animation
pane. - Click on any picture or block of text that youd
like to animate. - Next, click on Add Effect in the task pane.
33
More about animations
- You can add entrance effects, exit effects,
emphasis effects and motion paths to make your
text and graphics do almost anything. - Depending on your audience, keep the animations
down to a dull roar for the sake of
professionalism.
34
animations continued
- If, however, your job is to liven up the audience
or keep a room of kids interested in a subject,
GO CRAZY!
35
Quick Animations.
- If time is of the essence, you can change to your
Slide Design task pane, then click on Animation
Schemes. - This will allow a quick method of adding
animations to the entire slideshow quickly by
using Apply to all Slides - However, you cannot change the speeds, so use
Custom Animation if you need choices.
36
Print Notes Handouts
- Printing is key. You can print the entire
slideshow in full 8½x11 sheets by simply hitting
the print icon in your standard toolbar.
37
Printing Notes
- If you would like to add notes, use the click to
add notes section at the very bottom of your
screen while in edit mode. These can be printed
via File, Print then under Print What you
can choose Notes
38
Printing Handouts
- Handouts, such as the ones you received tonight,
are easy to print. Click File then Print,
then under Print What choose Handouts.
PowerPoint defaults to 6 slides per page. Change
to 3 slides per page if you want lines for note
taking.
39
Last word on printing
- Play around in the print dialog box for more
choices on printing. For example, you can print
current slide or choose only certain slides to
print.
40
Running the Show in a Loop
- To keep your slideshow running continuously, as
people walk in to a room or students move from
computer to computer watching slideshows, just
click on Slide Show then Set up Show and
click Loop continuously until esc.
41
Hope you enjoyed the show!
The End
Recommended
CrystalGraphics Presentations


