
Microsoft PowerPoint and Desktop Publishing Lesson 2 - PowerPoint PPT Presentation
1 / 38
Title:
Microsoft PowerPoint and Desktop Publishing Lesson 2
Description:
Title: No Slide Title Author: Bob Herring Last modified by: Bob Herring Created Date: 12/2/2002 7:34:00 PM Document presentation format: On-screen Show – PowerPoint PPT presentation
Number of Views:244
Avg rating:3.0/5.0
Title: Microsoft PowerPoint and Desktop Publishing Lesson 2
1
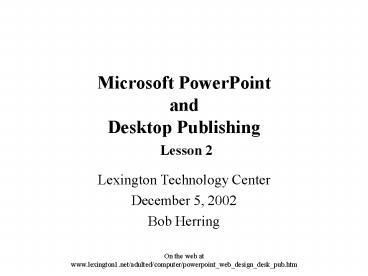
Microsoft PowerPointand Desktop Publishing
Lesson 2
- Lexington Technology Center
- December 5, 2002
- Bob Herring
- On the web at www.lexington1.net/adulted/computer/
powerpoint_web_design_desk_pub.htm
2
PowerPoint Lesson 2
Review of Tuesdays Lesson
- Starting and Quitting PowerPoint
- The PowerPoint Window
- Menus and Toolbars
- Slide Layouts and Design Templates
- Creating Presentations
- Text and Text Characteristics (Fonts and Sizes)
- Adding Slides
- Bulleted Lists
- Graphics and Clip Art
- Drawing Toolbar
- Saving and Exiting a Document
2
3
PowerPoint Lesson 2
Drawing Toolbar
- Choose Tools, then select Customize click the
Drawing checkbox
Select Object Tool
Line
Text Box
Arrow Style
Line Color
Line Style
AutoShapes
Shadow
Rectangle
Word Art
3-D Effects
Drawing Menu
Text Color
Arrow
Free Rotate Tool
Dash Style
Oval
Fill
3
4
PowerPoint Lesson 2
Using the Draw Menu
- Select more than one graphic
- Left-click the the word Draw on the Drawing
Toolbar
Select Multiple Objects by Holding Shift Key
Draw
4
5
PowerPoint Lesson 2
Draw Menu, Order
- Order controls how objects are stacked
- Click Draw, then select Order
Order
Order Sub-Menu
Draw
5
6
PowerPoint Lesson 2
Draw Menu, Align or Distribute
- Align or Distribute controls placement of
multiple objects - In the Align or Distribute sub-menu, choose
Align Top
Align or Distribute
Align or Distribute Sub-Menu
Draw
6
7
PowerPoint Lesson 2
Draw Menu, Align or Distribute
- After choosing Align Top, all objects are
lined up - Objects will align on the topmost shape
Shapes Aligned at Top
7
8
PowerPoint Lesson 2
Draw Menu, Rotate or Flip
- Objects can be rotated or flipped
- Choose Rotate or Flip, then select the
appropriate command
Rotate or Flip
Draw
8
9
PowerPoint Lesson 2
Draw Menu, Rectangle and Oval Tools
- Use the Rectangle Tool to create box shapes
- Hold down the shift key while drawing to draw a
square - Use the Oval Tool to create elliptical shapes
- Hold down the shift key while drawing to draw a
circle
Shift for a Circle
Shift for a Square
9
10
PowerPoint Lesson 2
Draw Menu, AutoShapes
- Other shapes besides rectangles and ovals are
available - Click AutoShapes and select the appropriate
category
AutoShapes
10
11
PowerPoint Lesson 2
Draw Menu, AutoShapes
- Basic Shapes provides many useful items
- After selecting a shape, draw it by
left-clicking and dragging
Basic Shapes
AutoShapes
11
12
PowerPoint Lesson 2
Text Boxes
- Click inside text boxes to edit them. The
border will be slashed (/////) - Click the border of a text box to select it.
Look for dots () - To move a text box, it must be selected.
Selecting a text box also - allows all the text to be formatted at once.
Slashes
Dots
12
13
PowerPoint Lesson 2
Working with Fonts
- Select Format, then Font
- Choose desired font and Text Effects
Text Effects
13
14
PowerPoint Lesson 2
WordArt
- Choose Insert, then select Picture click on
WordArt - Select the WordArt style that suits your
presentation and click OK
Select
14
15
PowerPoint Lesson 2
WordArt
- The WordArt text dialog appears
- Select the font, size, and style (bold, italic)
- Highlight and replace Your Text Here with
desired text - Use the WordArt Shape Tool to create even more
effects
15
16
PowerPoint Lesson 2
Word Art Toolbar
- Choose Tools, then select Customize click the
WordArt checkbox
Insert Word Art
Format Word Art
Word Art Alignment
Word Art Gallery
Letter Height
Word Art Shape
Text Direction
Edit Text Tool
Free Rotate
Character Spacing
16
17
PowerPoint Lesson 2
Color Options
- Select different colors by clicking More Fill
Colors - Use PowerPoints built-in palette of colors
Or choose your own - To copy a color, check its red-green-blue
values, then set them in - your presentation
17
18
PowerPoint Lesson 2
Fill Effects, Gradients and Textures
- Shapes can be filled with color gradients by
selecting Fill Effects - Select the colors to be used, then the shading
style - Shapes can contain textures rather than colors
- Select the desired texture from the Texture
tab
18
19
PowerPoint Lesson 2
Fill Effects, Patterns and Pictures
- Shapes can be filled with various patterns
- Select the desired pattern, then select the
color - A shape can contain a picture
- Click the Select Picture button to navigate
to the desired picture
19
20
PowerPoint Lesson 2
Draw Menu, Lines and Arrows
- Click the Line tool. The mouse pointer will
become a black cross - this is the beginning of the line. Position,
then hold down the left - mouse button and drag to create the line.
- Hold the Shift key while dragging to create
horizontal, vertical, - or 45o angle lines
- An arrow is just a line with an arrowhead --
create as above
20
21
PowerPoint Lesson 2
Draw Menu, Line Styles
- A variety of line thicknesses are available
- Click the Line Style tool to select the
appropriate width
Line Style
21
22
PowerPoint Lesson 2
Draw Menu, Dash Styles
- Lines can be dashed
- Click the Dash Style tool to select the
desired look
Dash Style
22
23
PowerPoint Lesson 2
Draw Menu, Arrow Styles
- Arrowheads can be added or changed
- Click the Arrow Style tool and select the
desired style
Arrow Style
23
24
PowerPoint Lesson 2
Draw Menu, Shadow Effects
- Shadows can be applied to shapes to achieve
various effects - Click the Shadow tool and select the desired
style
Shadow Settings Toolbar
Shadow
24
25
PowerPoint Lesson 2
Review of Tuesdays Lesson
- Shapes can be made to look three-dimensional
- Click the 3-D tool and select the desired style
3-D Settings Toolbar
3-D Effects
25
26
PowerPoint Lesson 2
Using the Freeform Tool to Create Shapes
- Paste the shape into the slide, then
- Use the Freeform Tool to draw the outline
Lines
Freeform
AutoShapes
26
27
PowerPoint Lesson 2
Freeform Tool, Part 2
- Right-click the outline
- Choose Edit Points from the pop-up menu
Edit Points
Pop-Up Menu
27
28
PowerPoint Lesson 2
Freeform Tool, Part 3
- The points that comprise the line appear
- Drag them to match the underlying shape exactly
- Add points as needed to make curves or
indentations
Drag Individual Points to Conform to
the Underlying Shape
28
29
PowerPoint Lesson 2
Adding Tools to the Toolbar
- Select Tools, then Customize choose the
Commands tab - Select Insert, then choose Symbol
- Left-click and hold the desired icon pull to
desired spot on toolbar
Tools
Customize
Commands
29
30
PowerPoint Lesson 2
Deleting Tools from the Toolbar
- Select Tools, then Customize choose the
Commands tab - Left-click and hold and pull the tool off the
toolbar
Tools
Customize
Commands
30
31
PowerPoint Lesson 2
Options, View Tab
- Choose Tools, then select Options
- The Options dialog, with its 7 tabs, controls
the overall program - The View tab controls various dialog boxes
and other effects
31
32
PowerPoint Lesson 2
Options, General Tab
- Choose Tools, then select Options
- The General tab controls the recent file list,
macro virus - protection, and user information
32
33
PowerPoint Lesson 2
Options, Edit Tab
- Choose Tools, then select Options
- The Edit tab controls how text will be
inserted and deleted
33
34
PowerPoint Lesson 2
Options, Print Tab
- Choose Tools, then select Options
- The Print tab controls the way that Word
interacts with your printer
34
35
PowerPoint Lesson 2
Options, Save Tab
- Choose Tools, then select Options
- The Save tab controls auto save and how
documents are saved
Auto Save
Save As
35
36
PowerPoint Lesson 2
Options, Spelling Tab
- Choose Tools, then select Options
- The Spelling tab controls spell checking
options - (Turns it off if its too annoying)
36
37
PowerPoint Lesson 2
Options, Advanced Tab
- Choose Tools, then select Options
- The Advanced tab controls where documents are
saved
37
38
PowerPoint Lesson 2
Review
- Drawing Toolbar
- Drawing in PowerPoint
- Changing Toolbars
- PowerPoint Options
38
Recommended
CrystalGraphics Presentations


