
Tracker Update - PowerPoint PPT Presentation
1 / 28
Title:
Tracker Update
Description:
The New station has had its outer diameter reduced to 396 to take into account ... The solenoid and its kit would sit on a plinth and it would move as one. ... – PowerPoint PPT presentation
Number of Views:57
Avg rating:3.0/5.0
Title: Tracker Update
1
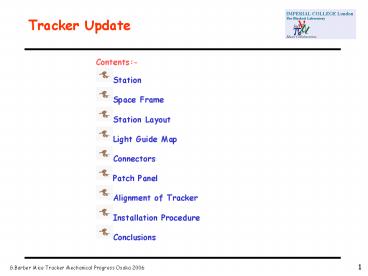
Tracker Update
- Contents-
- Station
- Space Frame
- Station Layout
- Light Guide Map
- Connectors
- Patch Panel
- Alignment of Tracker
- Installation Procedure
- Conclusions
2
StationsModifications to the Carbon Fibre
The New station has had its outer diameter
reduced to 396 to take into account the fact that
the bore of the solenoid is not machined but a
rolled tube. The connector flange has been
thickened to 3mm to allow machining. This is to
ensure that there is a uniform thickness thus
ensuring that the completed tracker is of one
axis and all planes are parallel. Also the face
that seats the connectors has a completely
machined face to allow all of the connectors to
sit down flat thus keeping the axis of the fibres
perpendicular to the plane
3
Space Frame
- Modifications
- The components that are used to construct
the space frame are similar to before with the
exception of the locating foot and the diameter
change. The foot was changed because of problems
during assembly, if the dowel location was pushed
into the foot there was no way to extricate it.
The new foot has 2 smaller dowels either side of
the structural tube.
Gluing Fillet Design
Old Foot Design
New Foot Design
4
Space Frame
Tooling The jigs that align the space
frames will need to be modified/re-made To
accommodate the new foot design and also to
match the new station to station pitch.
5
Station Layout/Pitch
- The final pitch has still to be decided but the
two alternatives shown are - Top-
- 15cm, 23cm, 25cm and 47cm
- Bottom-
- 15cm, 25cm, 23cm and 47cm
- If this is the case the only need for a
decision is to accommodate the length of wave
guide and Im sure we can accommodate a 2cm
change in the lengths by making them the longest
required.
6
Light Guide Map
View of the station onto the polished face of
the connector
Bulkhead Connector 5
Bulkhead Connector 1
Bulkhead Connector 4
Bulkhead Connector 2
Bulkhead Connector 3
This is the final version, assuming no one finds
any glaring mistakes, of the connector map for
the tracker it can be found in its full form at
http//www.hep.ph.ic.ac.uk/CAD/mice/finalmice
7
Connectors
During the test beam at KEK there was a
reduction in light output from the 4th
station this could be due to 2 or 3 different
reasons. To ensure that it was not the
connectors we carried out light transmission
tests thru both station and patch panel
connectors and also physically measured the fibre
positions.
This is what we found!!!
8
Prototype Patch Panel Misalignment
- The following slides show the misalignment of
the fibre areas. The hole centres were measured
using a microscope attachment on a jig boring
machine with digital X-Y readout. The
coordinates were then put into AutoCad and the
plots created. This gives an overlapping area
which is averaged and then given as a percentage.
9
Patch Panel Misalignment 101
Patch Panel Connector set 101 Loss of light due
to fibre/area misalignment 16.25 Due too the
fact that the fibres have a cladding approx 12
of diameter the actual loss is 18.34
10
Patch Panel Misalignment 102
Patch Panel Connector set 102 Loss of light due
to fibre/area misalignment 13.78 Due too the
fact that the fibres have a cladding approx 12
of diameter the actual loss is 15.55
11
Patch Panel Misalignment 103
Patch Panel Connector set 103 Loss of light due
to fibre/area misalignment 20.1 Due too the
fact that the fibres have a cladding approx 12
of diameter the actual loss is 22.69
12
Patch Panel Misalignment 104
Patch Panel Connector set 104 Loss of light due
to fibre/area misalignment 22.59 Due too the
fact that the fibres have a cladding approx 12
of diameter the actual loss is 25.5
13
Patch Panel Misalignment 105
Patch Panel Connector set 105 Loss of light due
to fibre/area misalignment 20.8 Due too the
fact that the fibres have a cladding approx 12
of diameter the actual loss is 23.48
14
Test Piece Misalignment
Test Piece Connector Set Loss of light due to
fibre/area misalignment 5 It should be noted
that there is a measurement error of /-25µ
15
Station Connectors
The work to investigate the misalignment of the
station connectors is still underway but it
appears that a similar displacement of the
holes took place, and for the same reasons.
These will be remedied the same way
Station Connector C16 Loss of light due to
fibre/area misalignment 15.8 (The cladding is
taken into account)
16
Patch Panel Hole Requirements
17
Positioning In The Solenoid
The tracker sits on 4 adjustable feet two at the
front two at the rear and is held down by a
spring loaded foot at the 12 oclock position.
This aligns the axis of both tracker and solenoid
The tracker is aligned in Z and Phi by pulling a
locating block into a Vee which is located using
dowels to the patch panel.
18
The Diffuser In The Solenoid
The new device to hold and change the lead
diffuser in the solenoid will be partially
mounted onto the cover of the patch panel. We
have allowed a bore of 331Ø in the cover with a
series of holes and a position for an O-ring.
The final details to be worked out with Wing
Stephanie
19
Installation Cartoon
- The following sequence is a first attempt to
show the stages of installation of the tracker
into the solenoid. They are not definitive and
are aimed to provoke a debate/discussion. I hope
that the installation will then evolve with all
interested parties contributing. It should be
noted that all of this work will need to take
place in a light controlled environment (NO UV).
20
Stage 1 of Installation
- The patch panel is fitted and sealed to the
solenoid. Hopefully at this stage we can test the
seals using cover plates.
21
Stage 2 of Installation
- An installation rig is fitted in front of the
solenoid and aligned. This will allow us to
safely insert the tracker, supporting it all of
the way to its final position
22
Stage 3 of Installation
- The tracker, complete with the light guide
support structure is lifted onto the installation
cradle. The light guide support structure is to
ensure that no damaging forces are exerted on the
fibres. Covers will be fitted during transit.
23
Stage 4 of Installation
- The tracker is then slide into its
pre-determined position inside the bore of the
solenoid. This position will already have had
the tracker target fitted, surveyed and
removed. This will allow us to position the
tracker, which will also have been surveyed, to
the correct alignment.
24
Stage 5 of Installation
- With the tracker in position and secure the
light guides can now be carefully re-routed to
their final position in the patch panel and the
seals fitted. If the external light guides are
not to be attached immediately then light
tight/protection covers will remain fitted.
25
Stage 6 of Installation
- The light guides can then be secured to stop any
damage and a shield (not shown) fitted to stop
any damage occurring when the diffuser is
installed. The Light guide support structure is
now removed.
26
Stage 7 of Installation
- The patch panel cover is fitted and sealed to
the patch panel. If we are not ready to fit the
diffuser mechanism then a cover plate will be
attached.
27
Requirements (those thought of at least)
- To carry out the work we will need at least 2M
of clear working area in front of the solenoid.
We hope that this is achievable either by
removing equipment in front of the solenoid or as
is more likely, by moving the solenoid sideways
out of the beamline. The solenoid and its kit
would sit on a plinth and it would move as one.
As already stated we will need this area to be
light controlled, this will probably be achieved
by building a tent structure over the area.
28
Conclusions
- We have the design completed but for a few
details and we still require a full set of
engineering drawings. - There is more work required on understanding the
connector problem. We are sure that it is
fixable but we need to satisfy ourselves. The
alternative would be to injection mould but this
is an expensive option if it is not required.
Recommended
CrystalGraphics Presentations


